4.3.15.14. Alerting System
The Alerting System enables IRM users and third party systems to:
-
generate (create) Alerts,
-
realize that an Alert is in effect,
-
view the list of current Alerts, act on them, and close them.
An Alert is used to calls attention to an issue and in addition it can be used as a lightweight, automatically-generated IRM-internal trouble ticket which can be assigned, prioritized and go through a lifecycle. Alerts can be used directly for very simple trouble-ticket use cases (typically ones that are resolved in minutes or at most a small number of hours), whereas the general ticket mechanism is used for more complex workflows that span greater time periods.
In order to allow different kinds of Alerts to be configured, IRM allows specifying an Alert Source. Alerts can be added in many ways, including by the user via the Web Client, through a third-party application, or by an IRM integration service.
An important capability of the Alert System is tied with another IRM feature -- the Trigger Action system -- in the following two ways:
-
A Trigger Action can generate an Alert as an action
-
An Alert uses the same Action system as Trigger Action, so that it can generate an email, send a Notification, or generate another Alert
The difference between a Trigger Action and an Alert is that the former can generate the latter, and Trigger Action is primarily a mechanism for monitoring state inside IRM while Alerts are primarily a mechanism for notifying users that something needs attention.
The following is a quick review of different UI components of the Alert System, their basic functionalities and how they relate to other parts of the IRM software.
Alert Manager
The central place for managing Alerts is the Alert Manager dialog. It can be accessed via the round "!" button at the top-right of the main application screen, beside the Statistics, User Settings, Global Settings, etc. buttons:
This dialog is very similar to other manager-type dialogs - it shows a data grid with each row representing an Alert:
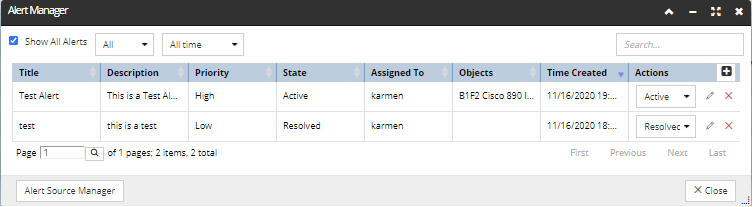
Column data
The columns contain an Alert's basic properties and Action buttons for each Alert:
-
Title of the Alert
-
Description text, which is optional
-
Priority of the Alert, which can be Low, Medium, or High
-
Alert State, which can be one of the following values:
-
Active - needs to be addressed
-
Acknowledged - Alert has come to the attention of someone, but not yet resolved (essentially "in process")
-
Resolved - issue was successfully resolved
-
Cancelled - issue has been noted but ignored; no corrective action taken
-
Paused - someone will get back to the Alert soon (essentially a "snooze"); will automatically go back to Active after some time
-
Assigned To - an Alert can be assigned by any Irm User to any Irm User, to take action
-
Objects - any objects relevant to this Alert that need to be addressed by the assignee
-
Time Created
Action buttons
The standard + button enables a new Alert to be created, while the pencil/edit Action button allows each Alert object to be edited. Clicking on either of them opens the Alert properties dialog (explained further in the text below).
Conveniences
Each row also contains a drop-down menu under the Actions column that enables directly changing the Alert's State:

Additional filtering options placed at the top-left of the dialog add convenience in cases where there are a larger number of Alerts. The default filtering options set the dialog to list active Alerts of all priorities created in the past week:
By default, resolved Alerts are excluded from this list. This can be easily changed by clicking on the Show All Alerts checkbox option - 
It is possible to filter the Alert list based on the priority level. This is enabled by selecting one of the options from the first drop-down menu, which shows the list of alert levels upon which the view can be filtered:

If you want to view Alerts for a period longer then the past week, select one of the options from the second drop-down menu , which shows a broader range of dates, including the last option, which lists all Alerts ever created:

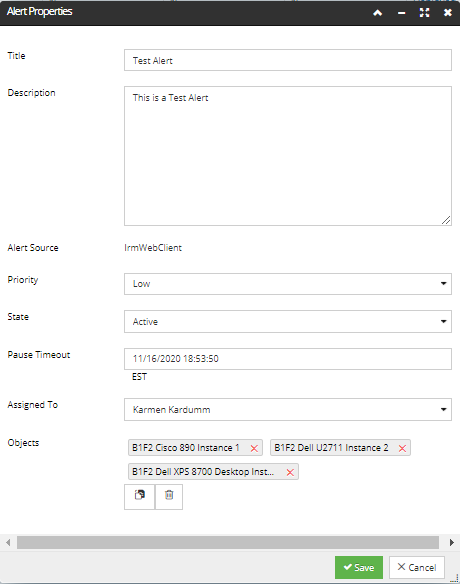
Alert Properties
The Alert Properties dialog opens when creating a new or editing an existing Alert. Most of the fields from this dialog are self-explanatory.
When specifying an Alert, depending on what is generating it (the Alert Source), not all the fields may be used:
-
The Alert Source field is automatically specified by the application generating the Alert and is read-only.
-
The Priority and State fields are set to default values and editable, while the rest need to be specified by the user.
-
While every Alert must have a Title, most Alerts will not have the Assigned To field set at the time of generation, as it is usually not set if the Alert is internally generated by IRM (for example, via Trigger Action). An Alert can be assigned by any IRM User to any IRM User, to take action.
-
Finally, one can paste all objects the Alert relates to simply by copying them into the IRM Clipboard and pasting them under the Objects field by clicking on the Paste button in the dialog. Individual objects can be cleared from here simply by clicking on the x button next to the object name, while clicking on the trashcan icon clears all objects.