Auto-moved Equipment in Elevation
In some cases, the Elevation dialog indicates that two Equipment objects occupy the same space in a Rack. When this happens, the application automatically moves an Equipment so that it does not visually overlap any other Equipment.
However, this mechanism does not update the stored Rack X/Y positions of that Equipment, because doing so might force the user to enter a MAC, or unexpectedly add the Equipment into a MAC. As a result, this behavior can be confusing, as it's not obvious why a given piece of Equipment is not at its expected location.
To avoid the confusion, the Elevation dialog shows a visual marker on the 3D Rack image in the central 3D panel (both front and rear) of an object that has been moved. The marker is represented as an Equipment label (balloon) colored red, so it's obvious which Equipment is moved, but without interfering with other Rack Equipment visualizations:
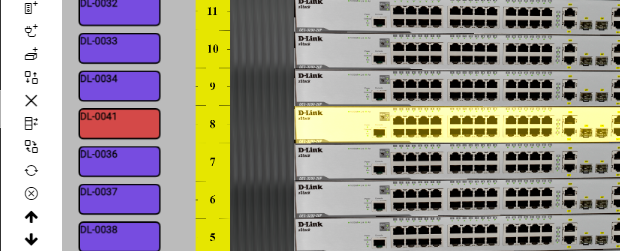
If the user moves the object and therefore causes the Equipment X/Y positions to be updated such that the object is now shown at its saved Rack X/Y location, the Equipment label is colored back in the default color. This way, the user can try to fix the problem and get feedback that the fix was successful.
We encourage users to attempt to eliminate such markers, as they represent a level of inconsistency in the data. Moving an object to a new location in the rack, and then moving it back, causes the Equipment X/Y positions to be updated to the correct value, in line with the visual position of the object and causes the visual indication to disappear.
In addition to the colored Equipment label, there is an additional section that appears in these cases in the Statistics & Analysis panel - Confirm Auto Corrections. This section is visible only if there is at least one Equipment in the Rack that was automatically re-positioned.
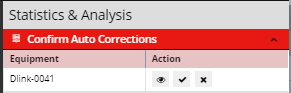
The section lists Equipment that requires position confirmation or change, along with Action buttons for each row: Select, Confirm and To Limbo.
-
the Select Action button simply selects and highlights the Equipment both in the Equipment grid and in the central 3D view panel,
-
the Confirm Action button selects and highlights the Equipment both in the Equipment grid and in the central 3D view panel and updates the stored X/Y position,
-
the To Limbo Action button removes the Equipment from the central 3D view panel and changes the Action button in the Equipment grid for selecting Rack Space position, leaving the Equipment in the Limbo state (i.e. in the Rack but not at any particular position).