4.3.13.3. Block Shapes
In IRM, a Block Shape represents an instance of a Block, which means there is one of these for each instance of a Block in the Design World. Essentially, a Block Shape is just a Shape that is drawn as a Block, as it gets its drawing info from a Block object. Block Shapes can be placed in the Design World by hand, but more commonly they are generated as the result of importing block instances from CAD files.
A Block is a template or “stencil” for Block Shape objects.
-
A Block does not have its own drawing data directly. Instead, it is a collection of primitive child drawing objects like Lines, Arcs, Text, and Images.
-
A Block is always assigned to a Category, though these Categories are a bit different from those used by Super Categories such as Equipment and Cable as they don't appear in the Categories and Types Tree.
-
Valid Block Categories exist for
-
Equipment Blocks,
-
Location Blocks,
-
Maintenance Hole Blocks,
-
Note Blocks
-
Basic Shapes.
-
Besides being used for drawing Block Shapes, Blocks are also used for drawing Location, Maintenance Hole, and Equipment objects.
There are two other related types of objects that we cover here just to distinguish from Blocks and Block Shapes, because it is easy to confuse these related object types:
-
Asset - an object that contains the actual byte array of an image file or other binary object and metadata about the content. In other words, an Asset is literally the contents of a .png or .jpg file or some other file that has been uploaded into IRM.
-
Image - a drawing primitive object (a peer to a Line, Arc, or Text) that is based on an assetTo put the whole object hierarchy together in one statement, we can say that a Block Shape is an instance of a Block which (often) has a child Image that references an Asset.
Note: although Blocks are often based on Images, they can also be based on Lines, Arcs, Text or some combination.
The main use of Block Shapes is to visually depict non-Managed objects in the Design World. The user can interact with Block Shapes in two other ways:
-
via the Block Shape Properties dialog
-
via the Appearance tab in various object Properties dialogs (Equipment Properties, Location Properties and Maintenance Hole Properties dialogs)
A good use case scenario for understanding Block Shapes is to create and insert one into the Design World, as it highlights the most important features of the Block Shape Properties dialog, as explained in the following images and text.
Insert a Block Shape into the Design World
In addition to inserting Block Shapes in the Design World, IRM supports other actions for Block Shapes through different context menu options:
-
View and edit Block Shape Properties through the Style tab in the Block Shape Properties dialog (which is the same as the Decorative Drawing Object Properties dialog)
-
Cut, Copy, Paste and delete Block Shapes.
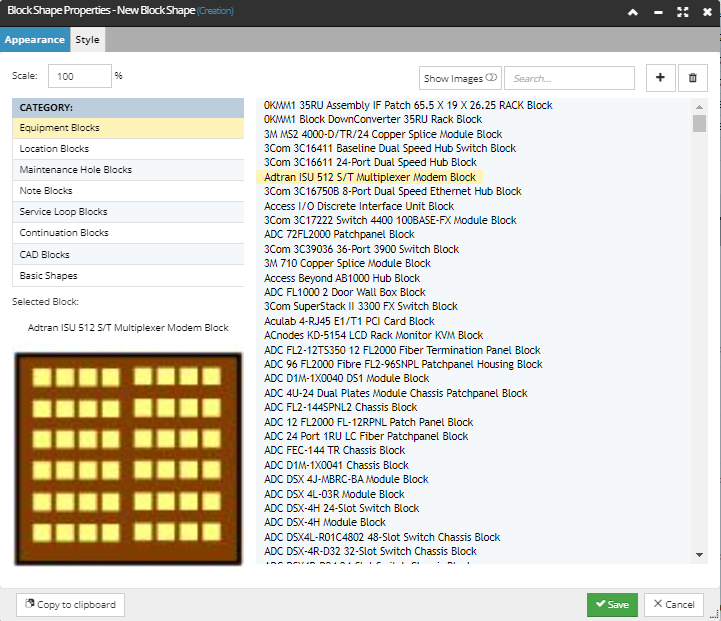
Note: If a Block Shape is saved under the Equipment Blocks Category in the Block Shape Properties dialog, means it will be available for any Equipment Type to select it as a Block Shape to represent it in the Design World. This is done in the Appearance tab in the Equipment Type Properties dialog.
That tab looks similar to the Block Shape Properties dialog, with a few different details, like the different categorization, as displayed in the screenshot below:
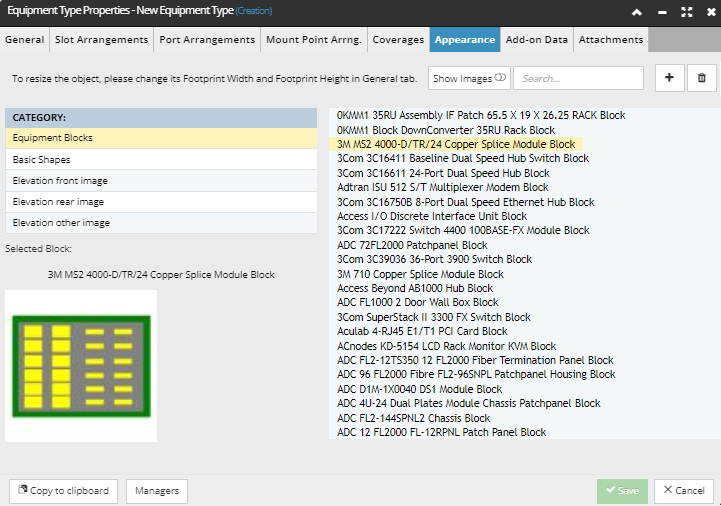
The Appearance tab enables the user to specify the Block Shape to represent certain types of objects in the Design World. If a Block Shape is saved under the Location (Blocks) Category in the Block Shape Properties dialog, this means it will be available for any Location object to select it as a Block Shape to represent the it in the Design World.