The first step in configuring the IRM-Linkware Live integration is setting up the Linkware Live integration service. This is enabled in IRM through the Proxy Source Manager dialog, which is the central place for configuring Proxy Sources. The main purpose of the dialog is to store configuration information for different sources of Proxies (recall that a Proxy in IRM is a representation of some object from an external system). This information can then be used directly by the Site Master or the Global Console, and can also be passed to the integration service applications as necessary (or retrieved by those applications, as the case may be).
A Proxy Source contains configuration information used by an integration application, or other IRM components, as necessary, to make the integration work. Click on the highlighted link for more general information about Proxy Sources and Proxy objects in general.
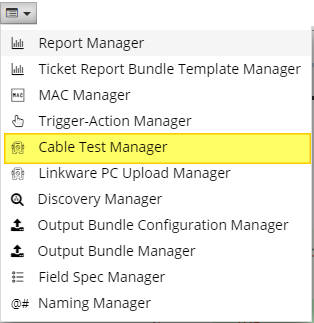
The Proxy Source Manager can be accessed through the Cable Test Manager dialog, which is accessed from the Manager menu located in the main application screen toolbar:
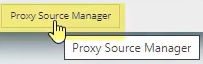
In the bottom-left corner of the the Cable Test Manager there is a button that opens the Proxy Source Manager dialog:
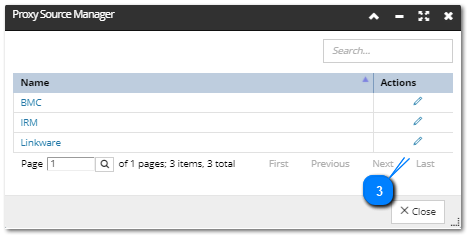
The Proxy Source Manager dialog shows a list of currently-specified Proxy Sources. In our example, the single defined entry is the "Linkware" Proxy Source:
In order to set up the Linkware Live integration service, you need to, among other actions, edit the Linkware Proxy Source, which is explained in the following steps:
Click on the pencil Action button to edit the Linkware entry
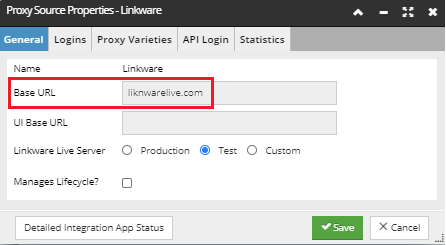
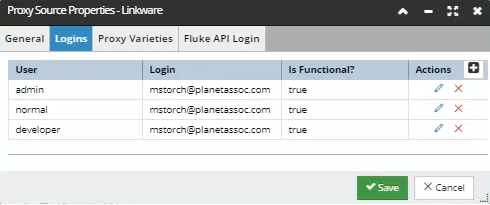
This opens the Proxy Source Properties dialog, which is organized into several tabs that group similar integration properties, such as General information, Login data, API Login information, and similar.
The configuration information available in this dialog is explained in detail in the designated subtopic under the Linkware Live integration section, so please use those sections to learn basics of that and related dialogs in IRM. This and related subtopics will focus on specific actions necessary to configure integration services and, in terms of explaining the UI components in IRM, highlight only specific controls accessible to the developer users which will administer these actions.
The Fluke production server linkwarelive.com is pre-filled for the Base URL field and cannot be changed:
The Manages Lifecycle? checkbox sets the Proxy Source as the owner and manager of the Lifecycle Stage of correlated objects.
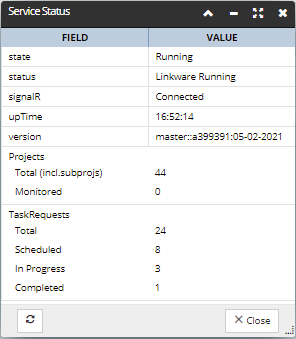
Click on the button at the bottom of the dialog -
opens a pop-out dialog displaying a simple data grid with details about the Linkware Live Service status, as well as basic statistics about the current Projects and Task Requests it's running:
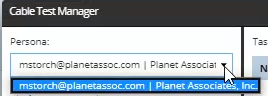
The next part of the configuration setup is to map your IRM account to a specific Linkware Live Persona
For this example, we have already set up two IRM accounts (admin & normal):
These accounts are both mapped to the Linkware Live account "mstorch" and what that means is when any of these users logs into IRM they will see the Projects within Linkware Live accessible by some persona of the mstorch account. Exactly which persona is used can be chosen in the Cable Test Manager dialog:
Once that's done, the list of Projects associated with that persona will be retrieved from Linkware Live, but they will all be in a paused state, which means they are not currently synchronizing data between Linkware Live and the IRM system. The user can unpause them in the Cable Test Manager.
Configure the API Login, which requires a Username and Password:
The API Login username and password can only be provided by your Fluke representative.
Linkware Live has a two-stage login process; connection to Linkware Live requires special API Login credentials that are different from ordinary user usernames and passwords.
API keys for the Fluke production server linkwarelive.com are pre-filled for the Username and Password fields and cannot be changed. To test the connection to the Fluke server, click the Test button and this should confirm that the API-level login was successful: