Duplicating objects
IRM provides two ways of duplicating an object:
-
by selecting the Quick Duplicate option, or
-
by selecting the Duplicate... option from object's context menu.
Quick Duplicate
The Quick Duplicate is a feature that automatically performs the duplication action without any user input. It's available for most types of objects as a context menu option, either from the Object Grid, or the Design World:
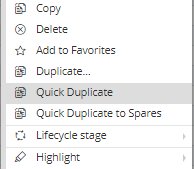
Because this feature does not use a dialog, the behavior for how to deal with each field in the copied object is pre-determined as follows:
-
The Name and Alternate Name fields are appended with "copy <n>", where <n> is an incrementing number that makes the new name unique. So, for example, if you quick duplicate an object named "Desktop", the duplicate's name is "Desktop copy 1". If you duplicate it again, you get "Desktop copy 2", etc.
-
the Serial Number, Asset Number 1, and Asset Number 2 fields in the new object are left blank.
-
Area quick duplication results differs from other types of duplicated objects in the way that, when performing an area quick duplication only an empty area is created, without any object or architecture.
Duplicate dialog
The second, more complex Duplicate operation is activated from the context menu in either the Object Grid or Design world for most types of objects:
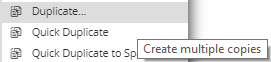
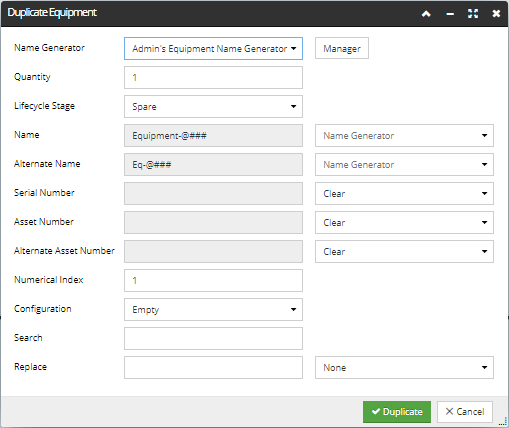
As indicated by the tooltip, this option allows multiple copies to be created, but it allow a set of parameters to be specified that allow various fields in the copied object to be treated differently. This is done via a separate dialog, an example of which is displayed and explained in the following text and screenshot images:
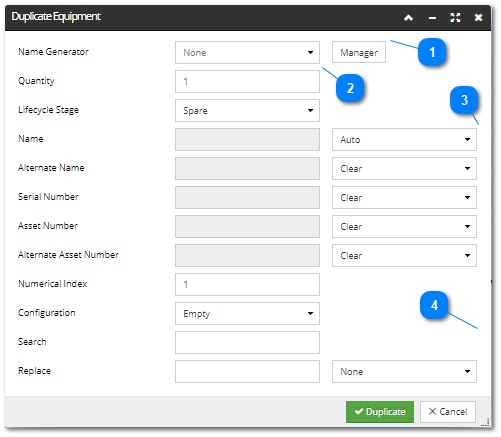
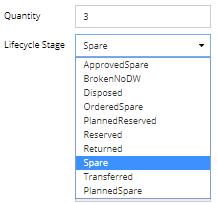
This dialog enable specifying different parameters, such as a Name Generator to be applied for naming duplicated objects, the number of objects to be duplicated, their Lifecycle stage, etc, which allows the user to specify more complex duplication operation. The benefit of this more sophisticated duplication is that after the operation is finished, many fewer changes are required in individual object Editors. Notice how some parameter values are already predefined and not editable, while others are editable, depending on the operation selected in each drop-down list box.
Let's review what this dialog enables when trying to duplicate an Equipment object:
Specify Name GeneratorAny dialog that allows creation of more than one object enables selecting an existing Name Generator, in this dialog it is done from a drop-down menu:
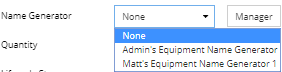 Another way of specifying a Name Generator for a particular Duplicate operation is via the Name Generator Manager dialog, which can be entered by clicking on the Manager button next to the drop-down menu:
The feature and dialog details are explained in more details in the previous topic - Name generator mechanism.
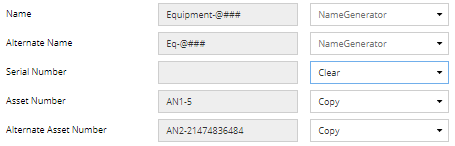
After a Name Generator is specified, the appropriate Name and Alternate Name fields in the dialog are automatically filled out with the current values from that Name Generator. Notice these fields are not further editable and can be changed only by selecting another Name Generator, or none, from the previous drop-down menu:
 Furthermore, the drop-down menus next to the Name and Alternate Name fields are set to the Name Generator option and are not editable either, indicating these values are derived from the previously selected Name Generator and that this can, again, only be changed by selecting another Name Generator, or none.
|
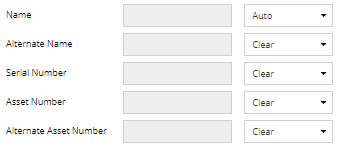
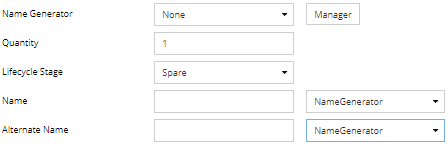
Specify the name-related fieldsThe following set of fields are specified in a more complex way. Notice that when the dialog is first entered, all the input fields that are greyed-out (not editable) and with all drop-down menus set to Clear, except for the Name field. If these options were left as-is, objects created by this Duplicate operation would have the Name field automatically generated by the application, and the rest of the fields would be left empty.
 Rather than leaving these fields cleared, other options are available via the drop-down menu to the right of each field name. Depending on which option is chosen, the text entry field between the field name and the drop-down menu may be enabled. The available options are shown below:
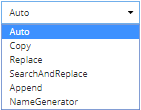 The following is a detailed overview of every option and how it affects the final values of the fields for the objects created by the duplicate operation.
and later changed your mind and decided not to copy the value from the original object, but to leave it un-specified, without any string value, selecting the Clear option clears whatever value was specified before and leaves the field in the newly created objects blank.
In case some other option was previously specified for a field, selecting this option will clear whatever value was specified for the field and enable editing, so a custom string can be specified to append to the original value:
 Note that those fields are not further editable and can be changed only by selecting either another Name Generator, or None option, from the drop-down menu. Doing that will unlock the fields for editing, but will also leave the previously specified values.
In another scenario, for example, if you just opened the dialog and didn't specify a Name Generator, you can still select the Name Generator option from the drop-down menu for Name and/or Alternate name fields:
 This unlocks the field values for editing and now you can specify custom Name and Alternate Name template string values:


While the Replace operation completely replaces the source string, this operation allows parts of the string to be selectively replaced -- a specific value is searched for and replaced with another value. If this option is selected, inline editing gets disabled for the selected field, any previous entry is cleared
and the rest of the parameters for this operation are taken from the Search and Replace fields at the bottom of the dialog:
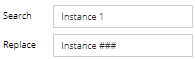 The Search and Replace fields specify the strings which will be used to search for and replace with for any fields that are in "Search and replace" mode. Both fields are simple text entry fields and enabled for editing, except that the Replace field also includes a Name Generator drop-down menu, which will be addressed a bit later.
For example, let's assume there is a rack "template" object named "Rack Rm202-C<RackNum>" and an Equipment in that rack named "RME Rm202-C<RackNum>-FrU16". If you want to duplicate the rack, including the child Equipment 10 times, you can use the "Search and replace" option for the Name field with a Search string of "<RackNum>" and the Replace set to use a name generator with a Name template string of "##" and an initial value of 1:
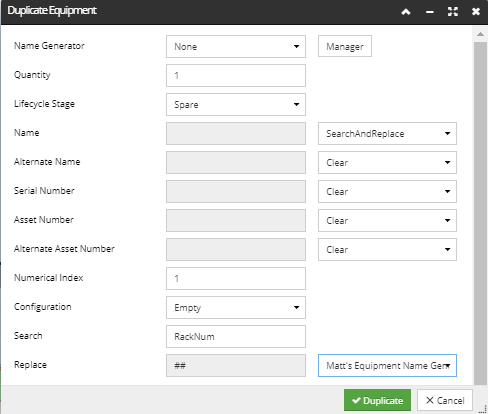 The name generator will generate "01" the first time it's called, then "02" etc. The result will be the first rack named "Rack Rm202-C01" meaning the first rack in the C row in Room 202. That rack will have a child named "RME Rm202-C01-FrU16", meaning it's a Rack Mounted Equipment object in the specified rack and located at RU 16 in the Front Rack Space. Other Equipment could have the same names, but with different Front RU, Rear RU, or other Rack Space positions. In this way, an entire Rack full of equipment can be duplicated many times, with the Name, Alternate Name, Serial Number and Asset Number fields all set to different values for the Rack itself and all contained equipment.
The drop-down menu next to the Replace field applies the Name field template specified for the selected Name Generator (because the Name field is in Search and Replace mode):
 The None option is selected by default and both input fields enabled for editing, in which case any constant string can be given there. However, when a Name Generator is selected from the drop-down menu, the Replace field gets populated with the Name template from the chosen Name Generator and is disabled for editing:
 The idea behind this second Name Generator is that it will be applied once for each new top-level Equipment object that is created, and the resulting string will be used to fill out the template values for the top-level equipment and all contained equipment. In other words, it is possible to use a Name Generator to do a search-and-replace operation that puts a different value for each created Equipment. The benefit of this is that the same search-and-replace can be applied to the (five) name-related fields of child Equipment which have different names from each other, but which want to have a component of the name that includes a rack number, for example.
|

Note: The full Duplicate feature is available only for the following Super Categories:
-
Area
-
Equipment
-
Cable
-
Pathway
-
Maintenance Hole
Also, some the fields (Serial Number, Asset Number, Alternate Asset Number, Lifecycle Stage and Configuration) are not enabled for some Super Categories for the Duplicate operation. For example, only equipment objects have Asset Numbers.