Importing Slotted Equipment
IRM allows the user to specify Slot Configurations during DDR Import, which effectively enables tthe import of Slot-containing equipment with different configurations in a single equipment import operation. As a result, an imported Slotted Equipment can automatically contain (child) Slot Equipment named and positioned as specified in the Slot Configuration. The child equipment to be included is specified in the associated Equipment Type Slot Arrangement configurations.
This topic highlights only steps specific to this type of DDR Import through a use case example of importing a faceplate with different Slot arrangement configurations. Note that the common details of Equipment DDR Import are already described in the Equipment Use Cases and are covered only briefly here.
Create a Slot Configuration DDR header/fields
The following is an example .csv file with columns (fields) required for a slot configuration DDR Import.

Most of these fields are the same as for the standard Equipment DDR import, except for one (Configuration) needed for this use case. The Configuration column indicates which Slot Configuration (defined by the Equipment Type's Slot Arrangements) should be used for each equipment.
Also, the Placement column specifies the Place By text strings that define the Design World Area location of the newly created Equipment
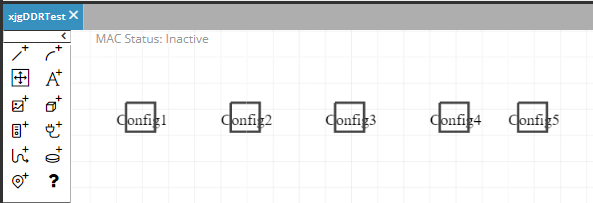
For this example, the goal is to import several Faceplate instances into a Design World Area, with the child Equipment automatically created and placed in the Slots as defined as per the Slot Configurations.
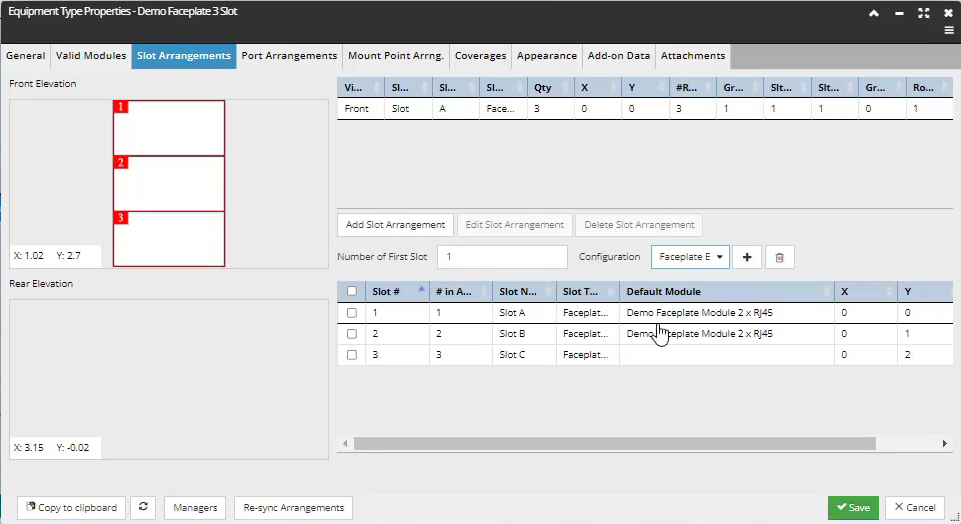
The following is the associated Faceplate Equipment Type, which has multiple Slot Configurations, the detail for which one (Faceplate E) is shown:
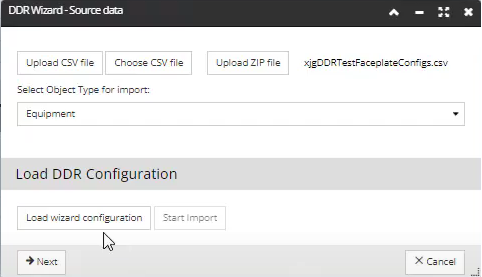
Open the DDR Wizard and specify the source data
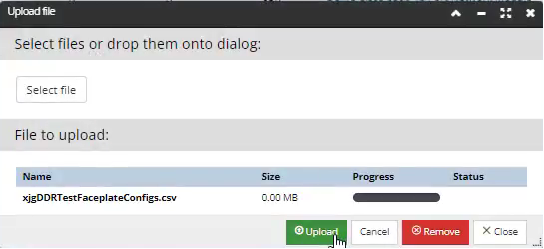
First, upload the spreadsheet file:
Next, select the Equipment as the type of object to import and leave the rest of the Source data parameters as default:
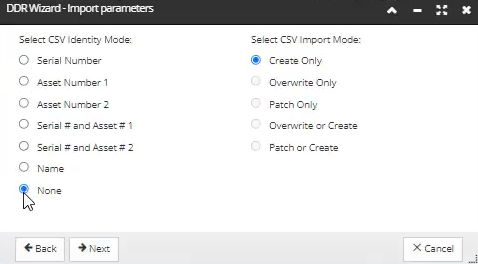
Select the default Import parameters
Next, configure the Source data placement parameters
This is one of the specific Slot-related wizard steps, as is allows you to specify the Placement parameters for the Equipment being imported.
First, select the Place in Area checkbox at the top, to indicate that we want to put the imported equipment into an Area.
Place in Area enables other options below it, which specify the exact method by which the Slotted Equipment is placed within the Area. In this case we choose Place by Text in order to put the faceplates near the appropriate text objects we have in the Design World.
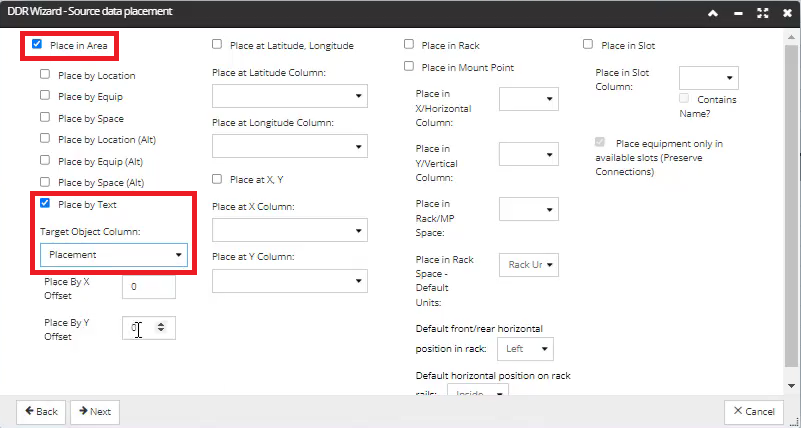
Click on Next button.
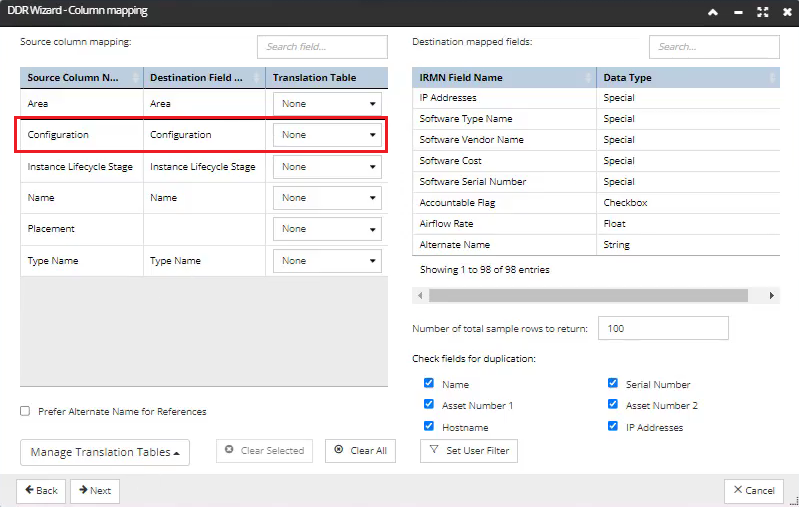
Select the default parameters in the DDR Wizard-Column mapping screen
For this example, the user wants to create Slot Equipment as specified per pre-defined Slot Configurations, which are specified under the Configuration column in the original spreadsheet file. To achieve this, the user ensures the Configuration field is mapped (see the Destination Field column below), which happens automatically in this example because we have a field with the exact same name in the DDR spreadsheet.
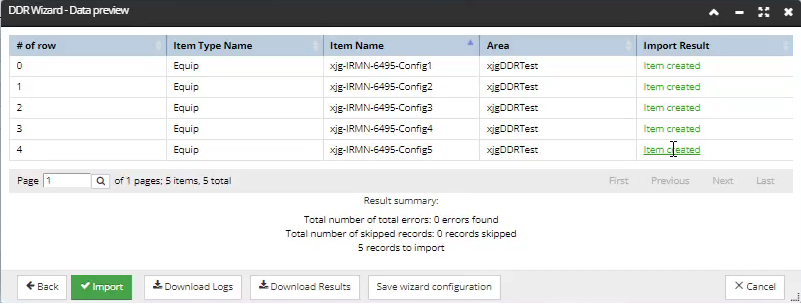
Complete the DDR Wizard upon successful Import Result in the Data preview screen