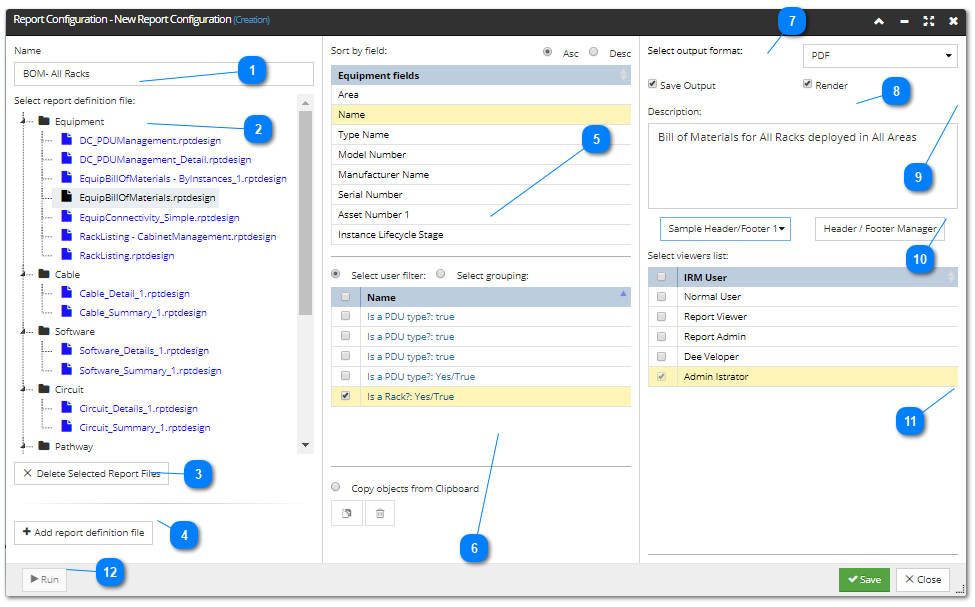
The Report Configuration dialog is used to create and edit Report Configurations, including the following items:
-
Upload new Report Definition files. -
Assign a specific Report Definition file to be used by a Report Configuration Template. -
Specify what content is to be included in the report output. -
Specify how the report output content will be sorted. -
Set the format to generate the report in. -
Specify the Report Configuration Name and Description. -
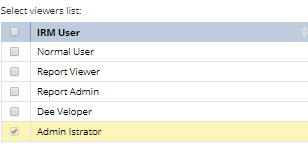
Define which users are able to view report or run the Report configuration. -
Execute the Report Configuration and preview the output results.
To access the Report Configuration dialog, the user should first navigate to the Managers drop down menu, and then select the Report Manager option.
To create a new Report Configuration, click the + button, which opens the Report Configuration-New Report Configuration dialog.
 Report Configuration NameThis is a short description to describe the purpose of the Report Configuration and is the name that will be seen by other system users who have the rights to view, run or edit the Report Configuration.
|
 Report Definition Files in Each Reporting CategoryThe Report Category Tree logically groups uploaded Report Definition by their associated object Category. It also identifies the Report Definition currently assigned to the Report Configuration and based upon its associated report Category. The Category associated with the selected Report Definition will define the available type of Filters, Clipboard object and Sort criteria that can be used within the Report Configuration.
|
 Delete Report Definition FileThis button is used to remove the currently selected Report Definition file from the Report Category tree
|
 Upload New Report Definition FileThis button is used to upload a new BIRT Report Definition file into its associated Report Category.
|
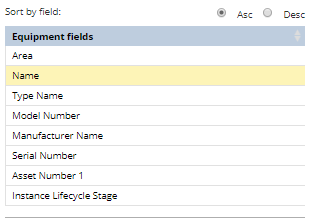
 Define Report Output Sort OrderThe available Sort Fields are based upon the selected Report Category and allows the report to be sorted by the selected Field in either Ascending or Descending order.
|
 Define Content to show in Report OutputThere are 2 methods of specifying report content:
-
-
By pasting from the clipboard ( By Clipboard)
By Filter allows the user to bulk specify report content based upon the objects returned from the selected Filter(s). This option is useful when large numbers of objects are required.
By Clipboard allows the user to copy & paste specific objects from the Area or Object Grid. This option is useful when reporting on a small number of objects or when it would be too difficult to use a filter to specify the objects to be included in the report output.
|
 Output FormatThe Output Format field indicates which format to apply to the report when it is executed. The following output formats are currently supported: XLS,XLSX, DOC, DOCX, ODS, ODP, ODT,HTML and PPT.
|
 Output OptionsWhen the Save Output option is checked it will download the Report Output file to a local folder and it will create a entry in the Global Console Reporting interface.
When Render is checked a preview of the Report Output will be displayed in a new browser tab.
|
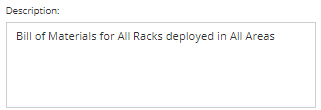
 Report Configuration Template DescriptionThe Description field is used to provide a fuller description of the Report Configuration.
|
 Set Report Header Footer optionThis option allows a Header and Footer configuration to be defined and/or assigned to the Report Configuration and displayed in the report output.
|
 Sharing the Report OutputAllows the report output to be shared with other users who can download the report output via the Global Console's Reporting interface
|
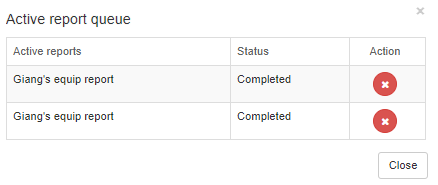
 Run the Report ConfigurationRun the Report Configuration. This opens the Active Report Queue dialog:
The action button cancels the execution of the Report Configuration, after the user approves a confirmation dialog.
|
|