A Proxy is a lightweight representation of an external object within IRM.
A Proxy Source contains configuration information for a source of Proxies. Proxies are generated on behalf of some software that IRM integrates with, usually by a special "integration service" application. Information in the Proxy Source is used by the integration applications and other IRM components as necessary to make the integration work. Proxy Sources can only be configured by administrator-level IRM users.
Click on the link for more information about Proxy Sources and Proxy objects in general.
Configuring the BMC Integration
In order for the BMC integration to work properly, the Proxy Source for BMC needs to be configured by using the Proxy Source Manager dialog. It can be accessed by clicking on the same-named button from either:
the Discovery Manager dialog
the Global Settings dialog
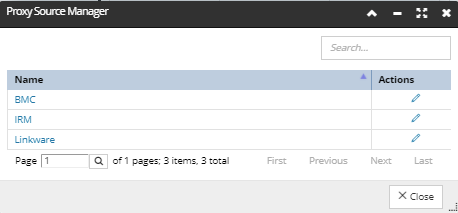
The screenshot below shows a pre-configured Proxy Source set up for BMC listed in the Proxy Source Manager:
To view properties of a Proxy Source, click on its Name, or the the edit (pencil) action button in the corresponding row. This opens the Proxy Source Properties dialog, which is divided into several tabs, each containing a specific group of properties.
The following is a description of each tab, as well as some common workflows in which it may be used, broken down into sections, with one section per tab:
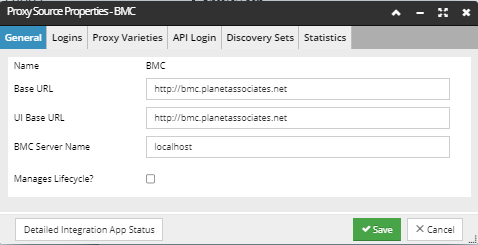
General tab
This tab is used for configuring basic BMC server information, such as the Base URL and the Name of the server, which is a necessary step during the initial BMC integration service set up on the IRM side. For this, you will need to get the Public IP Address or DNS name of your BMC server instance.
For Base URL, enter the DNS name or Public IP of the BMC instance used by IRM
The UI Base URL is used in case the server API and UI are on different machines.
A custom BMC Server Name is the name of the BMC Server as shown in the BMC Development studio on the BMC server used by IRM and may not be localhost in production environments, as shown in this example.
Setting the Manages Lifecycle? option to checked, it means that BMC manages Lifecycle Status in IRM. Specifically, the synchronization engine uses the BMC Asset Status and applies it to the matching IRM object.
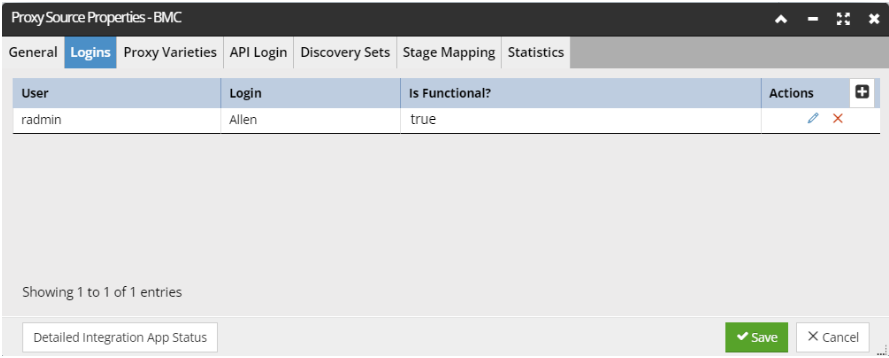
This tab is used to map IRM logins to BMC logins. Standard Action buttons enable editing, removing, or creating a new Login entry.
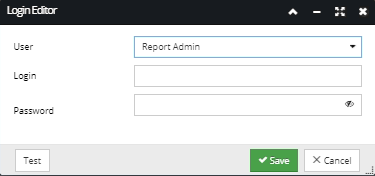
Below is an example of the Login Editor subdialog, which opens upon click of the + or pencil action buttons:
Later on, this login information can be edited, or deleted completely, as necessary. An additional Test button on the bottom enables a quick test to be done regarding whether that user can connect successfully to the BMC server.
Note: IRM Users refer to people that can login to the IRM software and should not be confused with the objects from Users tab in the Web Client, which refers to persons that can be assigned to Configuration Items for Asset Management purposes.
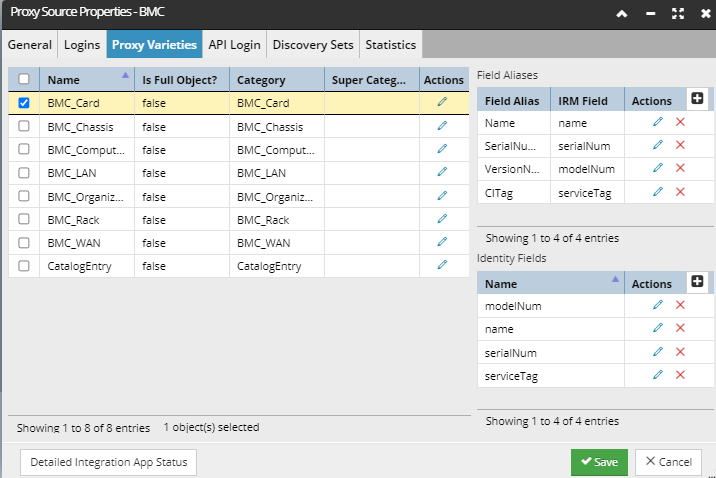
The left grid lists the Proxy Varieties specified for the selected Proxy Source, along with its basic properties, such as the Category and a flag indicating if it's a full object. A Proxy Variety identifies the objects that are supported by the specific Proxy Source integration, that is, what information is passed between the IRM system and BMC. For BMC, we're passing and managing Computer Systems, Equipment, LANs, WANs, Persons and BMC Organizations.
Aside from listing Proxy Varieties, the data grid also enables editing each Proxy Variety, simply by click on the pencil action button, which opens its Properties dialog. Within the Proxy Variety Properties dialog, there are two tabs:
the General tab, which shows the same information as in the data grid, with the addition of enabling the user to directly open the Category Properties by click on their name(s)
and the Correlation Strategy tab, which enables the user to set a Proxy Correlation Strategy for the selected Proxy Variety:
Correlation Strategy stores the parsed form of a logical expression of field code values, that describes exactly how the Site Master should correlate a Proxy to an IRM object. The fields used here are all in the Identity Fields set. The Correlation Strategy is user editable, so that users can choose the Correlation Strategy best for their organizations.
The screenshot below shows an example of a correlation strategy specified for a BMC Variety - a BMC_Card. It consists of one intermediate node containing a single expression and a leaf node containing two sub-expressions. Each expression can relate to one of the specified Identity Fields, which can be selected from the drop-down menu. The logical operator to apply to each of the sub-expressions can be set by click on the AND/OR switch buttons on top of them. The buttons on the right allow the user to add a rule (expression), or a group (a leaf node), or to delete each of them.
Notice two additional data grids are shown on the right of the Proxy Varieties tab, which populate with data when you select something in the main (left) data grid:
Field Aliases enables specifying the mapping of an external field (e.g. "Serial Number") to one of IRM's built-in fields (e.g serialNum -- note that both semantic and non-semantic fields are supported).
Identity Fields are fields that can be used to correlate Proxies on; fields listed here are from the "range" (second string) values from the Field Aliases grid. Note that this field is initially set by the Integration Service depending on what external system fields it knows about.
The API Login is used for operations that are not intrinsically driven by a user account, for example:
the Change Request's Task record,
Report Bundles created by the system,
reads and writes of Equipment objects that are synchronized between the two systems
In other words, when IRM makes changes within the BMC Remedy system that are not direclty on behalf of an IRM user, it does so using a specific BMC login. This login must be supplied in the API Login tab of the Proxy Source Properties dialog. The BMC User account must have proper permissions set in order for it to work correctly for this purpose.
The following are the steps to create and configure this BMC account:
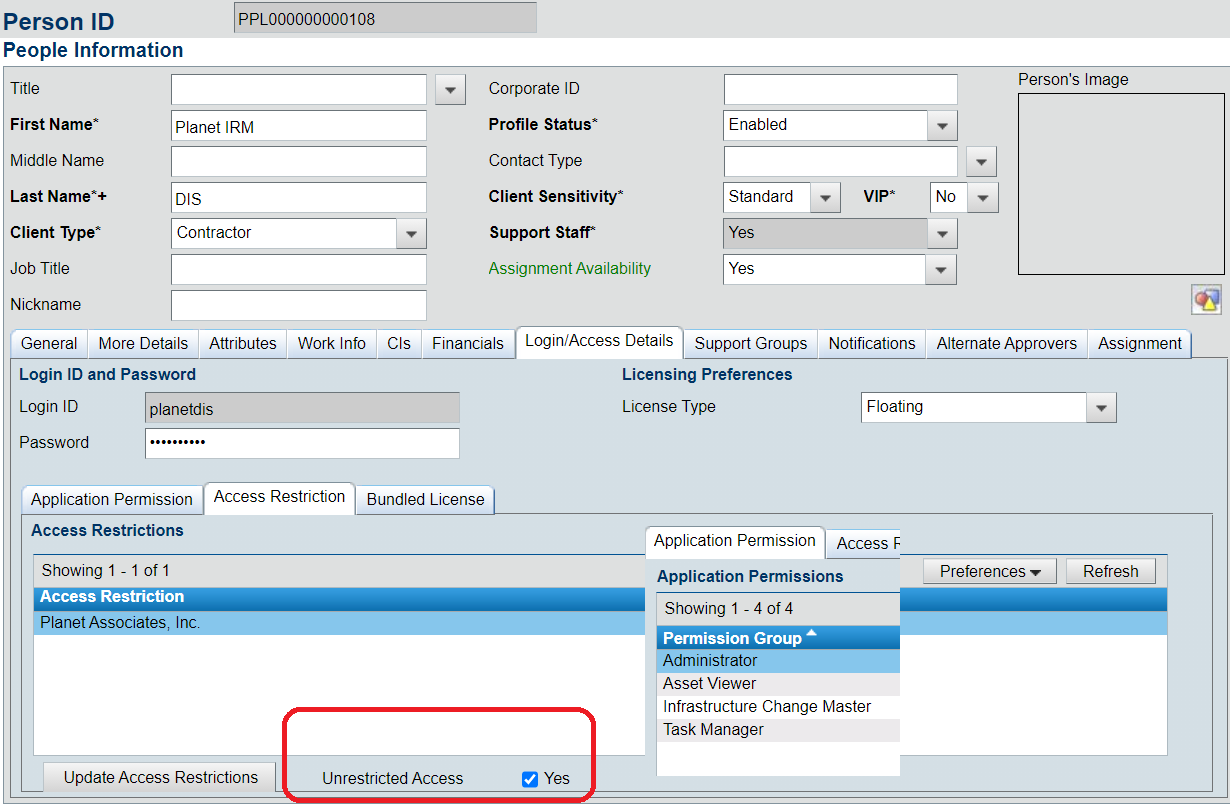
Using the BMC Administrator Console, logged in as ‘appadmin’, create the new login as displayed in the screenshot below.
Once the login configuration is completed, login to IRM with your IRM user account.
Go to the Discovery Manager
Edit the Proxy Source for the Discovery Manager - the Proxy Source Properties appears.
Inside the API Login tab, enter the login name and password you created in the first step.
Click the Test button. You should see a success popup appear. If not, then you do NOT have the correct credentials of the account created in #1 above. Verify the credentials and try again until you get Success.
The following is an example of a such configured user account within the BMC's Administration Console:
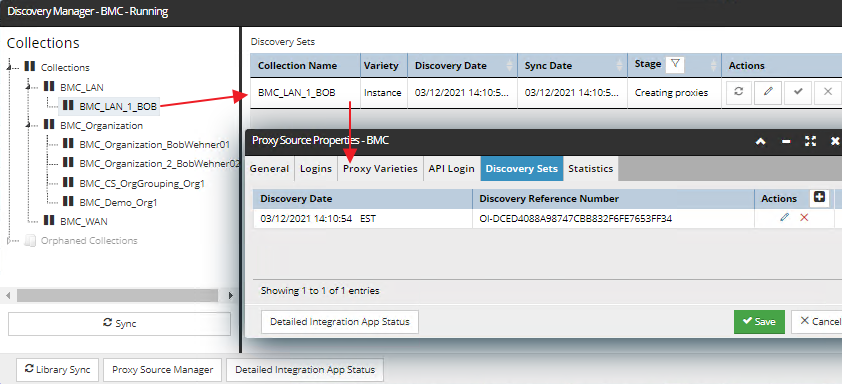
This tab enables the user to conveniently track the history of discovery runs for a specific Proxy Source. It displays a single paginated data grid which lists all Discovery sets by their Discovery Reference number used in BMC for the Collection, along with their Discovery Date, which is, the date when the synchronization of that Discovery Set started.
The Discovery Sets listed here are created when synchronizing a Collection in BMC with IRM:
More on the synchronization topic can be found under this topic.
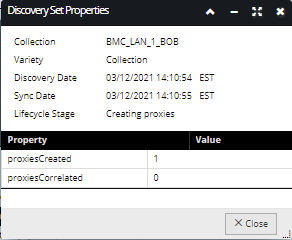
This tab lists different statistics describing the result of a synchronization operation for a specific Proxy Source. The data is listed for each Discovery Set specified for this Proxy Source, with one Discovery Set per row.
Additional properties are listed for each, similar to ones displayed in the Discovery Set Properties dialog (opened by clicking on the pencil icon in the Discovery Manager's top grid, as can be seen in the screenshot from the previous point).