4.3.10.4. Pathway hierarchies
IRM supports Pathway products (i.e., Pathway Types) that come with built-in child Pathways. It is also possible to add a child Pathway to a Pathway that does not have any built-in children.
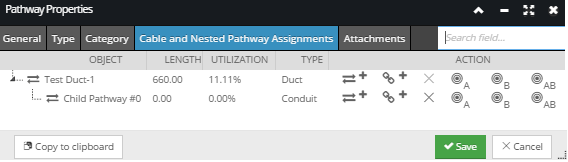
The Cable and Nested Pathway Assignments tab in the Pathway Properties dialog enables creating Pathway hierarchies and is used to create parent/child Pathway configurations to represent duct / inner duct configurations or tube cable within blown fiber environments.
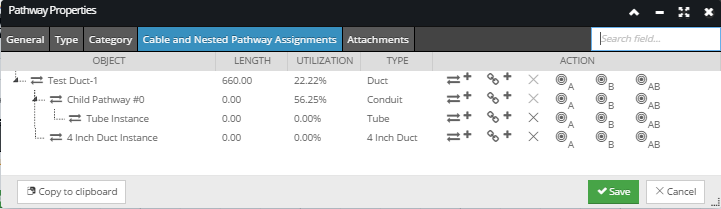
An example of the tab for a Duct Pathway object is shown in the screenshot image, while the text below explains its main features:
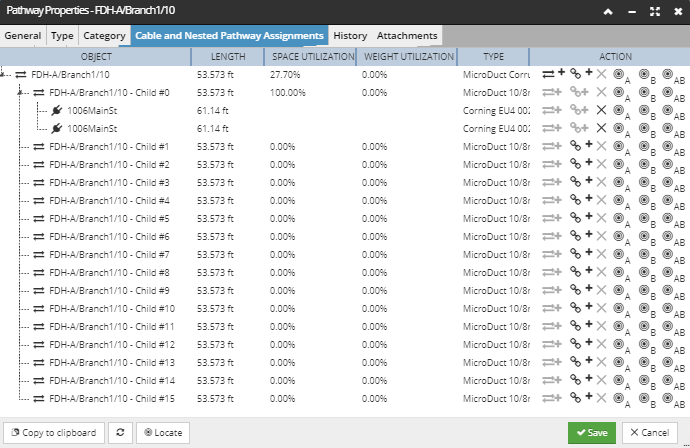
The tab consists of a grid with a tree structure that allows expanding and closing multiple rows of nested (child) elements. The selected (opened) Pathway object is displayed as the top (parent, or root) object and its contained Cable and Pathway objects are displayed as its children, or nodes.
Each row item can be viewed in more detail by click on the object name, which opens the appropriate Cable or Pathway Properties dialog. In addition, the Type column enable quick access to the associated Pathway or Cable Type Properties dialog:
In addition, it displays the following Pathway properties:
-
Length - sum of lengths of all lines that this objects consists of
-
Space Utilization - indicates the amount of occupied space, including any child Pathways or Cables
-
Weight Utilization - indicates the amount of occupied weight of the Pathway, including weight of any child Pathways or Cables
-
Type - Pathway Type / Cable Type, depending on the type of the object, either Pathway or Cableand Action buttons that enable different operations are displayed for each row entry:
-
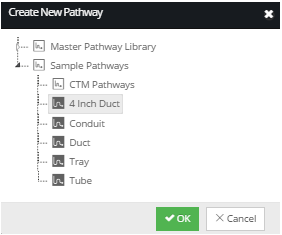
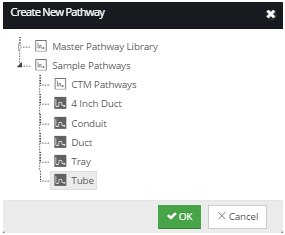
Add nested Pathway - opens the Add Pathway pop-out sub-dialog, which displays a list of Pathway Types and creates a new Pathway object instance.
-
Add a Cable - opens the Add Cable pop-out sub-dialog that displays a list of nearby Unassigned Cables.
-
Delete - enabled for Cable objects and empty nested Pathway objects. If a Cable is removed, it's added to the list of Unassigned Cables - the Cable is not actually deleted. However, if an empty nested Pathway is removed, the object is completely deleted.
-
Locate Cable / Pathway end A / B / A+B - opens the appropriate Area in the Design World and highlight the selected Cable or Pathway end(s).
Note: The Add nested Pathway and the Add a Cable buttons are enabled only for Pathway objects with sufficient capacity.
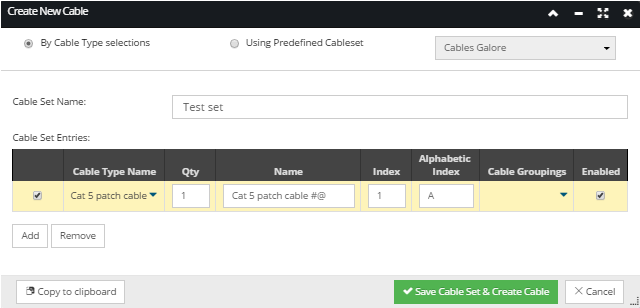
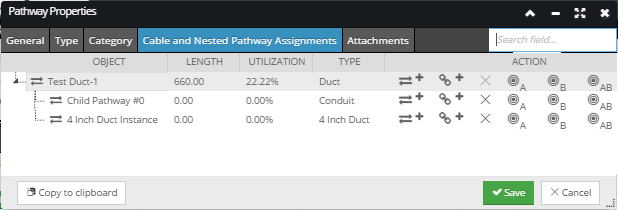
The following use case covers the task of adding several child elements to an existing Pathway object - the one created in the use case in topic Insert and route Pathway in Design World, to be specific. The idea is to add a nested Pathway and a Cable to the existing Duct, as well as a nested Pathway to the built-in child element of that Duct. In order to make all those operations in a single iteration of editing the Pathway Properties, the first step is to create and insert the cable that will be added as a child element.
The process is as follows: