Routing Duct Pathways over Tray Pathways
IRM enables routing of Duct Pathway objects over Tray Pathway objects simply by placing a Duct vertex near a Tray endpoint and selecting the appropriate context menu option in the Design World.
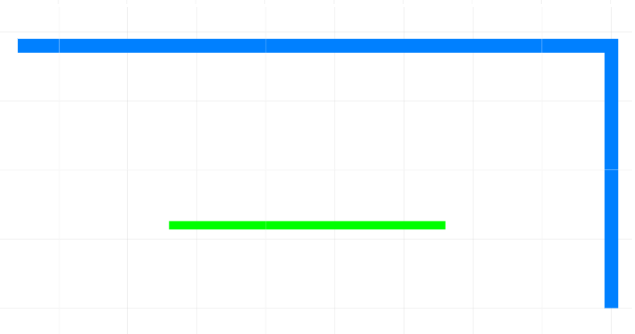
The following images and text explain the use cases for routing a Duct over a Tray, using the Pathway instance created in the use case in topic Insert and route Pathway in Design World. In this example the Duct Pathway is extended through one segment of another Pathway's route and exits though the same segment, and routed onward from there.  Insert a Duct and a Tray into the Design WorldFor this example we will be using a Tray Pathway instance created as explained in the use case in topic Insert and route Pathway in Design World and a Duct Pathway instance created in that same topic. Note: this example refers to a Duct Pathway, but the process is the same when routing any pathway type over or in a Tray Pathway.
|
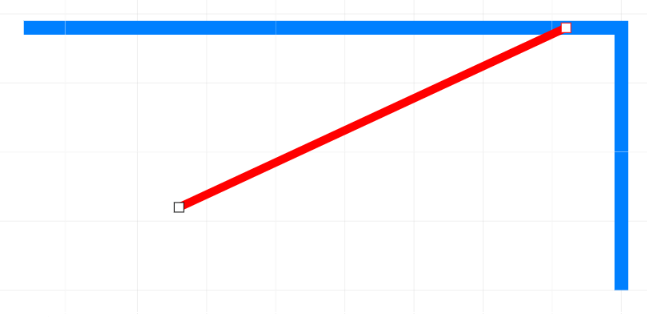
 Route the Duct to a point near the Tray's endpointTip: The routing duct over a tray function is invoked by selecting and existing duct in the Area or when inserting a new Duct into the Area.
If one of the Duct's end points is placed onto an existing Tray type Pathway object in the Area an additional sub-dialog will open, offering different options for how to route the Duct, as explained in the next step.
|
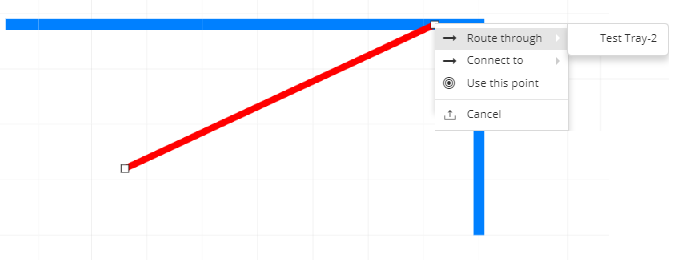
 Select "Route through" optionOnce a Duct's current endpoint is placed at some point along the Tray's route, an additional sub-dialog opens, offering the additional options shown in the screenshot above. If Route through option is selected, an additional sub-menu opens displaying all the Pathway objects. In this example, a single Tray Pathway 'Test-Tray-2 with no child Pathways is selected.
Note: If other the selected Tray contains other trays or ducts, then these can be selected and will appear as additional sub-menu options below the select Tray entry.
|
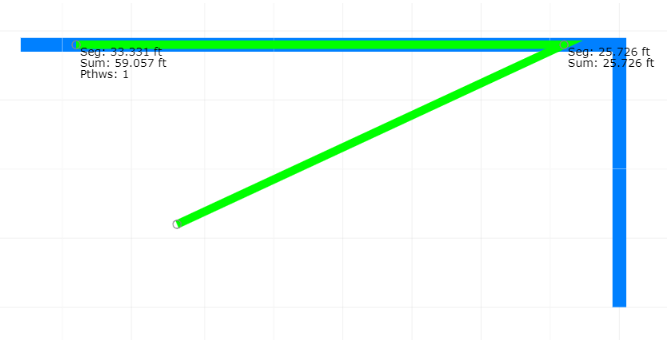
 Route the Duct through the TrayOnce the Route through option and the Pathway instance are selected, the Duct is routed from the starting point where it entered the Tray through the length of one of Tray's line segments simply by placing the cursor on the desired point. While extending the route, if the user does a double click rather than a single click, the route is terminated at that point.
|
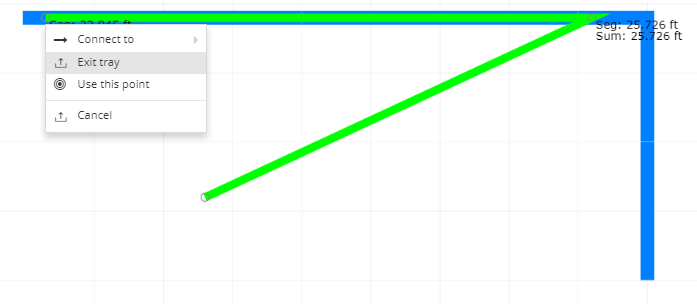
 Select an exit point along the Tray routeTray Pathways are different from Duct Pathways in one specific detail - a Cable or Pathway routed through a Tray type Pathway object can exit at any point along the Tray's route whereas, when routed through a Duct the item is routed through the whole length of the Duct and exits only at the Duct's endpoint.
In this example, a Duct is routed along 75% of the length of the Tray's segment, and a single click on the desired position opens a pop-out dialog displaying the option to exit the Tray. If Exit tray is selected, the Duct's route will exit the tray at the selected point and its route can be continued outside the Tray, starting from the point where Exit tray was selected, see next step.
|
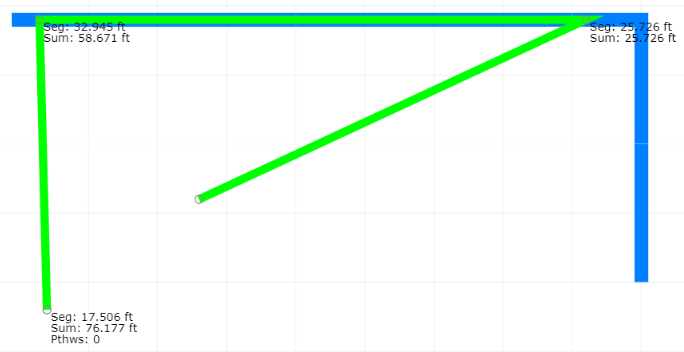
 Route the Duct outside the TrayOnce the Exit tray option is selected, routing of the Duct inside the Tray is terminated at the specified point and is continued outside the Tray. From that point, the Duct route can be continued further by placing the cursor on the desired point and clicking. While extending the route, if the user does a double click rather than a single click, the route is terminated at that point.
In this example, a point below the Pathway exit point is selected as the endpoint for the Duct route, as displayed in the screenshot above.
|
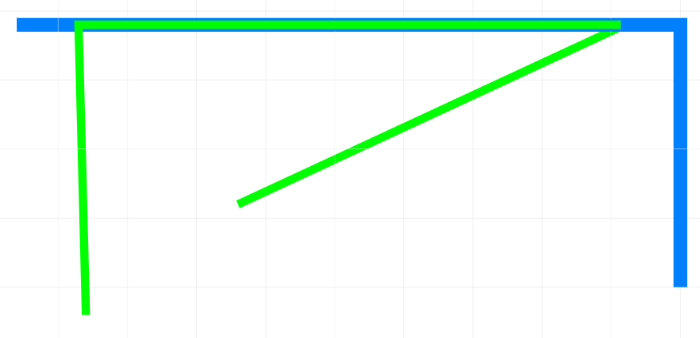
 Set the final point of the Cable routeIn the screenshot above the final Duct route is displayed after the pathway routing mode was exited by a double click.
|
|