4.9.2.1. Setting up the BMC Helix ITSM (Remedy) integration with IRM
The following is a step-by-step description of configuring BMC Server Filters to point to the IRM server. This will enable you to login and configure BMC Filters to point to the correct IRM instance.
The following information needs to be retrieved before proceeding with the operation:
the public IP of the BMC instance
the IRM Server DNS name for your IRM instance
After a successful login to your BMC Instance, login to the BMC Remedy Developer Studio
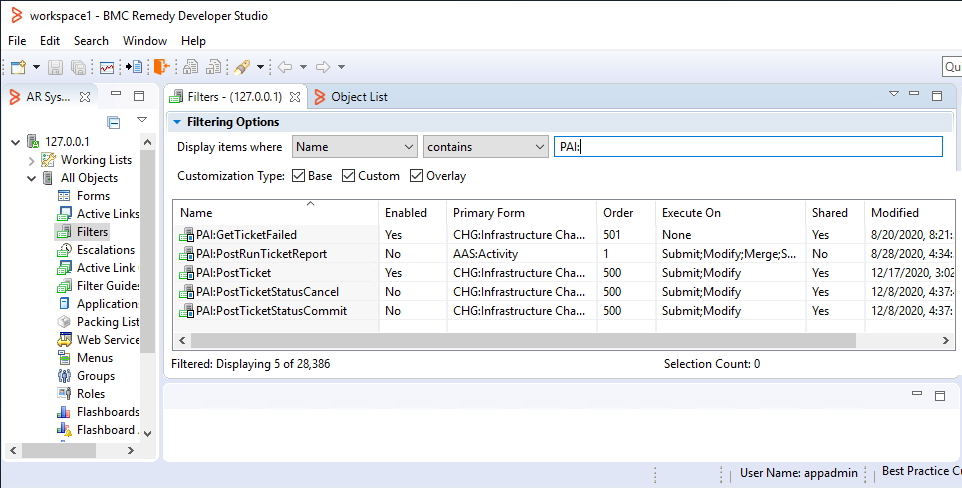
Expand your server branch (127.0.0.1 in the example below) and then expand the All Objects branch.
Double-click on the Filters branch and then click on the blue Filtering Option link (top left of Filter Grid).
Inside the right-most text box, enter "PAI:" into the search string to list all Planet Associates BMC Filters:
Next, double-click on the filter named PAI:PostTicket in the list.
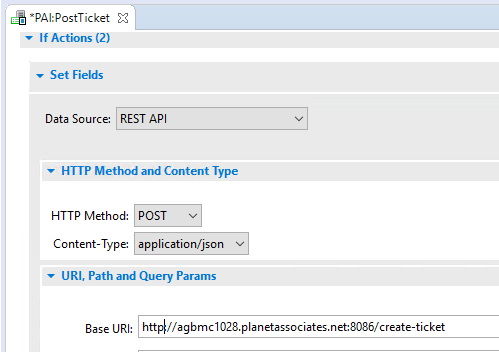
You will need to update the URI, Path and Query Parameters to point to the correct IRM instance
Locate and expand the If Actions(2) and then the Set Fields REST API section.
Update the URI, Path & Query Params to point to the correct IRM Instance by its DNS name (for IRM SaaS customers) or IP Address (for IRM on-premises customers). The IRM Discovery Integration Service endpoints use http not https.
In most cases, to reference your particular IRM server, you will be changing only the hostname part of the Base URL - for example, for "rwehner15exmaster.planetassociates.net" you just change "rwehner15". Also, for an on-prem instance you may also change https to http if you are not running in a secure environment.
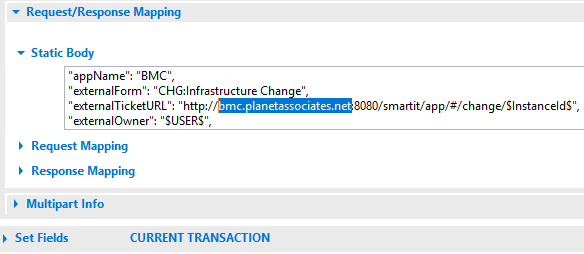
Expand the Request/Response Mapping section, then the Static Body sub-section and replace the BMC server name with the IP or DNS name for your BMC server.
Click on the Save button (top right main toolbar) or press CTRL+S to save the changes. The PAI Filter setup is now complete. Next Configure IRM to point to your BMC instance.