The next step in configuring the BMC Helix Discovery integration is setting up the Discovery Integration Service within the IRM application.
Configuring the Discovery Integration Service is done through the Proxy Source Manager dialog. The configuration information in this dialog is used directly by the Site Master, Global Console, and the Discovery Integration Service as necessary.
A Proxy Source contains configuration information used by an integration application and other IRM components, as necessary, to make the integration work. Click on the highlighted link for more general information about Proxy Sources and Proxy objects in general.
The following is a step-by-step tutorial of configuring the BMC integration service in IRM.
First, access your IRM instance and open the Discovery Manager in the Web Client interface
After a successful login to your IRM instance as an Administrator user, inside the Global Console, select the desired Site and click the Open Sites button. This opens a new tab and loads an IRM Web Client instance for the selected Site (this operation might take a minute or two).
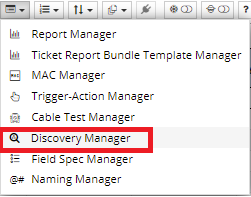
To access the Proxy Source Manager, first open the Discovery Manager dialog, which is done by clicking on the designated icon in the function bar in the main screen:
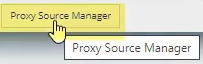
In the bottom-left corner of the Discovery Manager dialog there is a button that opens the Proxy Source Manager dialog:
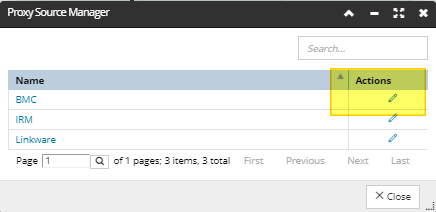
Within the Proxy Source Manager dialog there is a list of currently supported Proxy Sources, which should include a BMC item.
Now, open the Proxy Source Properties for the BMC Proxy Source, where you will proceed with the integration service configuration
This is done by clicking on the pencil icon next to the BMC row entry:
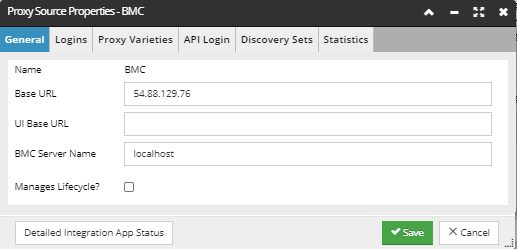
This opens the Proxy Source Properties dialog (see screenshot example in the point below), which is organized into several tabs that group similar integration properties, such as General settings, Login data, and API Login information.
This and related subtopics will focus on the specific actions necessary to configure the integration service and, in terms of explaining the user interface components in IRM, highlight only specific controls accessible to the admin users which will perform these actions. This and additional configuration information is explained in detail in the designated sub-topic under the BMC integration section.
Inside the General tab, specify the Base URL and the BMC Server Name field:
For this, you will need to get the Public IP Address or DNS name of your BMC server instance.
In the General tab, enter the following BMC server information:
For the Base URL, enter the DNS name or Public IP of the BMC instance used by IRM
Finally, enter a custom BMC Server Name - this is the BMC Server name as shown in the BMC Development studio on the BMC server used by IRM and may not be localhost in production environments, as shown in this example
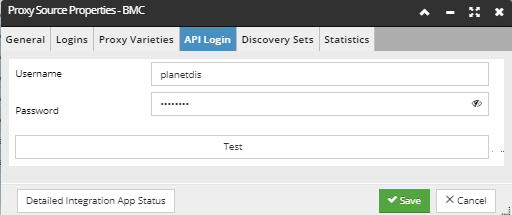
Configure the API Login, which requires a Username and Password:
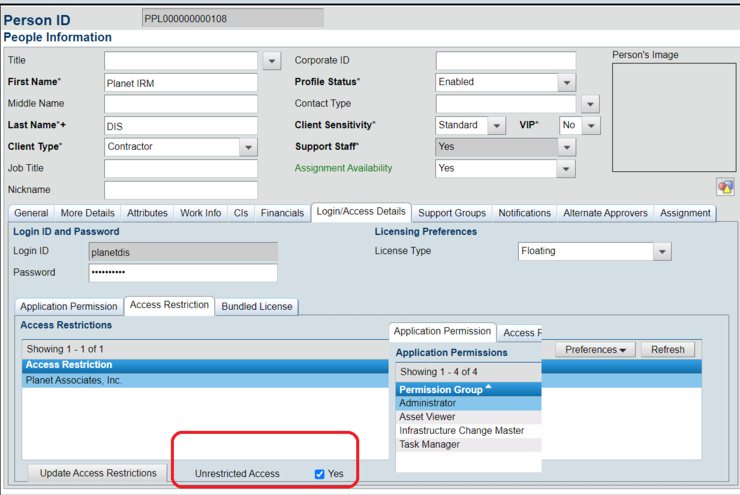
When IRM makes changes within the BMC Remedy system, it does so using a specific BMC login. This login must be supplied in the API Login tab of the Proxy Source Properties dialog. The BMC User account must have proper Permissions set in order for it to work correctly for this purpose. The following are the steps to create and configure this BMC account:
Using the BMC Administrator Console, logged in as ‘appadmin’, create the new login as displayed in the screenshot below
Once the login configuration is completed, login to IRM with your IRM user account.
Go to the Discovery Manager
Edit the Proxy Source for the Discovery Manager - the Proxy Source Properties appears
Inside the API Login tab, enter the login name and password you created in the first step.
Click the Test button. You should see a success popup appear. If not, then you do NOT have the correct credentials of the account created in #1 above. Verify the credentials and try again until you get Success.
The following is an example of a such configured user account within the BMC's Administration Console:
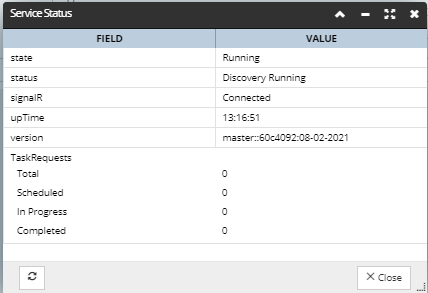
Finally, click the Detailed Integration App Status button to view the current connection status of IRM and BMC Helix ITSM
This button is located in the bottom of the the General tab in the Proxy Source Properties dialog. Clicking on it opens a small pop-out dialog displaying the integration service status:
After confirming that IRM can connect to BMC Helix ITSM (integration service state is Running) you can save the Proxy configuration by clicking on the green Save button in the bottom of the Proxy Source Properties dialog.
Also, please note there are additional items to configure in this dialog, but here we show only the basic configuration. For more details on this, please check the following topics - Proxy Source Configuration and Proxy Source Manager.