A Site is a self-contained unit of administration and data storage in IRM. It can contain quite a large amount of data and typically represents a single geographical location ranging from a single building to an entire Country. In the SaaS version of IRM, each Site has its own dedicated Site Master server, and possibly other servers to help with hot fail over, and user and/or data scaling.
The most basic IRM installation will have one Global Console server and one Site Master server, which might run on the same cloud virtual machine, or different virtual machines depending on how IRM is licensed. Each IRM Site has at least one dedicated server and stores all of its data in a modern database system. When a Site is opened via Global Console, it opens a new browser tab or window that provides access to all Areas and Managed Objects for which the user has permissions.
For more general information about Sites in IRM, see Sites.
Administrators can use the Global Console to create new Sites, delete Sites, and assign Policies that control which Sites and data each IRM user can access and modify. The first two of those functions are done through the Global Console Sites menu page.
TIP: A Site in the new web based IRM is roughly equivalent to a Dataset in older versions of IRM.
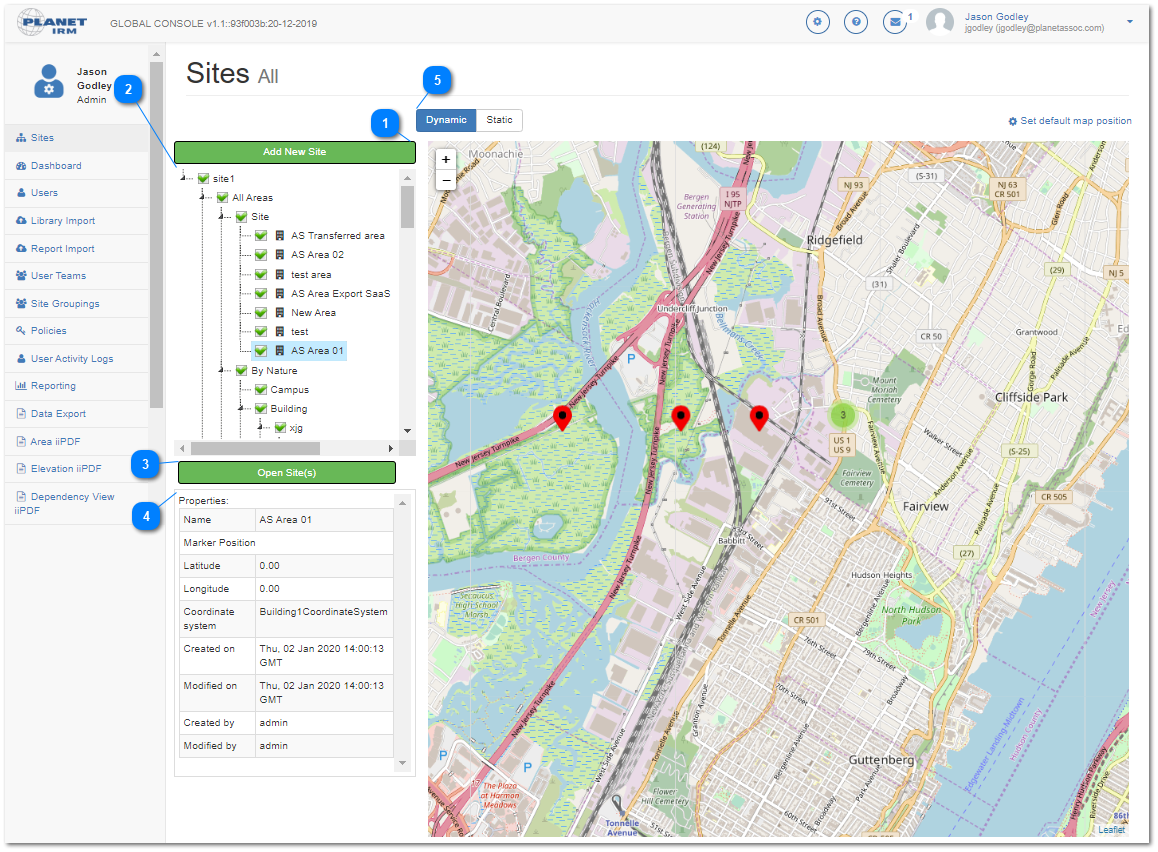
The following screenshot displays the Global Console application with the Sites menu selected and the Sites page opened, which is the default page that opens after a successful login. The text and additional images below explain the main features of this page in more detail.
Add New Site button
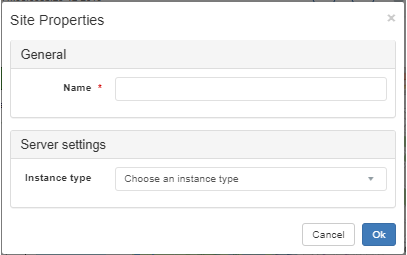
Clicking on the Add New Site button opens the Site Properties pop-out dialog, as displayed in the screenshot image below, that enables specifying basic properties of a newly created Site:
The dialog displays basic Site properties:
the Name of the Site, specified as a simple text string
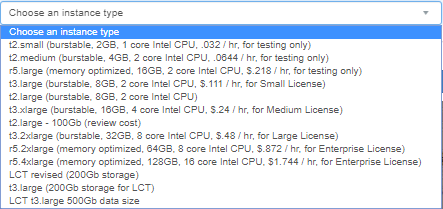
the Instance type, used to specify the server size in terms of CPU count and RAM size and associated cost in Cloud instance credits which is directly related to the IRM Licensing and available Customer Credits:
IMPORTANT: When specifying Site name, the user is prevented from naming Sites with names that include "-" (dash) or "." (period) characters. This is done in order to prevent specific characters to interfere with naming assumptions made by external parts of the application.
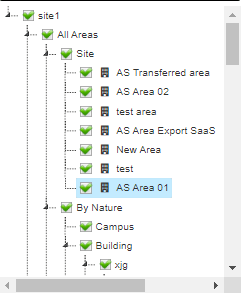
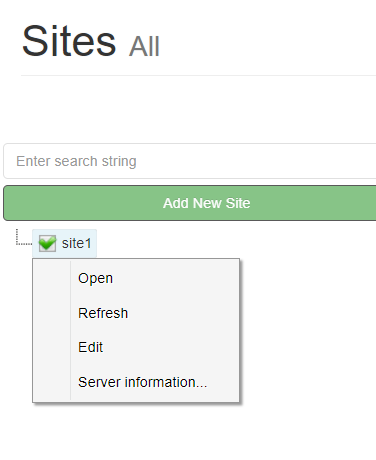
The tree control displays the deployed Sites listed as top-level nodes. Each Node branch can contain Area Categories or Areas and can contain many branching levels within each Site. The tree allows multiple selection at any level(s) of the tree structure, using the CTRL key to toggle a selection On of Off. Clicking on a node without the CTRL key de-selects everything and selects the clicked-on node. The tree also supports a (right-click) context menu, which has an option to Expand or Collapse the branch or to Open the selected branch and all associated Areas.
Each Site node in the tree has an associated checkbox, which is checked by default. Un-checking it causes all markers for that Site to be temporarily hidden.
The tree also supports a (right-click) context menu, which has an option to Expand/Collapse the branch or to manage the selected Branch and all associated Areas:
Open - opens the selected Site(s) and Area(s) Site in a new browser page in a new tab, according to the rules listed under point 4 (see below).
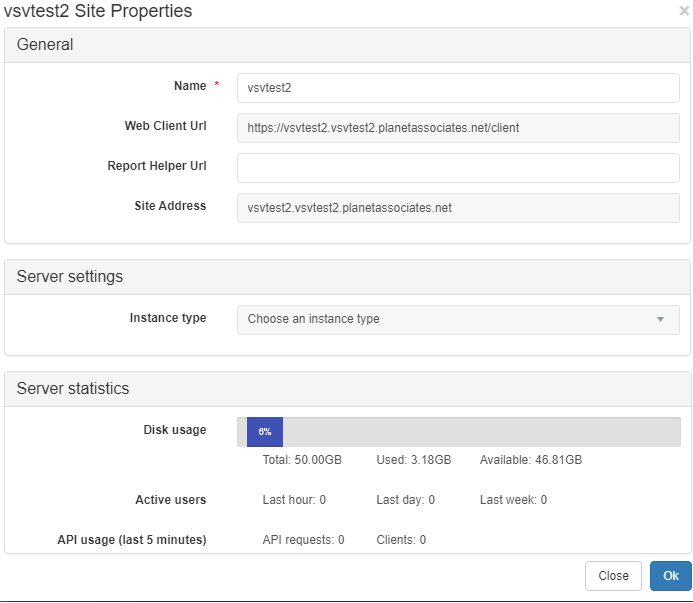
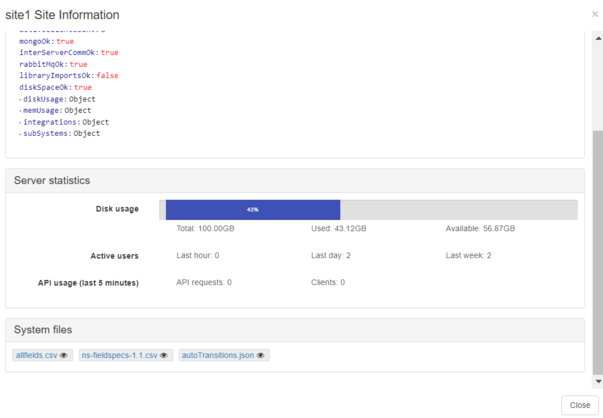
Edit - opens the <Site Name> Site Properties dialog. The same dialog opens when you select the Server information.. context menu option:
Aside from the general information about the Site, such as Name and Address, the dialog provides additional Server statistics summary, which displays information about disk and API usage, as well as basic statistics on active users. Additionally, the "Web Client Url" setting is used to call Sitemaster API from the Global Console, which allows sending requests over the docker network for On-Prem machines, or locally (using http instead of https) for SaS machines.
Delete - completely delete the Site. Important: This operation should be done with care, as it is not reversible.
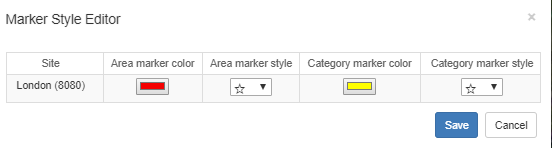
Set Marker Styles - opens the Marker Style Editor pop-out dialog, which enables specifying the Area and Category marker colors and styles for the selected site simply by selecting the appropriate color from the pop-out color picker, or selecting the appropriate style from the drop down menu.
Finally, the Expand All / Collapse All option serves as a toggle button that expands (shows) or collapses (hides) all tree nodes.
There is an Open Site(s) button just below the tree panel, above the Properties panel. This button is disabled if nothing in the tree is selected, and enabled if one or more items are selected.
The button causes Site(s) and Area(s) to be opened, according to the rules listed below:
A Site is opened if it's selected, or if any Category or Area under that Site is selected. This means that a single Open operation can launch multiple Sites, each in its own browser tab.
An Area is opened if it's selected, or if any of its direct or indirect parent Categories are selected.
Having a Site selected, by itself, does not cause any Areas to be opened, only the Site.
An Area is opened only once, even if both it and some parent Category(ies) are selected.
If you try to open more than 20 Areas in a single Site, a standard pop-out notification message appears warning that it is not recommended and that performance may suffer and/or the browser may have issues.
TIP: To keep performance optimal, Planet recommends that you don't open more Areas than you really need to complete your work. Opening a few Areas is generally fine, and how many you can open before your system has performance problems depends on many factors, including the size and complexity of the Areas, how you use those Areas, your browser and available system memory, etc.
When multiple tree nodes are selected, the Properties sub-panel is mostly empty, containing only the text "Please select a single node in the above tree to see its properties.".
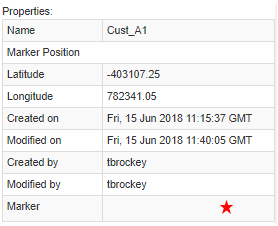
However, when a single tree node is selected, the Properties panel is populated with fields from the selected object.
Exactly what is displayed depends on the type of the selection:
Areas: Area Name, Latitude, Longitude, Creation Data, Last Modified Data, Marker Style
multiselection or no selection - the panel displays a text notification instructing the user to select a single node in the tree to see its properties.
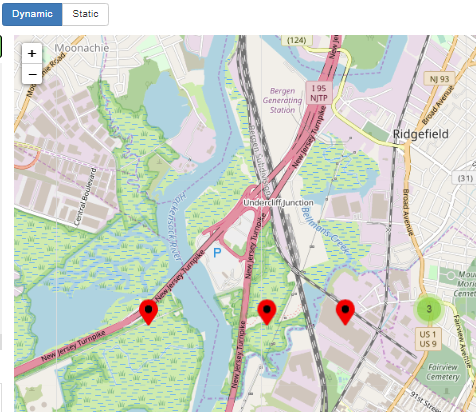
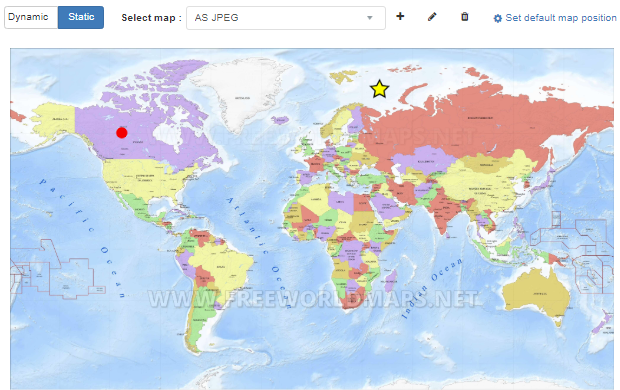
The main portion of the Sites page is dedicated to the world map, which upon Global Console page load displays all visible markers (icons) for existing Areas or Categories.
Note: For general information about both types of maps enabled in IRM see the main topic under the User Guide - Accessing a Site. The following are only additional Map management features enabled for Admin users.
The toggle button just above the map enables switching between the dynamic and the static map version.
For Administrator users additional controls for managing Static maps are enabled:
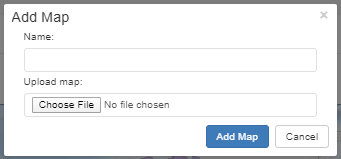
- allows adding a new map. Click on it opens the Add Map pop-out dialog, which enables specifying named and a file to be uploaded.
- enables removing the selected map. Click on it opens the standard Confirm Action pop-out dialog.
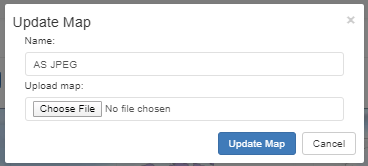
- allows a new image to be uploaded or the map to be renamed via the Update Map pop-out dialog, similar as for the "+" button. This action does not affect any markers already placed on the map (i.e. their x, y position).
Right click on the Area will open a context menu as shown below:
Server information will open a dialog can be for downloading the version of the file (allfields.csv) used by the Site Master as shown below.