A Site is a self-contained unit of administration and data storage in IRM. A Site can contain quite a large amount of data, typically for a single geographical location (either a single building, campus or region). In both SaaS and on-premises versions of IRM, each Site has its own dedicated Site Master server, and possibly other servers to help with hot failover, user and/or data scaling. Therefore, the most basic IRM installation will have one Global Console server and one Site Master server, which might run on the same cloud virtual machine, or different virtual machines depending on how IRM is licensed. For the most part, IRM users need not concern themselves with the server infrastructure that supports the product.
An IRM installation can have multiple Sites, however, it is important to understand that once data is split across Sites, the following restrictions apply:
Standard reports only operate on data with a single Site.
the IRM Web Client can only work with data from a singe site, so filtering, visualizations, etc. are all on a per-Site basis
it is not possible to connect cables or circuits between objects contained in different Sites.
Each IRM Site has at least one dedicated server and stores all of its data in a modern database system. When a Site is opened via Global Console, it opens a new browser tab/window that provides access to all Areas and Managed Objects for which the user has permissions.
Administrators can use Global Console to create new Sites, delete Sites, and assign Policies that control which Sites and data each IRM user can access and modify.
TIP: The Site object in the new web-based IRM is roughly equivalent to a Dataset in older versions of IRM.
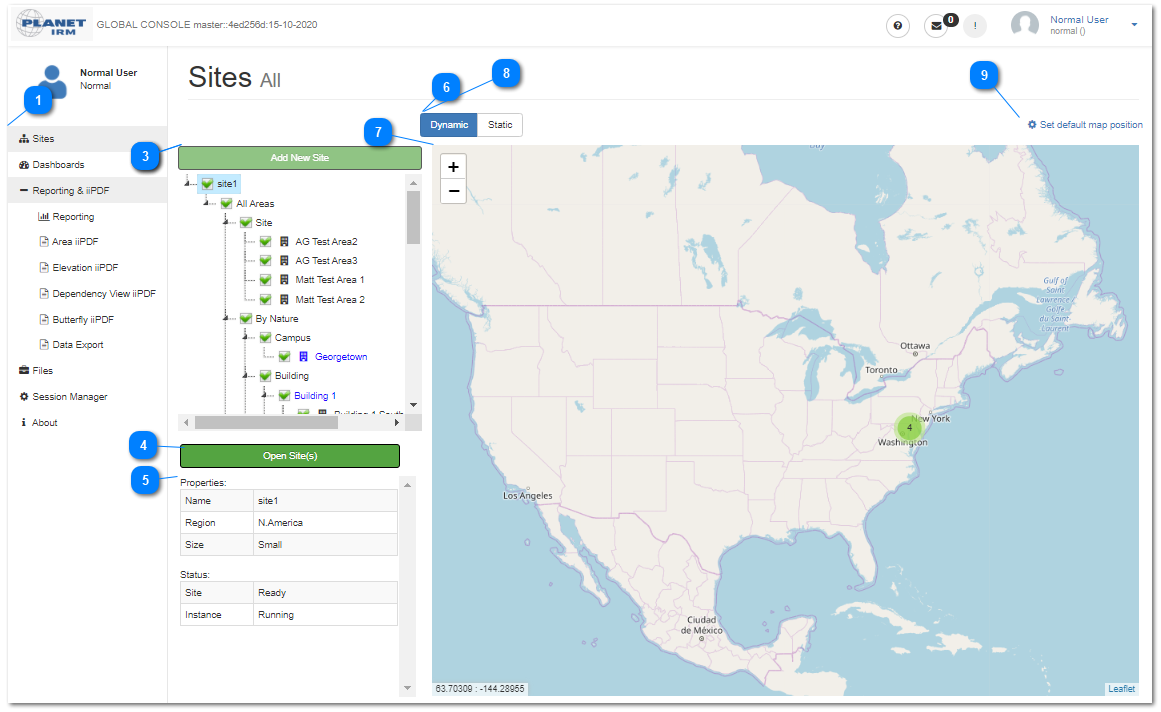
To access a particular Site, an IRM user needs to access the Global Console application, which requires a user login (see the previous topic - Global Console). The following screenshot displays the Global Console application with the Sites page opened.
Note: This example is for Normal IRM users only; for more information about using Global Console for Administrator IRM users, see the Administrators’ Guide
Select Sites from navigation menu
After a successful login, the Global Console page opens with the Sites navigation menu opened by default.
The Sites tree menu displays all Sites available to the current user, listed as top-level nodes. Under each Site node all of the top-level Area Categories for that Site are displayed, under those Categories any sub-Categories are displayed and so on, finally including the Areas of the Site.
Clicking on a node de-selects previously selected node(s) and selects the clicked one (toggle selection mechanism). The tree enables multiple selection at any level(s) of the tree structure, by CTRL+clicking on desired nodes.
Only nodes displayed in blue font have markers assigned, so selecting them also zooms and centers the map to the marker position. Selecting nodes which don't have markers assigned doesn't change the map view.
The checkbox next to each node in the tree is used to enable or disable its display marker in the map.
Note: The Add New Site button is enabled only for Administrator users.
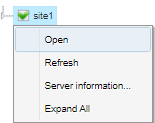
Open - opens the selected Site(s) ot Area(s) Site in a new browser page in a new tab, according to the rules listed under point 3 (see the next point below). This option is available for all tree nodes.
Refresh reloads the content of the tree menu.
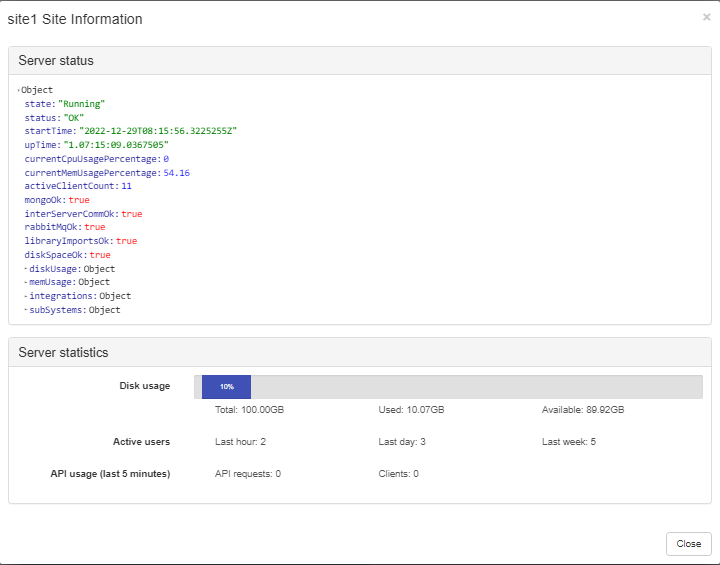
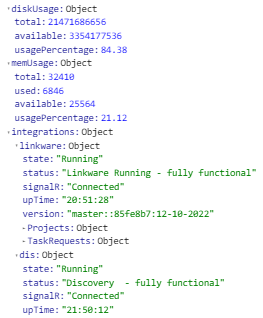
To help resolve technical issues, Server information... option shows information available from the Site’s Server status (top panel) and Server statistics (bottom panel):
The top panel displays different Server properties which are read-only and additionally expandable, in case of collection objects. It informs the user about the state, uptime CPU, memory and disk usage, etc. The usage information, as well as integration object- related information are displayed as expandable collections :
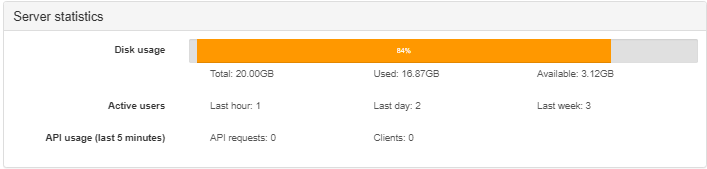
The first section under Server statistics (bottom) panel shows the Disk usage information in a graphical way, for user convenience, with additional text displaying total, used and available disk size:
Notice the color of the disk usage bar indicates the disk space limitation is close to being met.
The Active users section displays the number of distinct Irm Users in that Site within a specified period, such as last hour, day and week.
API usage (last 5 minutes) shows the number of REST transactions on that Site in the last 5 minutes and count of clients that caused them. This number is a measure of how busy the server has been recently, without getting into system-level details, such as CPU load.
Finally, the Expand All / Collapse All option shows / hides all tree nodes. This option is available for nodes.
The button causes Site(s) and Area(s) to be opened, according to the rules listed below:
A Site is opened if it's selected, or if any Category or Area under that Site is selected.
An Area is opened if it's selected, or if any of its direct or indirect parent Categories are selected.
Having a Site selected, by itself, does not cause any Areas to be opened, only the Site.
An Area is opened only once, even if both it and some parent Category(ies) are selected.
This button is disabled if nothing in the tree is selected, displaying only a notification message in the Properties panel:
TIP: For optimal performance, Planet recommends that you don't open more Areas than you really need to complete your work. Opening a few Areas is generally fine, and how many you can open before your system has performance problems depends on many factors, including the size and complexity of the Areas, how you use those Areas, your browser and available system memory, etc.
Displays different data depending on the type of the selection in the Sites tree menu. For multiple or no node selection the panel displays a text notification instructing the user to select a single node in the tree to see its properties (see previous point).
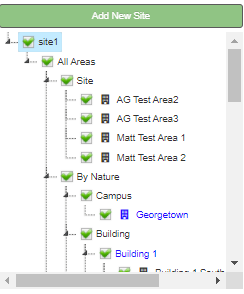
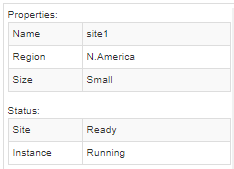
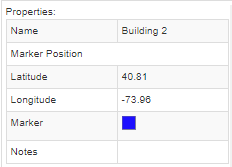
For a single node selection the panel displays different fields, depending on the type of the selected object - screenshot images below represent Properties panel for:
Sites:
Categories:
and Areas:
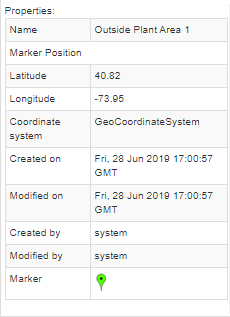
Most of the properties displayed here are self-explanatory, except for the Markers - explained in one of the next points.
The main portion of the Sites page is dedicated to a controllable world map, which upon Global Console page load displays all visible markers (icons) for existing Areas and Area Categories.
The map is navigated and used in a similar way as most popular street and world maps, such as Google-Maps, for example:
panning for navigation
mouse wheel scroll or +/- buttons (top-left corner) for zooming in/out
clicking on any graphical element, such as geo-location markers, zooms in on it and shows any additional content
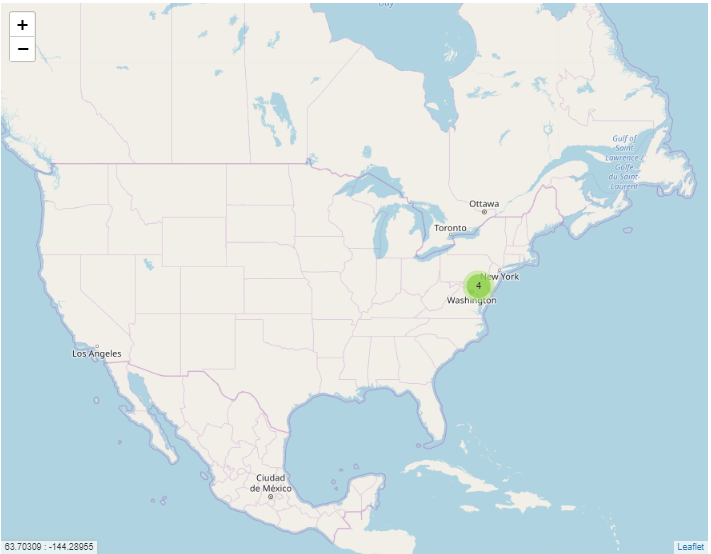
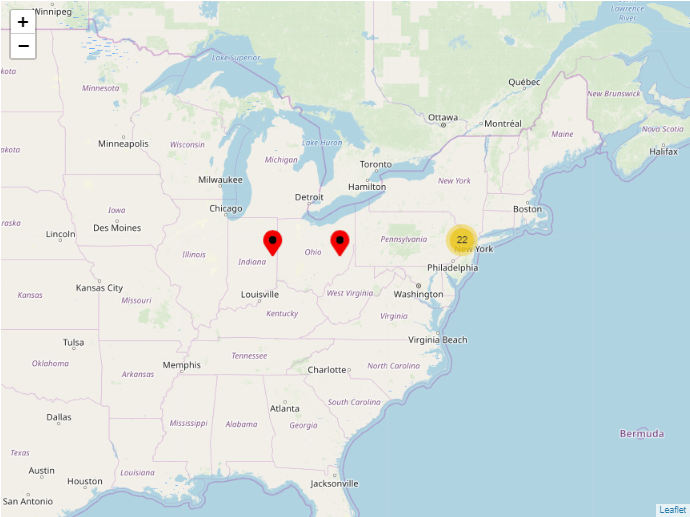
Markers displayed in this map (red and yellow icons from the screenshot image) are graphical representations of an Area/Category geo-location.
Some points regarding the behavior of markers:
Sites don't have any markers drawn, only Area Categories and Areas do - notice the Properties panels from previous point
Areas and Categories require Latitude and Longitude to be specified to have markers drawn - notice Marker Position field section in the second and third Properties grid from previous point.
Clicking or CTRL-clicking a marker causes the corresponding tree node to be selected / de-selected
In case multiple markers are located in close proximity to each other, a consolidated meta-marker is displayed instead. A meta-marker is represented as a circle with a number inside, indicating how many Area or Category markers have been consolidated into it (yellow circle with number 22 from the screenshot image). To see individual markers, the user only can either:
zoom in enough such that individual markers under it become visible and are still on-screen,
or simply click on a meta-marker, which will do that for you
In addition to supporting a dynamic map (explained in previous point), IRM enables loading (and saving) basic static maps directly into Global Console. This feature is useful for users who want some particular kind of map not available via our OSM (Open Street Map) solution.
The following are their main features and differences in comparison to the Dynamic maps:
Global Console supports an arbitrary number of maps, exactly one of which is displayed at any time.
Each map is just an arbitrary image, with no concept of geo coordinates and no panning or direct zooming.
A small number of built-in maps are available and cannot be deleted.
The map image is automatically scaled to fit the same map rectangle we have in the Global Console, so if the window is made larger, the image is expanded to fit the space, while preserving its aspect ratio. That is, the image is made as large as possible within the window without clipping it or altering its aspect ratio. This resizing means that there is an "indirect zooming" of the image.
Markers work for static maps like they do for the dynamic map in terms of selection. Even though the map cannot be zoomed directly, it can be effectively zoomed by reducing or enlarging the window size, so consolidation markers are supported.
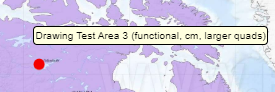
Additionally, hovering with a mouse cursor over a static map marker displays a text label with the name of the Area (or Category):
If the user clicks on a Site or Area in the tree, that has a marker on a static map, that map is set as the currently selected one.
Note: only Administrator and Developer users can add, delete and edit static maps and markers.
Allows the user to set the current map view as the default map position. This is the map view that will be loaded by default when user logs into Global Console. The view saves the Zoom Area, Zoom Level, Map Orientation and Map Rotation/Perspective as a user setting.
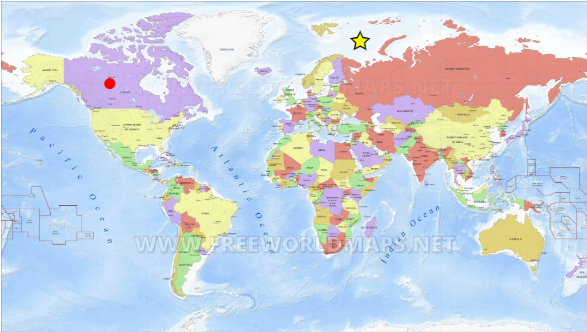
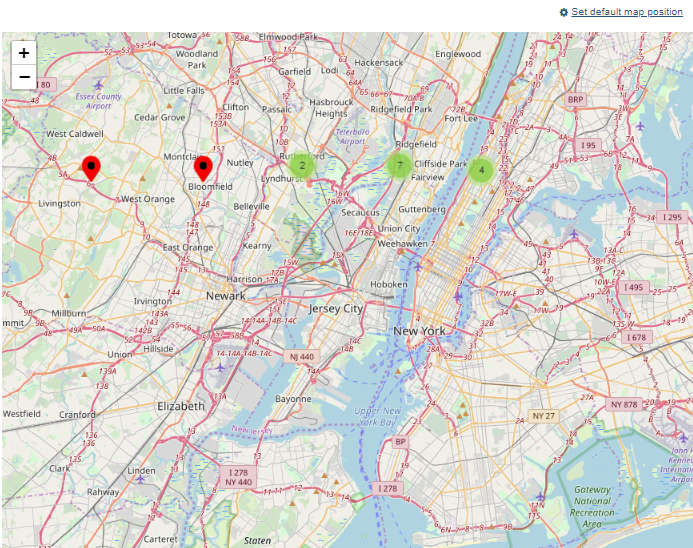
For example, let's say this is the current map view at the time the user logs in the Global Console:
However, the user wants to have the map show another area by default, i.e. the area around New York, so he zooms in and centers the map to the desired position and view:
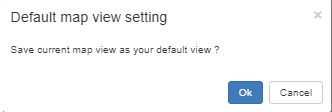
and clicks on the Set default map position button, which opens a pop-out dialog for confirming this is the desired default map view:
The next time this user logs into the Global Console this is the default map view he will see.