This topic demonstrates the use case of running and validating a Manufacturers Sync operation. The prerequisite for this operation is a pre-configured Manufacturer SyncOp in the SyncOp Manager dialog.
The Synchronization operation starts with a click on the ‘Play’ (Sync) button for the Manufacturers SyncOp. This will initiate the IRM ServiceNow Integration Service (SNIS) which will first Create a Proxy entry for each Company record found in the ServiceNow database. After creating the Proxies, it will then attempt to Correlate the ServiceNow Manufacturer with an IRM Manufacturer.
The process is as follows:
An IRM Proxy object is is created for each ServiceNow Manufacturer for which a Proxy does not already exist
this Proxy contains the ID of the ServiceNow Manufacturer.
If an IRM Proxy can be correlated to an IRM Manufacturer, then the ID of the correlated IRM Category is also stored in the Proxy object and the Proxy is said to be correlated.
Otherwise, the Proxy is uncorrelated, which is to say that it knows about some ServiceNow object but does not have a matching IRM object.
After the synchronization completes, the SyncOp is placed in the Completed Lifecycle Stage as shown below. This means that the SNIS has correlated what Proxies it could and is now waiting for the user to review and edit the correlations.
Users set the stage to Accepted by click on the same-named button in the Synchronization results dialog manually in case when the SyncOp is specified to require acceptance by the user. When it's false, the SNIS sets it automatically (Completed -> Accepted). Also, the "Accept" button is available only for the instance-level SyncOps (Hardware, Software).
The user should now use the tools within the Viewer to ensure that each ServiceNow Manufacturer is correlated to an IRM Manufacturer. The following methods are available to the user to manually correlate the 2 sets of records:
Manually Map existing ServiceNow manufacturer to an existing IRM Manufacturer record
Create the missing IRM Manufacturer in IRM from the existing ServiceNow manufacturer record
Create the missing ServiceNow Manufacturer from the existing IRM manufacturer record.
To review, change as needed, and finally accept the results, click the Sync Details action button (the eye button) to review the correlation results. A new dialog opens, displaying the list of all ServiceNow Manufacturer Proxies in the left-side columns and all IRM Manufacturer Categories in the right-side columns.
For those Proxies that are successfully correlated, the matching IRM Category is shown on the same row.
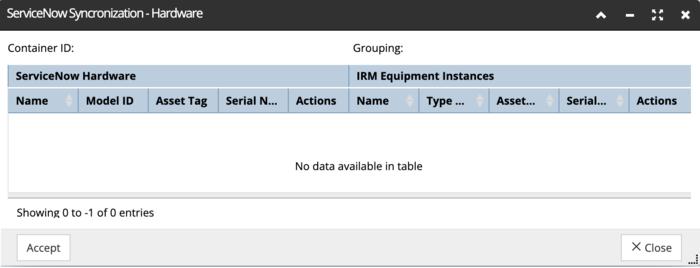
Unmatched objects appear on a row by themselves, as can be seen in the screenshot example below:
The user now has the task of reviewing all mappings and mapping any unmatched IRM “By Manufacturer” Category with any unmatched (or incorrectly matched) ServiceNow Proxy. While this process can be tedious due to differences in the spellings of Manufacturer names in both systems, the set of Manufactures in both IRM and ServiceNow are relatively stable, which makes this process somewhat time-consuming only for the first time.
The following options are available:
Mapping an IRM “By Manufacturer” Category to a ServiceNow Manufacturer Proxy :
Click the blank IRM "By Manufacturer" category next to a ServiceNow Proxy entry and click the 'Map' button.
A list of available IRM "By Manufacturer" Categories appears - select one and confirm the choice by click on the OK button, which closes the pop-out list.
The new mapping is reflected in the original dialog as the selected Category appears for the designated , as well as in the Proxy object, which is also updated to show the mapping.
Mapping a ServiceNow Proxy to an IRM “By Manufacturer” Category :
Click a blank ServiceNow Category next to an IRM By Manufacturer category entry, then click 'Map'.
A list of available ServiceNow entries opens - select one and click OK. This closes the pop-out list and reflects the new mapping in the previous dialog, as well as in the associated Proxy object dialog.
To remove an existing mapping, click the 'x' (Unmap) button under the either IRM or ServiceNow column, depending on for the one that was just mapped in the prior step.
This clears the IRM column entry and the Proxy is properly updated, removing the 'IRM Categories' entry that was there.
By clicking on the '+' (Add) button, the user can attempt to create a new object and automatically maps it to the corresponding row object.
Clicking '+' under a blank ServiceNow Categories row opens ServiceNow in a new tab. Under Manufacturers a 'New' company record is opened, with the name populated and 'manufacturer' checkbox checked. Clicking on Submit calls its own business rule to submit that to the SNIS, which creates a Proxy for it, fills in the ServiceNow object ID (externalId) and the IRM object ID and maps it.
Clicking '+' under a blank IRM "By Manufacturer" Categories row opens a new Categories dialog in IRM, with the Name, Variety and Super Category properties automatically populated. Click on the Save button creates a new Equipment Category object and maps it.