This section shows how to properly create a new Area and an associated Coordinate System.
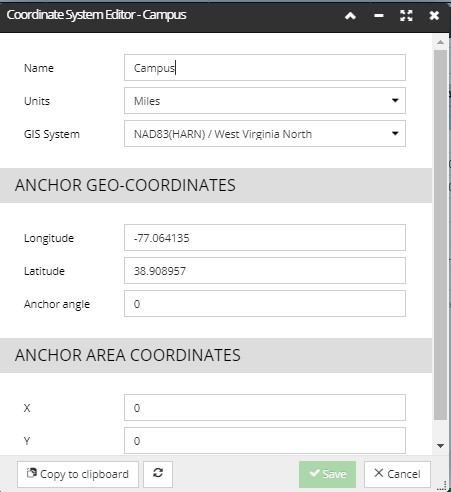
The first step is to open the IRM Web Client and click on the + button in the top left of the Area Object Grid tab, to create a new Area. Next, to create a new Coordinate system for the new Area - under the Coordinate System field, select Create New Coordinate system from the drop down menu. This automatically opens a new Coordinate System Editor dialog:
Enter the following Coordinate System details as displayed in the screenshot image and confirm by clicking on the Save button.
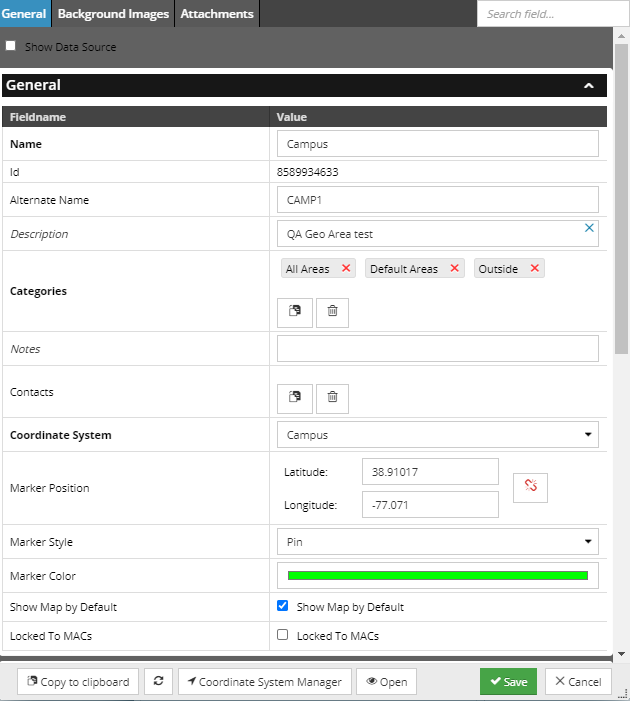
Next, complete the creation of the new Area by entering the values as shown in the image, making sure you use the coordinate system created in the previous step:
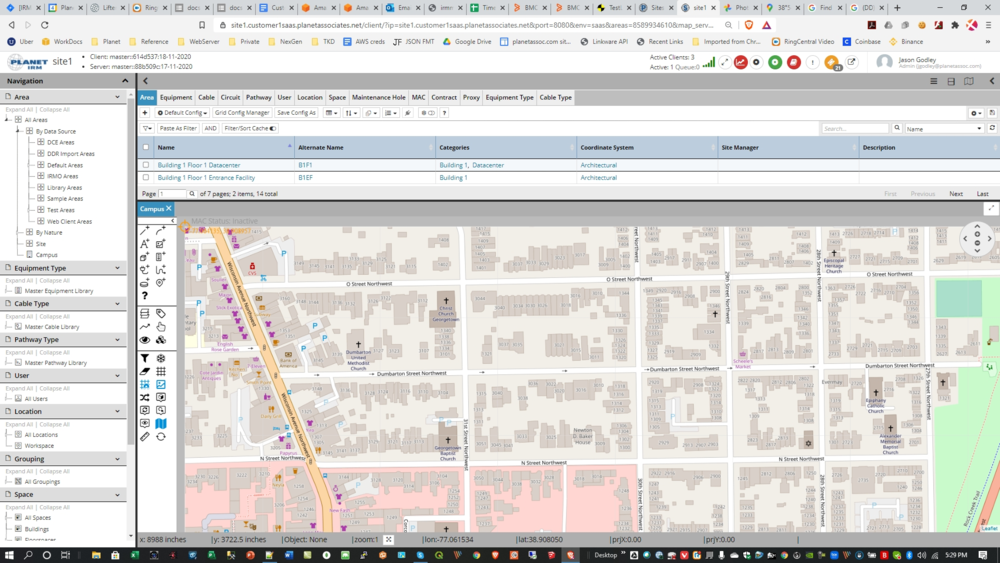
Open the Design World for the New Area named "Campus" and confirm that it displays the correct map data. Zoom in to the the top left corner and at zoom level 1 it should appear as shown in the screenshot below.