A Cable Set definition is used to create, draw and name one or more cables of the same or different types in a single operation.
The Create New Cable dialog is used to create or edit a Cable Set and can be accessed from the Design World Toolbox -
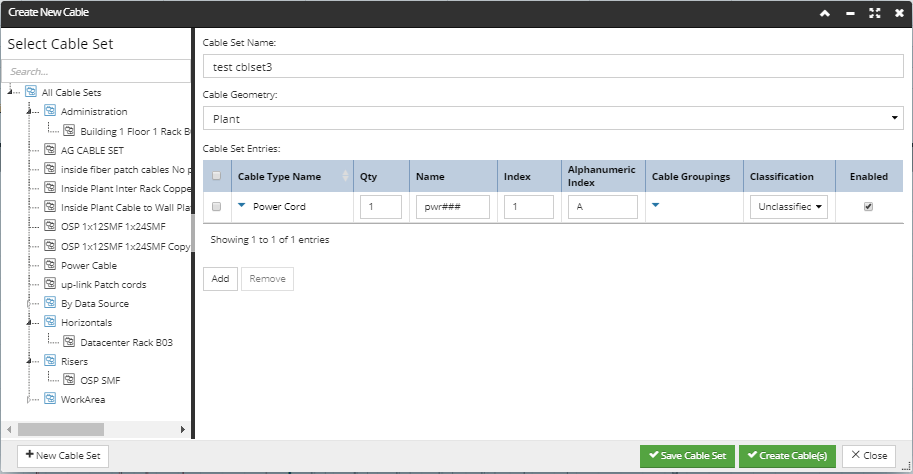
The dialog is divided into two sections:
the list of categorized Cable Sets on the left
Cable Set properties, such as Name and Geometry, and Cable Set Entries grid, listing different Cable Types specified for the Cable Set, on the right
By default, a default Cable Set is selected on the left and displayed on the right side, providing a quick way for the user to create some cables. If any other of the listed Cable Sets on the left side of the dialog gets selected, the right side gets reloaded with relevant data.
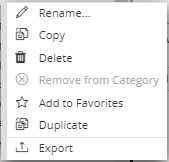
Also, the list of Cable Sets has an additional set of context menu options enabled for easier managing the list:
Rename option opens the standard Rename pop-out dialog that enables quick and easy renaming of the object.
Copy automatically copies the Cable Set object into the system Clipboard, same as for other objects.
Delete opens the standard Confirmation dialog asking the user to confirm object deletion.
Remove from Category option is enabled only for Admin users, enables quick and easy un-assignment of the Cable Set to a particular Cable Category
Add to Favorites automatically copies the Cable Set object into the Favorites list, same as for other objects
Duplicate creates an exact copy of the Cable instance
Export option opens a new Data Export Configuration dialog with the Cable Set automatically added for export
Below is a step-by-step use case scenario of specifying a new Cable Set:
Click + New Cable Set button
This de-selects any previously selected Cable Set and clears the Cable Set Name.
Click on the text input field under the Cable Set Name column and enter a string. This can be any alphanumeric value that will represent the name of the Cable Set.
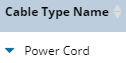
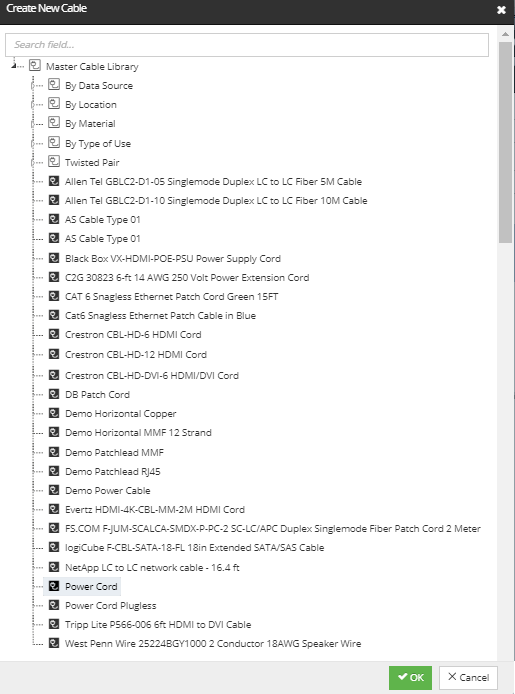
Click on the arrow icon under the Cable Type Name column opens a pop-up dialog displaying a Cable Type and Categories tree, basically the same as the Cable Types section in the main C&T tree. After selecting the Cable Type (Power Cord in our example), the OK button is enabled.
Click on the OK button closes the sub-dialog and brings the Cable Set Properties dialog back in focus with the Cable Type Name field populated.
Click on Cancel button closes the sub-dialog and brings the Cable Set Properties dialog back in focus without any changes made.
Type a name format, a set of alphanumeric characters where any contiguous sequence of the special symbol "#" gets replaced by the current numeric index value and "@" is replaced by the current alphabetic index value (see Index items below); the number of contiguous "#" symbols indicates how many digits are generated, with leading zeroes preceding as necessary; and the number of contiguous "@" symbols indicates how many letters are generated, with leading spaces preceding as necessary.
For example, the "pwr ###" name format, with Quantity set to "3" and Index set to "4", means that three Cable instances would be generated, named: "pwr 004", "pwr 005", and "pwr 006".
Initial numeric value that is auto-incremented when multiple cable instances are inserted. This value replaces any contiguous sequence of "#" in the name format value to generate the name of the Cable Set entry. For example, if Name = "Cable-###" and Index = 4, the initial Cable Instance resolves to "Cable-004" and increments as follows would be "Cable-005, Cable-006" etc.
Similar to Numeric Index, but use alphabetical sequencing using base 26 (e.g., a, b, c, through to z). The sequence will repeat as needed starting with "aa" and cycling through until all alphabetic combinations are used.
Examples:
Name = "Cable-@@". Index = "AA" initial Cable Instance Name =Cable-"AA" and increments as follows "Cable-AB, Cable-AC, etc"
Name = "Cable-@@". Index = "aa" initial Cable Instance Name = Cable-"aa" and increments as follows "Cable-ab, Cable-ac, etc"
Name = "Cable-@@". Index = "Ab"Auto-Index will fail as mixed case is not supported
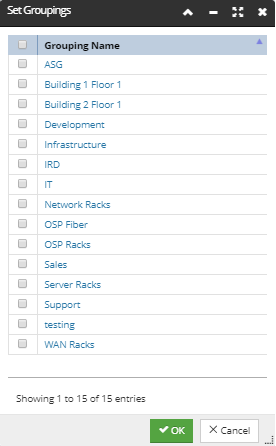
Next value to set is the Grouping, clicking on the arrow icon under the Cable Groupings column. The Set Groupings sub-menu dialog opens displaying multi-select checkbox list of Groupings. After selecting Groupings and clicking on OK button the sub-dialog closes and the Cable Set Properties dialog is brought back in focus with the Cable Groupings column populated. If Cancel button is clicked, the sub-dialog closes and the Cable Set Properties dialog is brought back in focus with no changes made in the Cable Groupings column.
An alternative approach is to cut and paste the grouping value from the Grouping C&T tree onto the Grouping paste control.
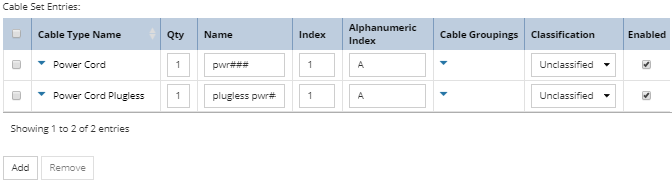
Click on the checkbox next to the appropriate Cable Set entry will temporarily enable/disable a given Cable Set entry, meaning that Cable Type will not be added when drawing the Cable Set in the Design World.
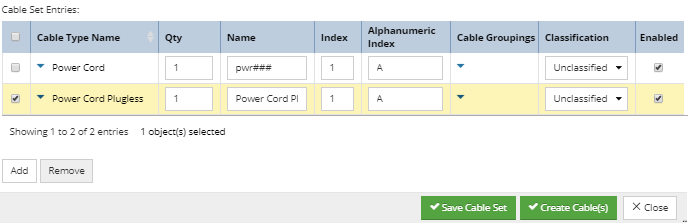
Cable Types can be added or removed from the Cable Set. To add a Cable Type, click on the Add button under the Cable Set Entries grid, which automatically creates a new empty row in the grid and opens the Create New Cable sub-dialog, same as in step 3.
For this example, another power cable (plugless) Type is added to the current Cable Set:
Click on the Save button in the main Cable Set Properties dialog closes the dialog and brings back focus in the main application screen. Click on the Cancel button in the main Cable Set Properties dialog closes it and brings back focus in the main application screen without creating a new Cable Set.