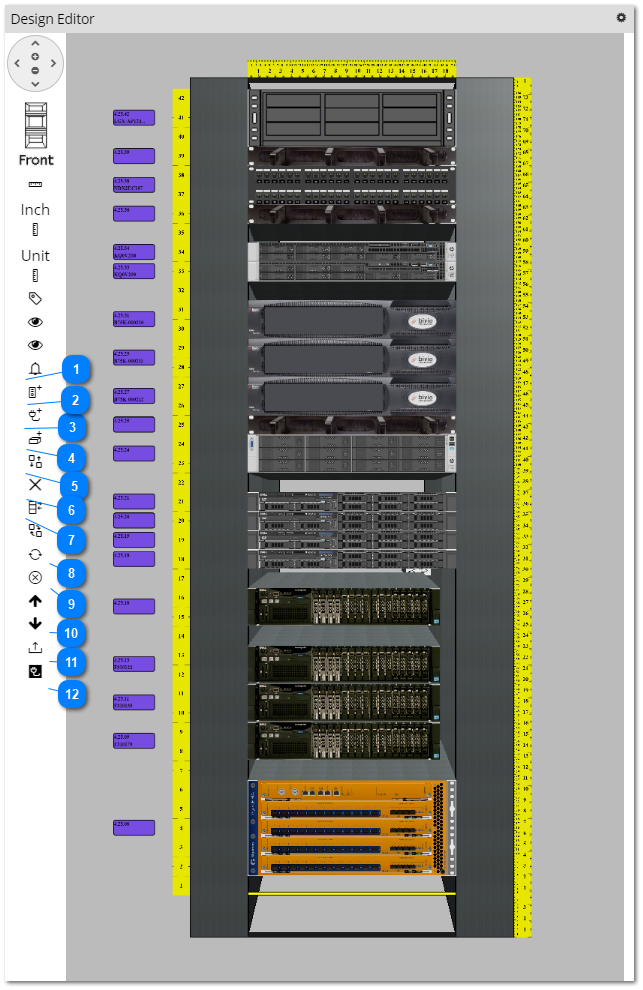
Design Editor - Equipment controls
In addition to view controls, the Design Editor section of the Elevation dialog contains controls that enable managing Equipment inside the Rack. Each of these is explained in more detail through the following screenshot images and text.
 Add Equipment |
 Draw Cable |
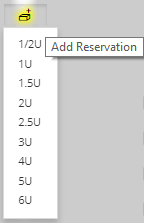
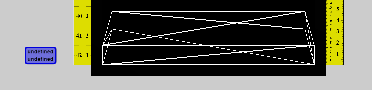
 Add Reservation - Enables creating a placeholder, or a "reservation" in the Rack where some piece of Equipment will eventually be placed. Click on it displays a drop-down list of different Rack Unit sizes to reserve (first screenshot image). When selected, a wire frame of the size of the specified number of rack unit(s) is displayed inside the Design Editor (second screenshot image):
The reservation can be:
-
moved around the rack space as desired -
replaced by a "real" Equipment object by selecting the wire frame object and clicking the Replace button (see next point for more detail) -
removed from rack view or deleted
Important Note:
When using this tool, the Lifecycle Stage of the Reservation Equipment object is set to Reserved by default:
|
 Change SpaceUsed to Move Equipment from Front to Rear or from Rear to Front at the same RU position.
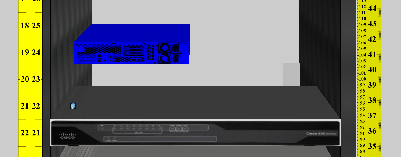
Select an Equipment object in the Rack:
The Change space button is enabled. Clicking on it moves the selected Equipment to the opposite side of the rack i.e. move from Front to Rear or from Rear to Front.
Clicking on the button again moves the Equipment back to the front of the Rack.
|
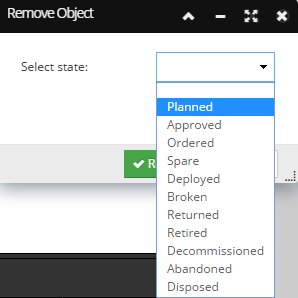
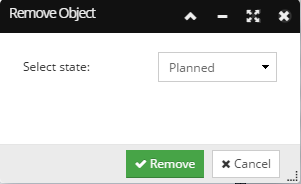
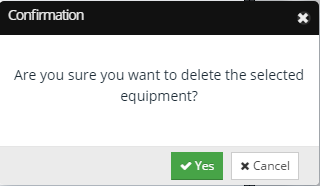
 RemoveThis button removes the selected Equipment from the rack view by changing its lifecycle stage. It does not completely delete the object. Selecting an Equipment object enables the Remove from view button.
Clicking on it opens a confirmation dialog:
If Yes is clicked, a list of available new lifecycle states for the Equipment item is displayed:
The removal is finally confirmed clicking on the Remove button:
|
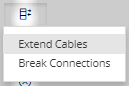
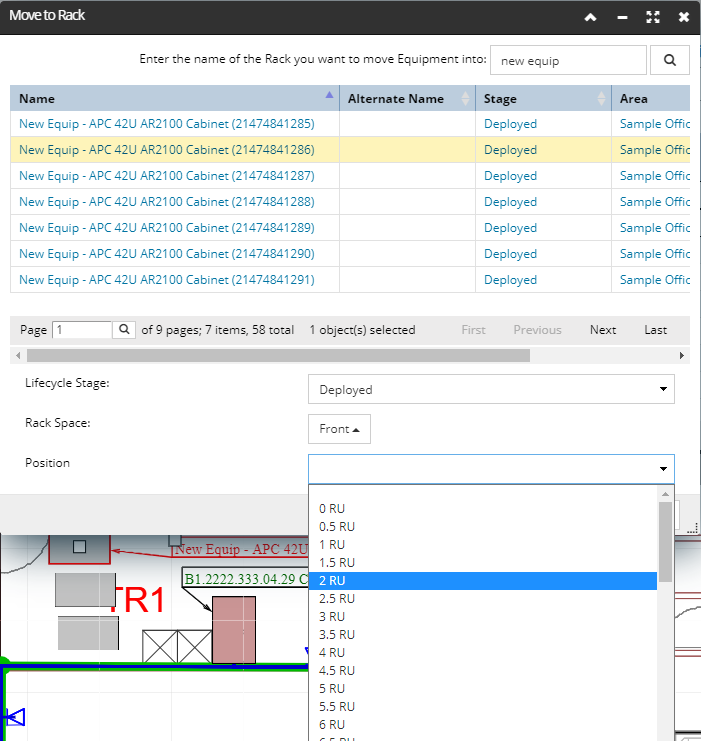
 Move To RackAllows the user to move Rack Equipment from the currently opened Rack to another and is enabled upon Equipment selection. Click on it opens a small sub-dialog displaying a list of 2 choices for managing any existing connections: Extend Cables, or Break Connections:
Selecting on either of these choices brings up the Move to Rack dialog, displaying the list of available Racks in a paginated data grid, along with basic properties such as the Name and Alternate Name, (Lifecycle) Stage, Area and the Contiguous RU, that is, the number of currently available contiguous RUs. For convenience, the Quick Search box above it enables quick filtering of the list by Name.
Once the user selects the target Rack from the grid, additional properties for that the target Rack need to be specified in order to accurately move the selected Equipment, such as the Lifecycle Stage, the Rack Space (set to Front by default) and the Position, all of which are set by a designated drop-down menu:
Note: The Position list shows only empty available positions within the previously selected Rack Space that are large enough to accommodate the selected Equipment.
Once these are set and the Rack is selected, the Move button at the bottom is enabled and click on it will finish the moving operation, close the dialog and bring focus back to the Elevation dialog.
|
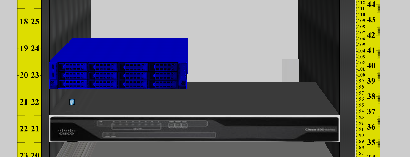
 Flip HardwareThis button rotates the selected Equipment by 180 degrees around its Z axis, inside the Rack view (Elevation), allowing the user to set which image face (front or rear) is displayed the specified rack space.
Selecting an Equipment object enables the Flip button. Clicking on it rotates the Equipment by 180 degrees:
Clicking on the button again rotates the Equipment by 180 degrees again, putting it back like it was before the two Flip operations. Flipping an Equipment object affects the 3D view but does not impact cable connectivity, rack utilization, or other data. It can be used to track how a given equip object is installed or used simply to provide the best view of an Equipment object's ports.
|
 ReplaceThis button replaces the selected Equipment by another piece of Equipment, either from Spares or by creating a new instance of the selected Equipment Type. This feature works the same as the Replace (for single Equipment objects) feature from the Design World.
|
 Delete EquipmentThis button completely deletes the selected Equipment object from IRM Library. Selecting an Equipment object enables the Replace button. Clicking on it opens the confirmation pop-out dialog. After click Yes button, the Equipment object is deleted:
Note: most organizations do not actually delete obsolete, broken, returned, or decommisioned Equipment but instead simply set its lifecycle stage accordingly.
|
 Swap Up / Swap downThese arrow buttons enable the user to re-arrange rack elevations, that is, to move items up or down in a rack layout that is fully populated. The ordinary method of dragging the Equipment around does not work well because the destination is occupied. Clicking on one of the Swap buttons moves the selected item up or down in the rack and also re-arranges any items conflicting over the same space by moving the conflicted item downward when moving selected item upward, or moving the conflicted item upward when moving the selected item downward..
|
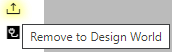
 Remove to Design WorldThis button enables to simply move Equipment objects directly from the Rack to the Design World. The placement of the object in the Design World doesn't change; when the Equipment is in the Rack, it's x,y location is the same as that of the Rack, and after this removal operation that x,y remains the same. That means that the removed Equipment will be directly on top of or underneath the Rack in the Design World and will need to found via the disambiguation menu.
Other properties of this operation:
-
the Lifecycle Stage of the Equipment doesn't change.
-
Cable connections to the Equipment are not broken, nor do Cables ends need to be updated - because the Equipment hasn't moved.
-
If you wants to drag the Equipment to e.g. a nearby bench, you can do that as a separate step after this remove operation.
-
if the operation is done under a MAC, when it's done, a Remove Variety Of Change is generated
|
 Toggle PortsClicking on this button turns the Port Visualization on/off. The button is set off by default, due to faster loading of the dialog, because showing the status of all ports requires loading multiple objects. Once the dialog is opened and all objects loaded, clicking on this toggle switch allows user to view the Port Visualizations, at which point they are loaded. Clicking on the Toggle again hides the Port Visualizations.
|
|