The Shapefile format is a popular geospatial vector data format for geographic information system (GIS) software. Shapefiles use vector features such as points, lines, and polygons to represent different geographical objects, such as roads, rivers, and lakes. Each item usually has attributes that describe it, such as name or temperature.
IRM enables importing a shapefile to an existing Area in the Design World.
The import drawing process is started from an Area opened in Design World by right-click on the on the Canvas and selecting the Upload Shapefile... option from the context menu, which opens the Import Shapefile wizard.
The flow of the operation from that point is as follows:
Select destination layer
Select a destination layer from the list of layers, or create a new layer for the imported data. The destination layer is defaulted to a layer with the same name as the shapefile. All of the shapefile data will be imported to the specified layer.
Check / uncheck on the Clear target layer checkbox sets a flag (true/false) indicating whether to delete existing objects in the destination layer. This feature allows this import operation to replace any existing objects in the same layer, creating a convenient way to re-import updated versions of the same shapefile data over and over again.
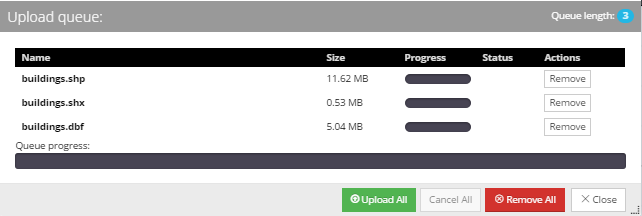
Click on the Select files button opens a web based file chooser which allows multiple shapefiles to be selected for import.
Note: A single conceptual shapefile is split across 3 or more physical files, all of which must have the same filename prefix.
The suffixes of the 3 mandatory physical files comprising a single conceptual shapefile are .shp, .shx, and .dbf (there may be others also, .sbn, sbx, etc.). The selected file contents are assembled into a single upload operation.
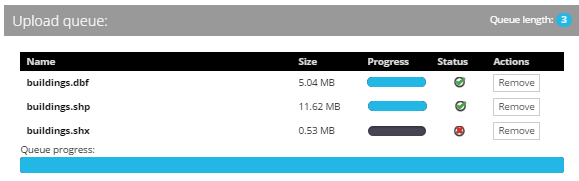
Once the files are selected they are displayed in the Upload queue grid, along with their Size, upload Progress and Status.
The grid enables the following features:
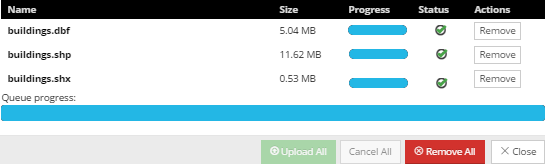
upload all files - click on Upload All button at the bottom of the dialog. The upload progress of each file is indicated through the individual Progress bars for each row entry, through the Queue progress bar at the bottom of the dialog that displays the cumulative import progress and the Status icon, which appears for each individual successfully imported file.
remove individual files from the Upload queue - click on Remove button next to the row entry. This will also disable the Upload All button, since a single shapefile is split across 3 physical files with the same filename prefix (as noted in the previous step).
remove all files from the Upload queue - click on Remove All button at the bottom of the dialog. This stops the import operation (if the Upload All button has already been clicked) and removes all files from the Upload queue.
cancel file import - click on Cancel All button at the bottom of the dialog. This button is enabled only once the import has started (if the Upload All button has already been clicked). Status column displays appropriate icons indicating the operation was canceled.
A successful shapefile import is indicated with the Status column (checkbox) and the Queue progress bar at the bottom.
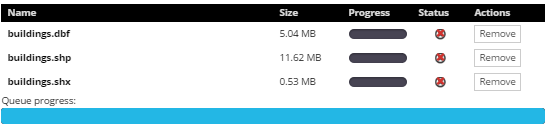
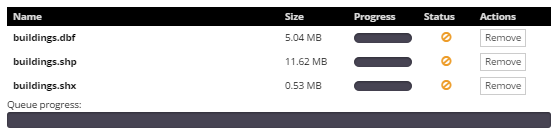
In case the import operation due to failure if importing one of the files (i.e. the .shx file), the Upload Queue would look as in the following screenshot:
The application validates that the files are valid shapefiles and that each conceptual shapefile is complete (does not have missing physical files).