In addition to the simple and quick Convenience Filters and Quick Filters, IRM provides a more full-featured filtering mechanism, called Named Filters. A Named Filter contains a detailed specification of what objects should be shown in the Object Grid. Named Filters are created and managed using the Filter Manager dialog, which is accessible by clicking on the Funnel icon in the Filters bar in the main application screen.
The following are some of the functions provided by the Filter Manager:
manage (create, edit, delete, duplicate, share) multiple named filter objects per Super Category
manage (create, edit, delete, duplicate, share) multiple conditions for each filter
The power of Named Filters lies with the ability to define multiple conditions for a single filter. Once defined, the results of the Named filter can be used to:
Filter the objects displayed in an Object Grid
Content passed to a Report Config.
Objects assigned to Groupings
The following screen shots shows how to create, define and apply Named Filters to the Object Grid
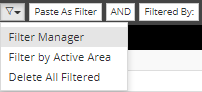
Open Filter Manager
Select Filter Manager from the Funnel Icon in Object Grid Toolbar
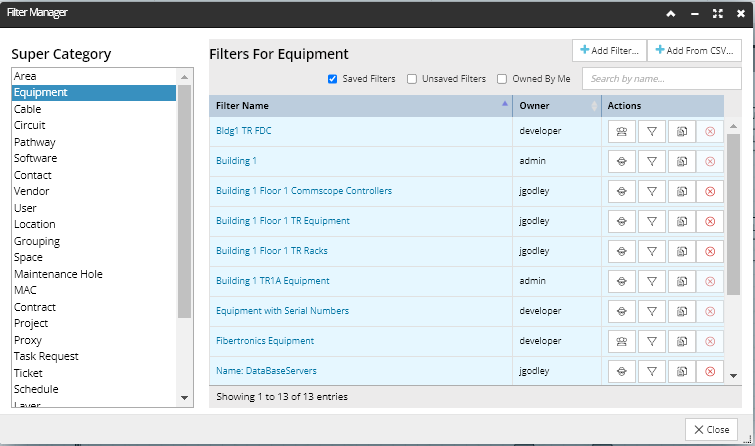
This dialog is used to manage all Named Filters defined within each Super Category.
The Filter Manager dialog consists of two sections:
the Super Category list, displayed in the left side of the dialog and is used to show the named filters defined within the selected category.
the Filters Grid on the right side of the dialog lists the Named Filters defined within the selected Category
In this example, clicking on the Equipment Super Category will display only filters for that Super Category, as indicated by the text label above the grid that automatically changes to say Filters for Equipment Type in this example.
The Filters Grid is a standard grid that lists all Filters by name for the selected Super Category, along with their Owner, and available Actions:
Add Filter: Opens Filter Editor where user can define the new Named Filter Properties.
Filter Name. Hyper link to the Filter Editor.
Toggles the User Visibility settings.
Apply or Cancel the Filter to its associated SuperCategory Object Grid.
Duplicates the Filters
Deletes the Filters
Note actions on existing Filters are restricted depending on the current user and the visibility setting of the Filter:
public (shared) Filters are fully editable for all users
private Filters are fully editable only for the user who is the owner of the Filter
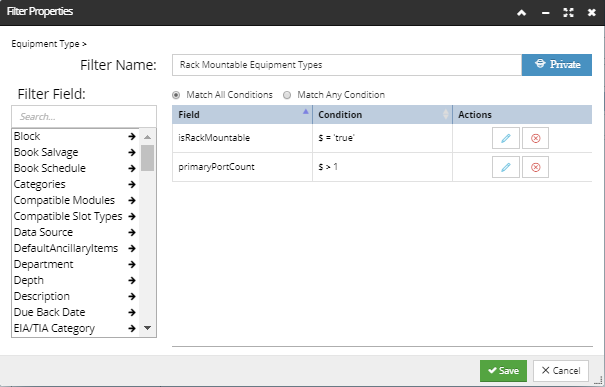
The following Dialog is used to Add New Named Filter or Edit existing Named Filters.
The Filter Properties dialog enables the user to define the Filter Name and select and set Filter Field Conditions and comprises of 4 sections:
Filter Name the descriptive name of the Filter
Filter Field allows the user to select the field from the object model to include in the Filter definition.
Click on Field Name to add it to the Field Condition list
Click on the to display and select Fields associated with Object References such as User, Vendor, etc
Field Conditions allows the use to set he search criteria associated with the selected field.
Click on to view and edit the Field Condition
Click on to remove the Field and its Field Condition from the Filter definition.
Match Conditions specifies if the results require all or any of the Field Conditions to be met.
Define Field Conditions
The available field condition options are dependent upon the the selected field type, below is table of the each field type condition options:
Field Type
Conditions & Values
String
Note: User can Add multiple values and choose which one to use for the Filter. When using Like Conditions, the wildcard will be automatically assigned to the selected Value.
When using In Conditions the user will be allowed to selected multiple Value entries.
Use this button to update the selected Value entry in the list
Use this button the Add a new Value entry to the list of defined Values
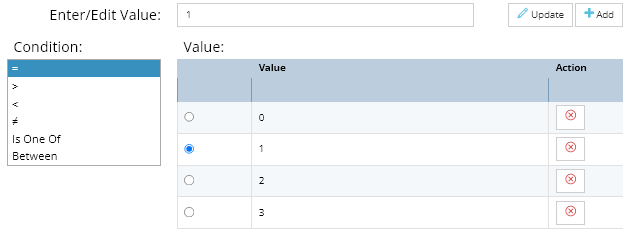
Number
Note: User can Add multiple values and choose which one to use for the Filter. When required to enter a number range the user will be required to enter 2 numbers to represent the upper and lower bounds for the number range.
Use this button to update the selected Value entry in the list
Use this button the Add a new Value entry to the list of defined Values
Date
Note: Where user is required to specify 2 dates then 2 calendars are displayed
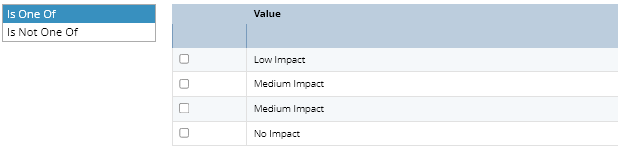
List
Note: The list of values is dependent on the select Field
Checkbox
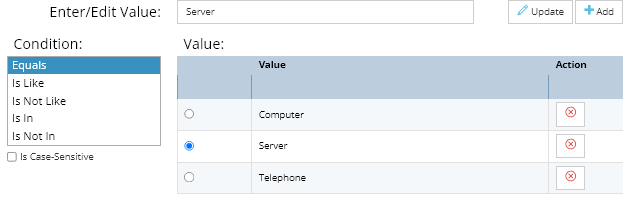
After Selecting the Condition type for the selected Field, the user can then enter or select the search criteria Value for the selected field condition.
The available Value options are dependent on the selected field type and will either the require the user to select a value or enter a value for the search criteria.
Example: The following example shows:
IsRackMountable is a checkbox field using the condition value of True i.e. checked.
primaryPortCount is a number fields using condition value of greater than 1.
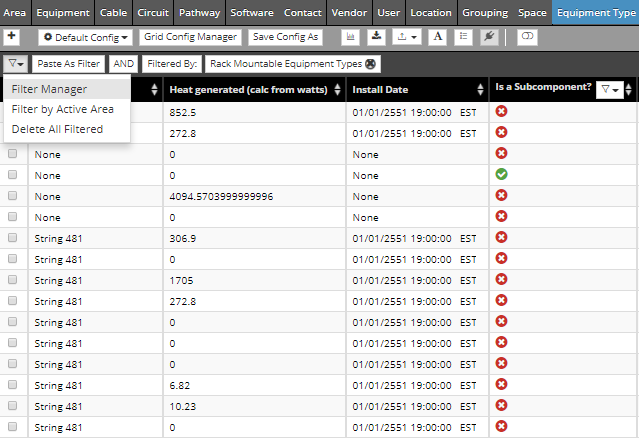
When a named Filter has been applied to its Object, its Name appears in the Filter Toolbar section .
The user can remove the Named Filter being applied by clicking on the icon at the end of the Filter Name, this will remove teh Filter criteria from the grid and reload the grid data..
NOTE: To remove the applied grid filter simply click on the (X) in the top right corner of the filter name shown on the Filter menu bar.