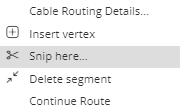
Snip Cable dialog
The dialog is accessed only from the Cable context menu in the Design World:
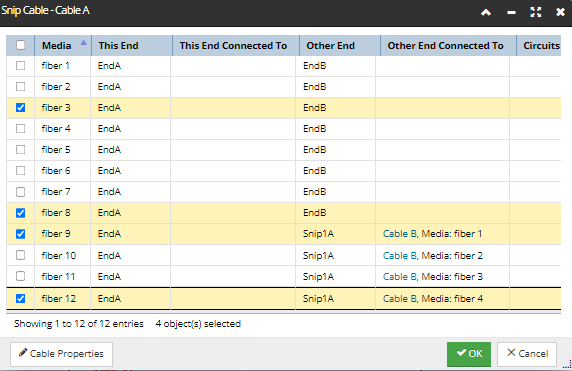
It lists all individual Media fibers of the selected Cable in a standard data grid, with the column data displaying what is connected to each Media at the both Ends. More importantly, it allows the user to select individual Media fibers to Snip simply by clicking on the checkbox next to its name, in any order:
TIP: In case more information about the Cable object is needed, simply click the Cable Properties button at the bottom-left of the dialog.
Important: Most of the column data is self-explanatory, with the exception of This End column. It shows the name of the Cable End closest to the Snip point, which is the point along the Cable line where the context menu was opened to initiate Snipping. Note that "closest" means closest along the length of the Cable, not necessarily closest in x,y location, although the two definitions usually coincide for plant cables. Also note that a single Media strand can be snipped at more than one point and therefore have several ends.
Also, notice there is a Circuit column, which lists any Circuits that each media is on. If Circuit impact is High or Highest, the font color for the Circuit is red, otherwise it is the default color. This visualization serves as a protection for the user accidentally breaking a Circuit. In case the user selects any media that are on a Circuit, when the OK button is pressed, a warning dialog is displayed. The font for this dialog is red if Circuit impact is High or Highest for any involved circuit, otherwise it’s the default color.
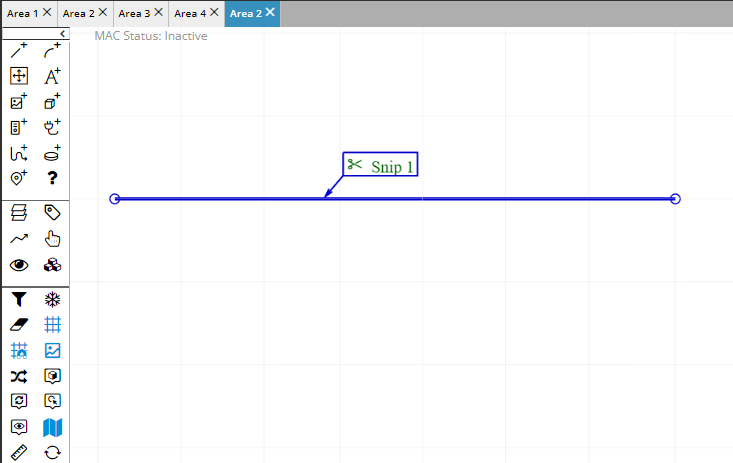
Design World Area representation of the Snipped Cable
If the Snipped Cable is not selected, the location of the Snip point is indicated by an arrow followed by a special Label. The Label displays the name of the Snip and a small scissors icon:
The Snip name is generated automatically upon creation and consists of the fixed "Snip" prefix, followed by the number of the Snip, which is assigned by the order of creation.
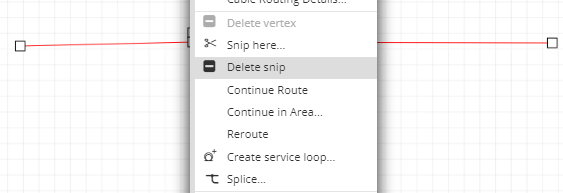
If you select the Snipped Cable, you can observe that the Snip point is additionally indicated by a vertex:
Initiating a context menu over a Snip point uncovers an additional Delete snip option:
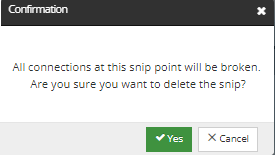
If selected, this will not only delete both of the Snip Media Ends, but also any connections made to them. Before proceeding with Snip removal, the application warns the user and asks for confirmation via a pop-up dialog: