While the IRM Circuit Library contains a large number of commonly used Circuit Types, occasionally a customer will have a type of circuit that is not in the Library. In this case, in order to best manage instances of those circuits in IRM, it is necessary to create a new Circuit Type.
To define a new Circuit Type, follow these steps:
Select "Create Circuit Type..."
Select the Category within which the new Circuit Type is to be defined. Open the context menu on the selected Category and select + Create Circuit Type... option. This opens a new instance of Circuit Type Properties dialog with default values set to some of the fields, while others are left blank.
Specify theCircuit Type's name by entering a text string in the Name field.
Specify the Lifecycle Stage by click on the Product Lifecycle Stage drop down menu and selecting one of the values by click on it.
Specify the Bandwidth value either by entering a numeric value or by clicking on the numeric stepper. This value is not mandatory and is set to 0 by default
Note: this can cause issues later if defining sub-channel configuration, as explained in step 4.
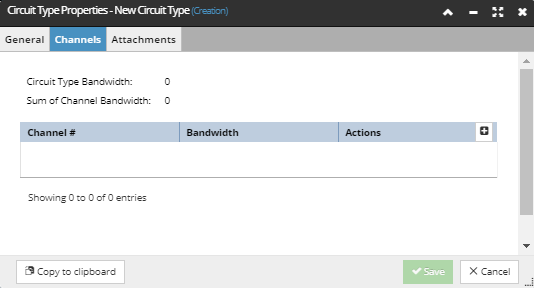
Click on the Channels tab displays a set of numeric fields and a grid that lists all of the Channels that the Circuit Type has defined. The Circuit Type Bandwidth field displays the same value as the Bandwidth field in the General tab set in the previous step. The Sum of Channel Bandwidth value changes whenever the Bandwidth value of a Channel is changed, a new Channel is created or a Channel is removed. The grid is empty by default and displays the appropriate message - No channels to display.
The grid is populated by click on the + action button, as explained in the next step.
As mentioned in the previous step, the newly created Circuit Type doesn't have any Channels configured by default.
Configuring channels can be done in the Channels tab by click on the action buttons in the grid and setting the appropriate field values:
The + button inserts a new channel at the selected row entry position.
If no Channel is selected and + is clicked, the new row entry (Channel) is placed at the bottom. The Bandwidth value is set and editable either by entering a numeric value or by click on the numeric stepper.
If an existing channel row entry is selected and + is clicked, the new row entry (Channel) is placed on the selected row, while the selected row and all rows below are moved one position down.
The Bandwidth value is copied from the selected existing Channel.
Channel # values are automatically set and incremented in both cases.
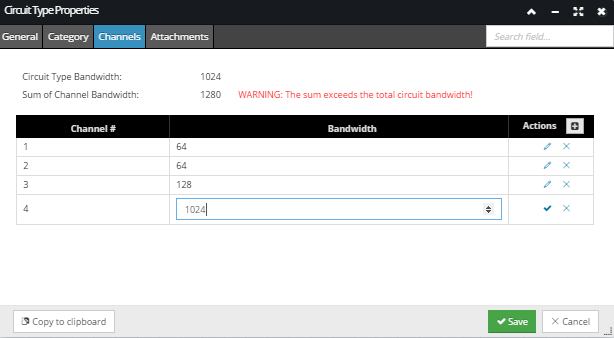
If the Bandwidth of the new Channel causes the sum of all Bandwidths to exceed the Total Circuit Bandwidth, the appropriate message is displayed next to the Sum of Channel Bandwidth field. In this case, the new Channel should be given a smaller Bandwidth value:
Once the new data is entered it can be saved by click on the Save button, which closes the Circuit Type Properties dialog and displays the new Circuit Type object in the C&T Tree. To cancel Circuit Type creation, click Cancel button, which will close the Circuit Type Properties dialog and bring back focus to the main application screen.