4.3.14.3. Global Settings
Similarly to the User Settings dialog that was covered in the previous topic, the Global Settings dialog allows the user to view and change various settings. The major difference is that Global Settings contains parameters that affect the entire IRM installation, and are therefore stored on the Global Console and distributed to Sites as appropriate. Only Administrator users can change these settings.
These settings can be viewed in the Global Settings dialog, which is accessible by clicking on the green gear button next to the user information in the top right corner of the main application screen:

Note: Again, Global Settings should not be confused with User Settings, which are covered in the previous section.
The following screenshot displays the fully maximized Global Settings dialog, with explanations of the settings given below in numerated points, each representing a UI accordion group that contains similar settings.
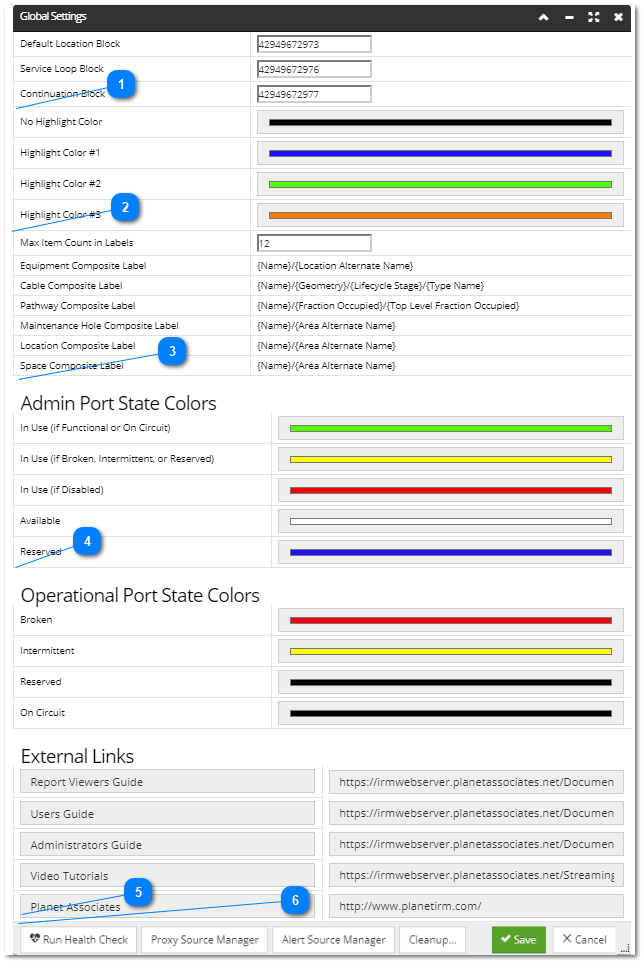
Highlight Colors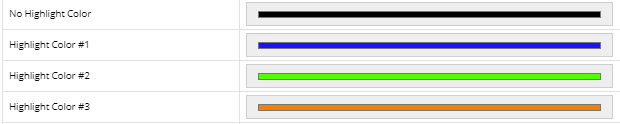 In IRM, objects that can be drawn in the Design World (Equipment, Cable, Pathway, Maintenance Hole, Location, and Space, collectively known as "drawn Managed Objects") can be displayed with some special effects. These effects are applied if the specified Analytic or other conditions are met - see Analytics Manager for more details about that feature.
Certain details of exactly how to draw Managed Objects are specified in this section of the Global Settings dialog. Specifically, each of the highlight colors displayed in the screenshot correspond to a separate highlight state, which is a fixed list of three states, with the first option representing the default color in which the objects will be displayed if no highlight color / effect is applied.
|
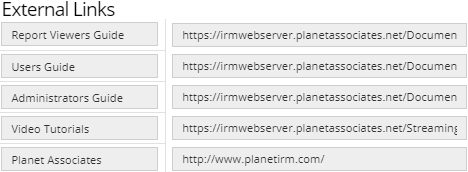
Default Label format for different Managed Objects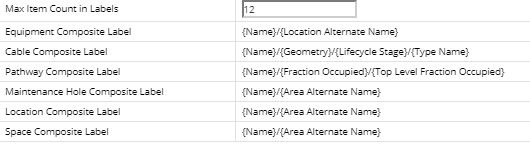 The Global Settings section from the screenshot above displays the format of the default Labels for each of the Managed Object Super Categories that support Labels - specifically, Equipment, Cable, Pathway, Maintenance Hole, Space and Location objects. The values specified for these label fields provide the defaults that are used when creating a Label object for that Super Category. They are Composite Strings which can consist of literal characters and special placeholders (strings in { } ) that get substituted with the relevant field data when the Label is drawn.
For example, for the second item in the above table, the Equipment Composite Label is set to {Name}/{Location Alternate Name}. When the Label is drawn, this Composite Label will be translated to something like "Router ABC/B1F2R3", where "Router ABC" is the name of the Equipment object and "B1F2R3" is the short name of the Location (Building 1, Floor 2, Room 3). See the section Labeling Equipment in the Design Worldfor more detail on the labeling mechanism. |
Admin and Operational Port State Colors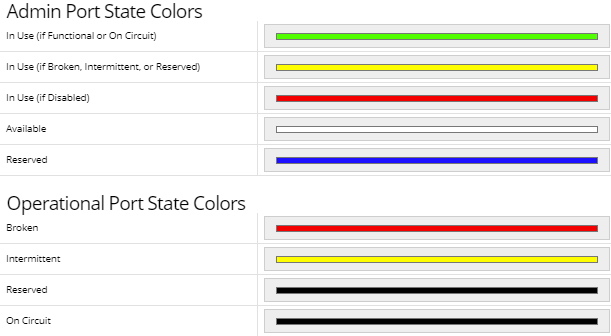 The two Global Settings section displayed above display colors specified for visualization of different states of Ports in Elevation dialogs. The Port State is divided into two groups - Admin and Operational Port States, with the caveat that the use of "admin" here is not exactly the same use as in admin vs. term Ports – here we are distinguishing between managing a Port by plugging / unplugging cables ("admin") vs. by reconfiguring a managed switch or similar device via software ("operational" or "op" for short). Each group lists the selected colors for each of the enumerated values.
For additional details about what each state represents, see the following topic - Port Visualization.
|