Planet Associates Inc
×
Menu
Index

Importing Equipment into Mount Points via DDR

 
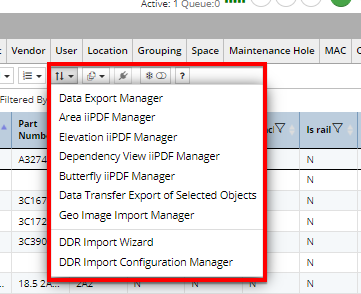
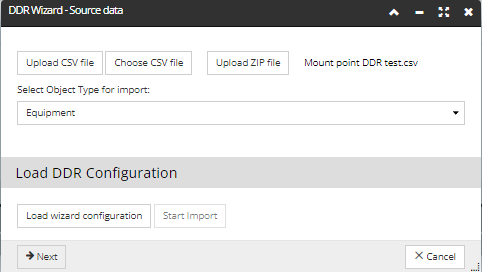
Another advanced feature of DDR Import is the ability to import cards and modules into a mount point arrangement. This allows the user to create and place equipment modules into a specified mount points. This section covers all steps and options available when importing an Equipment object into Mount Points via the DDR Import Wizard.
 
Note that the focus is on specific options and features available for this particular use case, while common details already described in the introductory topic are covered only briefly.
 
1

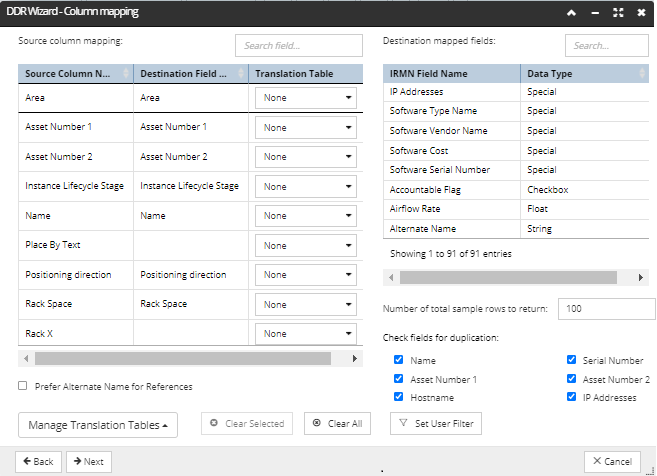
Create a Mount Point DDR header/fields

At a minimum the following headers/fields must be present
  • Area
  • Type name
  • Name
  • Instance Lifecycle Stage
  • Slot Placement
  • Rotation
  • Rack X
  • RU
  • Positioning direction
  • Rack Space
  • Place by Text
 
Additional headers/fields may be added such as:
  • Serial Number
  • Asset Number 1
  • Asset number 2
2

Fields used in this example are the same as for the standard Equipment DDR import

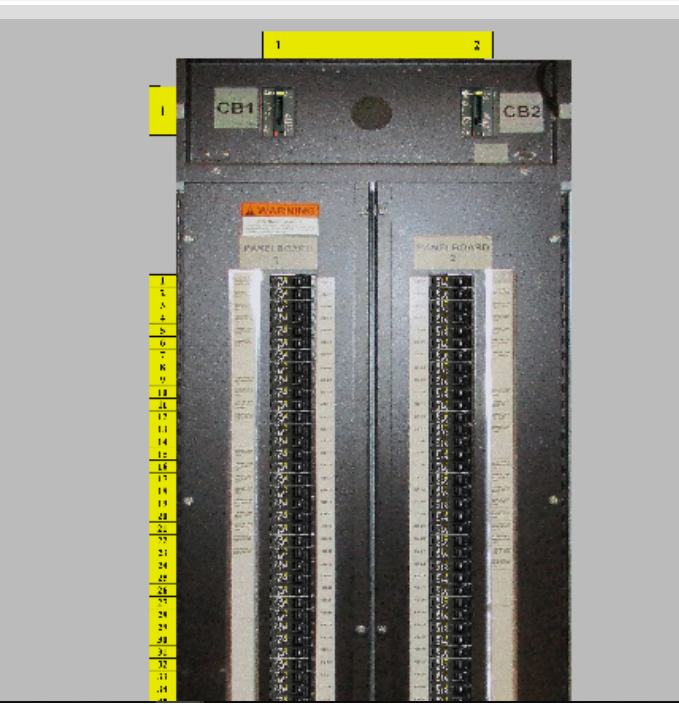
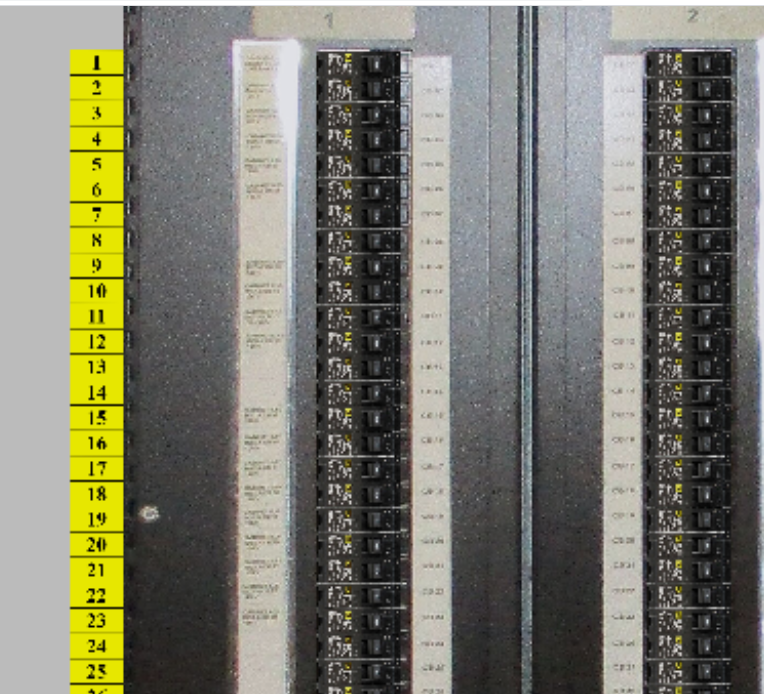
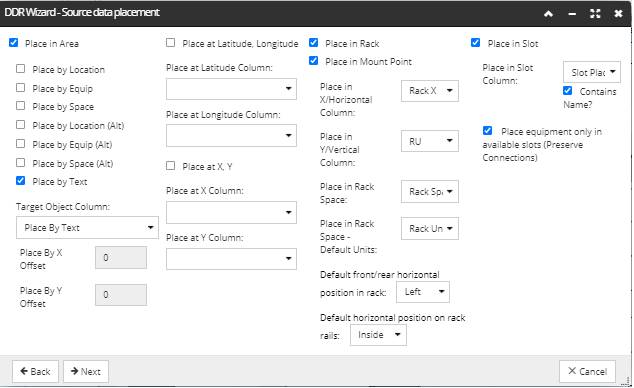
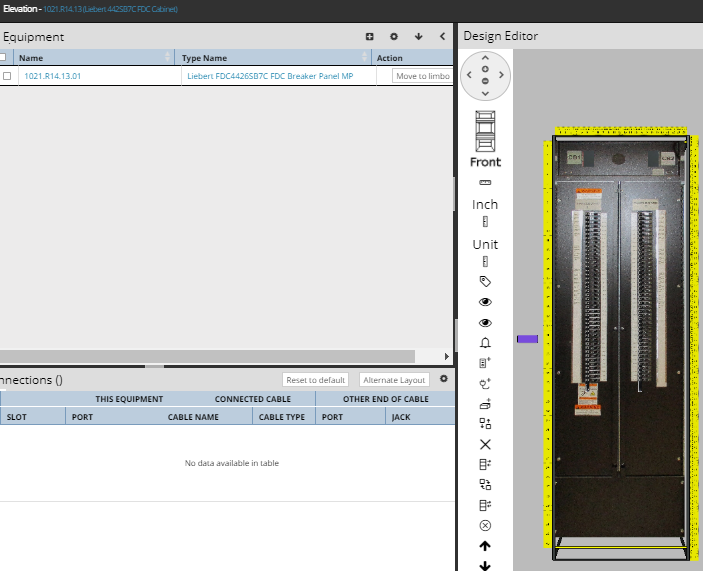
Rack X is populated with the column number, as seen in the top yellow ruler below. If there is 1 column, the Rack X value is always 1; if there are 2 columns, the values would be either 1 or 2, etc.:
          
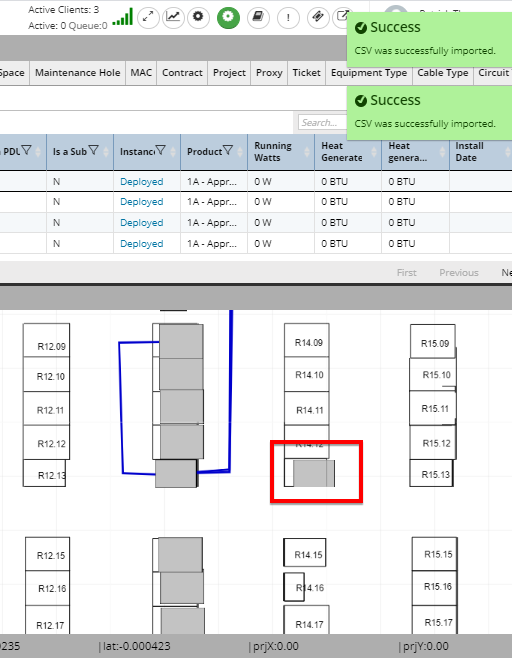
RU reference column name in the spreadsheet is populated with the row number of the Mount Point, as seen in the yellow ruler:
 
     Note: RU is used for reference only so that it can be mapped to the correct DDR import field.
 
3

Enter IRM Web client and click on the Export & Import button

Next, select the DDR Import Wizard from the drop down list:
4

Select Upload CSV file

Next, click the Select File button. Select the appropriate Mount Point DDR CSV file.
Click the green Upload bottom.
5

Select Next in the DDR Import Wizard - Source data screen

6

Select Next on the DDR Import Wizard - Import parameters screen

7

Make the following selection on the DDR Import Wizard - Source data placement screen

Select Place in Area checkbox
  • Select Place by Text checkbox
  • Select the Place by Text in the Target Object Column drop down 
     
Select Place in Rack and Place in Mount Point checkboxes
  • select RU from the Place in X/Horizontal Column drop down
  • select Place by Text from the Target Object Column drop down
 
Select Place in Rack and Place in Mount Point Boxes
  • Select Rack X from the Place in X/Horizontal Column drop down
  • Select RU from the Place in Y/Vertical Column drop down
  • Select Rack Space from the Place in Rack Space drop down
  • Select Place in Slot as needed
 
Click on Next button.
8

Select Next in the DDR Wizard-Column mapping screen

 
9

Select Import in the DDR Wizard-Data preview screen

No errors are found:
10

Confirm that Success Popups and rack are shown in the web browser

11

Data import confirmation - open Elevation dialog

Inside the Elevation dialog, open the Panel's Elevation dialog and confirm that all Breakers have been added and have the correct rotation: