A Project is IRM's abstraction of a real-world project. It is a Categorized object and cannot be placed/drawn in the Design World. The definition of a Project can be as simple as installing a Server to the build out of an entire datacenter. The purpose of the Project object is to provide a mechanism for managing key dates and lifecycles associated with the Equipment procurement, delivery, configuration and deployment along with the key Stakeholders and Vendors assigned to the project. A simple Project may be managed by its own lifecycle but for larger projects that incorporate multiple phases and many (MACs), each of which will have its own lifecycle. The content of each MAC is also used to generate the Project EBOM (electronic bill of materials) identifying the hardware and materials required by the project broken down by each MAC within assigned to the Project.
The following images and text depict in detail all tabs from the Project Editor dialog and related sub-dialogs, as well as their main functionalities:
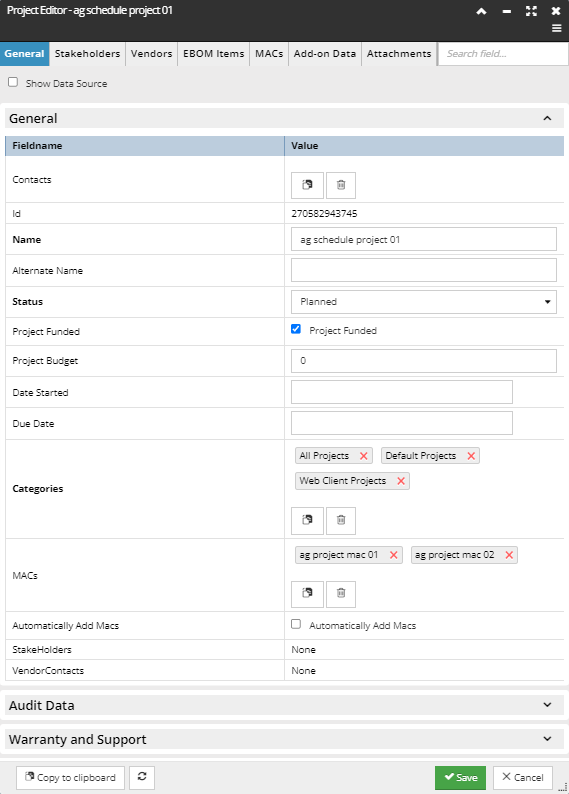
"General" tab
The General tab displays different sets of Field Name - Value pairs organized in two named accordion groups/menus (i.e., General and Audit Data), similar to other Properties dialogs in the application. Click on an accordion group expands/collapses the contents. This tab also enables inline editing of certain fields like Name, AlternateName and DataSource, which are also available for other object types and some that are specific to Project, such as Status, Project Budget, Project Funded, and Due Date / Date Started.
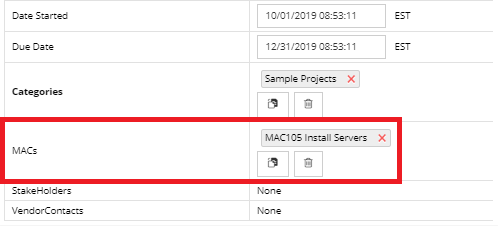
From here, the user can view a list of assigned MACs - under the MACs field in the General tab:
In addition, MAC objects can be directly added (using the standard Paste from Clipboard button), removed individually (click on the x button in the MAC name label), or removed all at once (using the trashcan button) from this tab.
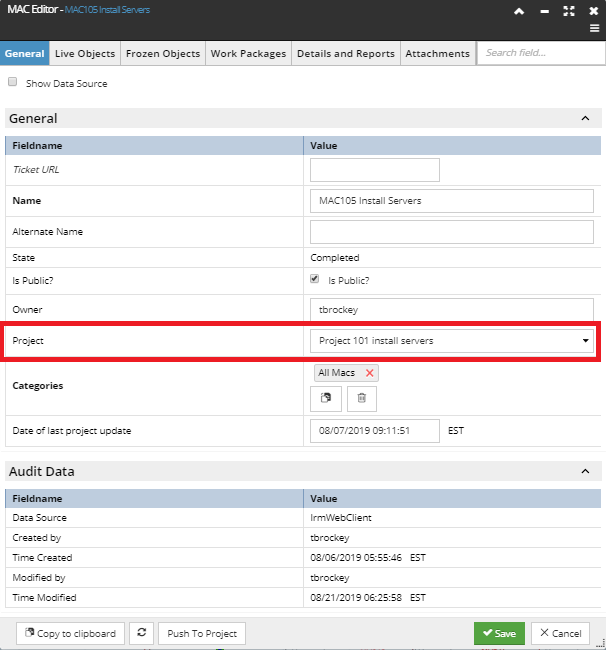
The MAC-Projects relation can be observed other way around - the Project a specific MAC is assigned / pushed to can be viewed in the General tab of the MAC Editor, under the relevant Project drop-down menu:
Notice the Push To Project button at the bottom of the dialog, which enables instant copying of the MAC data to the selected Project. See more details under MAC topics.
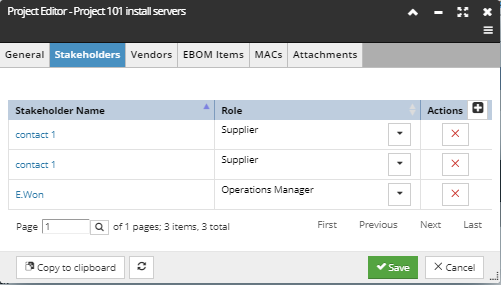
The Stakeholders tab displays a grid that enables viewing and managing Stakeholders for the selected Project.
Several actions and additional sub-dialogs are available from this tab:
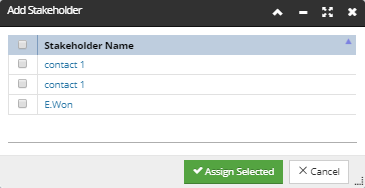
Click on the + action button opens the Add Stakehoder sub-dialog, which displays all Contacts in a multi-select list. It enables specifying which Contacts are to be assigned to the current Project. Click on the Assign Selected button to assinge selected contacts as Stakeholder.
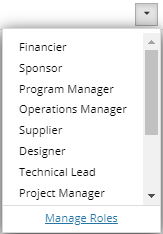
Since a Contact may have different roles in different Projects, it is possible to set the Stakeholder Role for each Stakeholder entry. The role assignment is specific to the Project and is enabled also in the Stakeholder tab, via the drop-down menu under the Role column. Click on it opens the list of all roles, as displayed in the screenshot. An additional Manage Roles button is displayed below the Roles list.
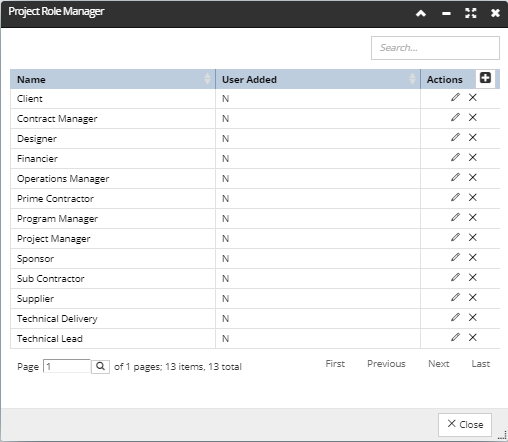
Click on it opens a simple pop-out dialog - Role Manager.
The dialog enables managing the Project Roles through Action buttons:
the + button adds a new row entry at the bottom of the grid
the pencil button enables inline editing of the row entry
the x button enables removing a Role entry from the list and un-assigning it for all Stakeholders
Any changes made in this sub-dialog are confirmed or canceled by clicking on the buttons at the bottom, which close the sub-dialog and bring focus back to the Project Editor dialog and the Stakeholder tab.
In addition to the previously mentioned functionalities, the Stakeholder tab also enables removing Stakeholder entries from the grid simply by clicking the x action button next to the appropriate Stakeholder row entry.
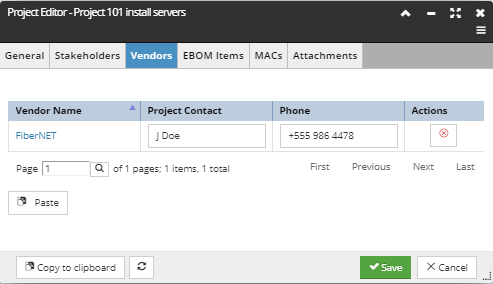
The Vendors tab displays a grid that enables viewing and managing Vendors for the selected Project.
Several actions are available from this tab:
To add Vendor, select and copy a Vendor from the Vendor tab in the Object Grid and Paste it into the grid by click on the Paste button.
To edit Vendor details related to the selected Project, like Project Contact and Phone values, click on the fields and edit them inline.
To remove Vendor from the grid click on the x Action button next to the appropriate Vendor row entry.
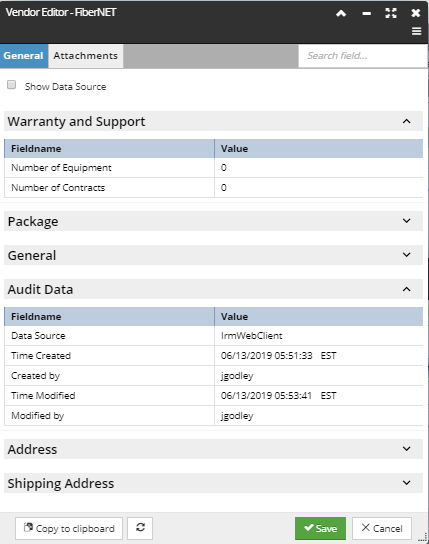
More details about a particular Vendor object are available by clicking on the Vendor Name under the first grid column, which opens the appropriate Vendor Editor dialog:
For additional details about Vendor objects, click on the following sub-topic - Users, Contacts, Vendors.
The Type Line Items grid has aggregate counts for each item type used in the project, both the proposed quantity and the actual quantity and can contain entries for:
Equipment,
Cables,
Circuits,
Pathways
Software
There are several properties displayed for each row entry:
Proposed Quantity - used to "pencil in" a quantity when first creating a new Type entry in the EBOM
Actual Quantity - calculated from the number of instances / children
Has Ancillary - identifies if Ancillary items are assigned to Type entry
Additional features available in the EBOM Type Line Items grid via Action buttons:
Adding a new entry into the EBOM Type Line Items list by clicking on the + Action button, which opens the EBOM Item Editor dialog (explained in one of the next points).
Editing the current row by clicking on the pencil Action button, which also opens the EBOM Item Editor dialog (explained in one of the next points).
Removing the row item from the EBOM Type Line Items list by clicking on the x action button next to the appropriate row entry
The Instances grid list explicit object instances associated with the selected row entry in the Type Line Items grid:
Instance Line Items are added to the BOM by cutting and pasting their IDs from the Object Grid.
Instance Line Items are added to the BOM by an assigned MAC entry.
If instances of a a same Type is added whose Type already exists in the BOM, then the Types Line item Actual Qty column is updated, otherwise, IRM creates a new Type Line Item of the relevant Type and set its planned Count to 0. In addition, this grid enables removing individual row entries.
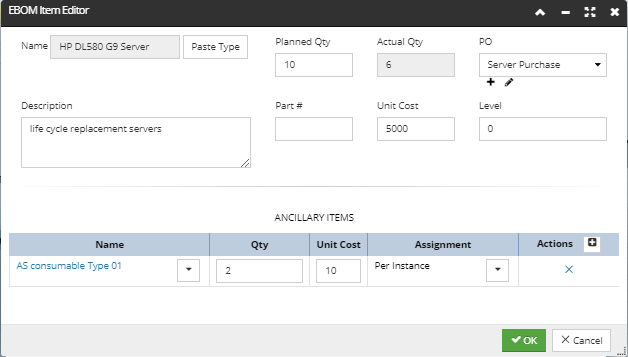
The EBOM Item Editor dialog is used to create and modify Type Line Items and enables the following actions:
Paste an Equipment Type name from the Clipboard to the Name field by clicking on the Paste Type button
Manually specify Planned Quantity by entering the value in the Planned Qty field.
Automatically adjusts the Actual Qty field value based upon the number of associated Equipment instances.
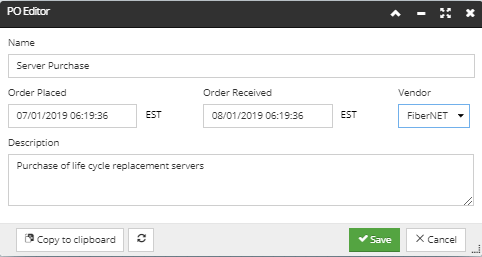
Select an existing PO (Purchase Order) from the PO drop down list or Create New PO Clicking on the + button under the PO drop down list
Listtheassigned Ancillary Items for this Equipment Type e.g. Installation Pack, Mounting Panel, labelling pack, etc.
Add a new Ancillary item to the Equipment Type definition(+ button)
Change an Ancillary item entry by editing the Qty, Unit Cost, and Assignment fields directly. Assignment allows the ancillary items to be specified either as a total for the Type (using the Per Type option) or as a count for each instance (using the Per Instance option)
Note: In IRM, a Purchase Order does not directly include PO line items, it just has general information about the PO. This "lightweight" PO is then referenced by Project Line Items. This design avoids the complications that would result with having line items in both Purchase Order and Project objects. A single Purchase Order can be referenced by more than one Project.
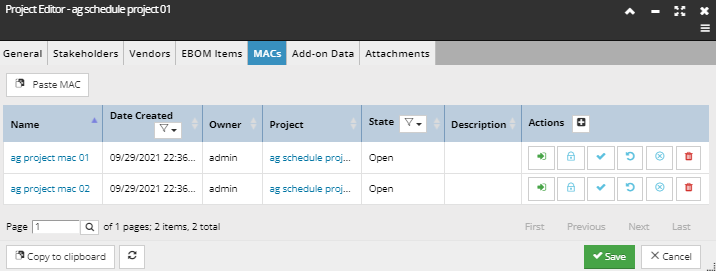
This tab displays a data grid that lists all MACs pushed to this project by their Name and Status. From here existing MAC objects can be removed simply by click on the "x" action button for the relevant row, or a new MAC can be created and entered by click on the "+" action button.
In addition to pushing MACs to a Project via the MAC editor, there is another way to do this for user convenience - via the Paste MAC button at the top of this tab, which starts the push operation from the Project editor: