Routing Cable through Pathway
The following use case scenario demonstrates placing and routing a Cable into a Maintenance Hole by assigning and routing it through an existing Duct Pathway, using the same objects as in the
parent topic.
Step 1 - Draw the new Cable in the Design World
When the mouse cursor is over the Design World it changes its appearance from arrow to cross hair, indicating it's in drawing mode. The Butterfly Diagram enables managing only Cables assigned to the top-level Ducts, so it is necessary to assign the newly created Cable to the existing Duct.
This can be made only for Cables that are actually drawn through the same route in Design World as the Pathway object:
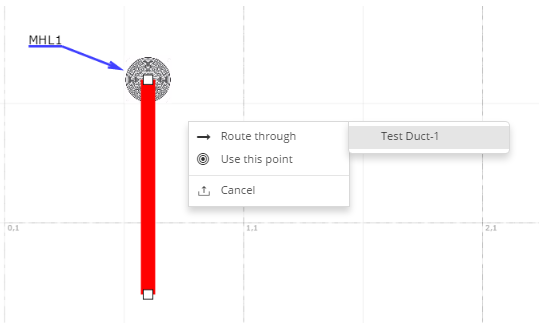
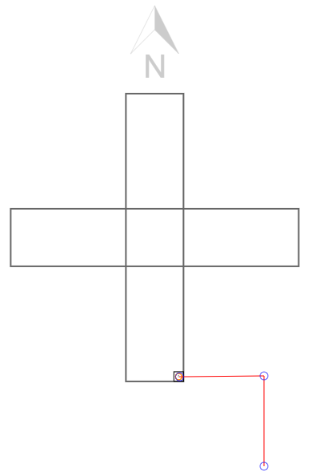
The first step in routing a Cable over / through the existing Duct in the Design World is setting the starting point of the Cable. In this example the starting point is at the Maintenance Hole object, which is set by a single left click on the Maintenance Hole object in the Design World.
This opens a pop-out menu displaying 3 options for Cable drawing:
-
Route through + list of available Pathways - this options routes the Cable through the whole length of the selected Pathway and places another Cable vertex at the far end of the Pathway
-
Use this point - this option sets the first Cable end on the selected point, but doesn't route the Cable through the Pathway
-
Cancel - this option cancels the creation of the starting point for the Cable.
For this example, since we want the Cable to be routed through a Duct, the Route through Test Duct-1 option is selected:
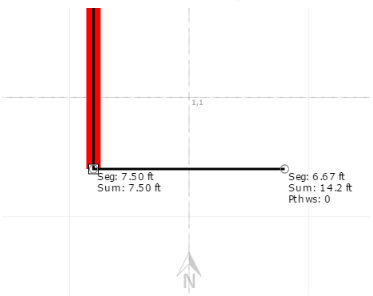
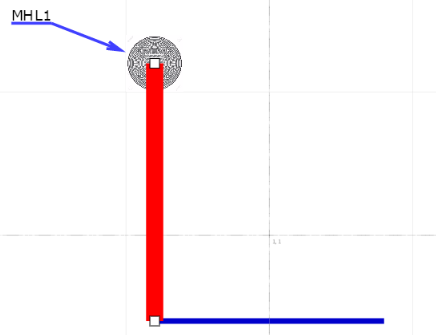
This sets the starting cable point on the Maintenance Hole, routes it through the Duct and creates another cable vertex at the Duct exit point.
The third and final point is set by double click on the desired position, which sets the final route and the appearance of the newly created Cable.
Step 2 - Assign the Cable to the existing Duct
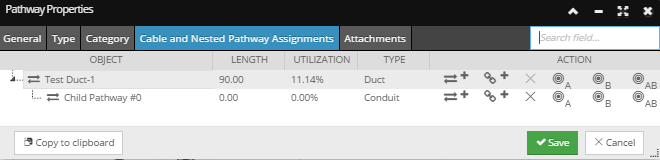
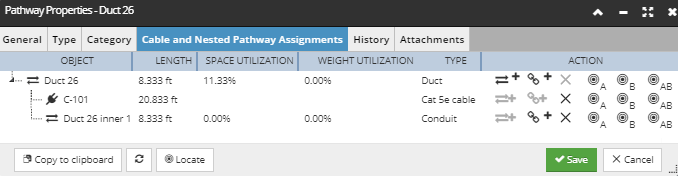
In order to manage the newly created Cable in the Butterfly Diagram, it needs to be assigned to the Duct. This can be done in the Cable and Nested Pathway Assignments tab in the Pathway Properties dialog. This tab displays a grid listing all child Pathways and Cables assigned to the selected Pathway.
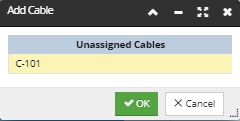
Click on the Add Nested Cable action button next to the appropriate row entry that represents the Pathway entry that we want to assign a Cable to. This brings up the Add Cable pop-out dialog listing all available Cables located near the selected Pathway:
Click on the appropriate Cable entry enables the OK button. Click on it closes the sub-dialog, brings the focus back to the Pathway Properties dialog and displays the newly added Cable as a nested / child element of the selected Duct Pathway:
All changes made in this dialog need to be saved by click on the Save button, which closes the sub-dialog and brings focus back to the main application screen.
Step 3 - Open Butterfly Diagram for the Maintenance Hole
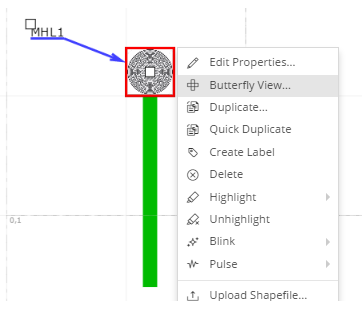
A single left click on the Maintenance Hole object in the Design World selects it, while a single right click opens its context menu:
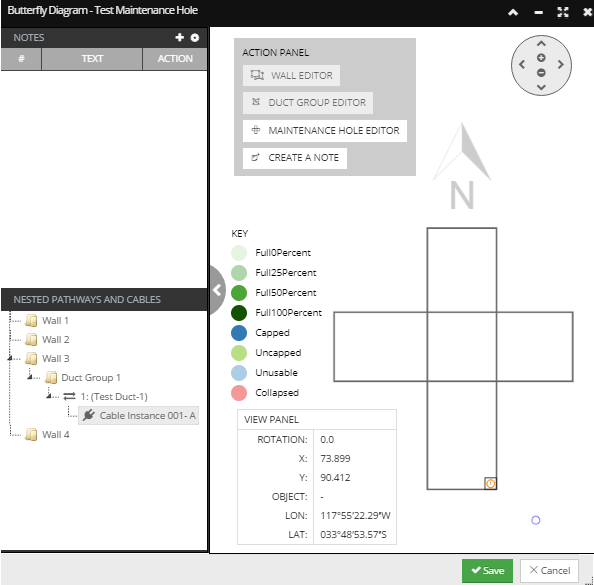
Click on the Butterfly View... option from its context menu opens the Butterfly Diagram for the selected Maintenance Hole, displaying the assigned Duct, both in the central Butterfly drawing and in the Nested Pathway and Cables tree menu:
Step 4 - Click "Draw Cable" option
Select the Draw Cable option from the newly added Cable's context menu in Nested Pathways and Cable tree menu. This changes the cursor from arrow to a small blue circle indicating a starting point for the Cable line.
Step 5 - Draw the Cable in the Butterfly View
Click on the Duct sets the Cable line starting point, the second click sets the second Cable line vertex and so on:
The final point of the Cable line is set by a double click, which completes the route of the nested Cable in the Butterfly Diagram:
Connecting a Maintenance Hole to the other end of the Cable is the same process as described in steps above.