This section covers the use case of adding, editing and removing Plug Definitions. The following screenshot images and text explain the Cable Type Properties - Plugs tab and all sub dialogs associated with these operations. The purpose of this example is to show all three operations through adding a Plug Definition for a Fiber Cable Type.
Use Case - Add Plug definitions
This use case describes the step-by-step process of adding a single fiber Plug Definition to End A of the selected Fiber Cable Type, which is done from the Cable Type Properties-Plugs tab:
The Plug Definition that is finally added to the Cable Type (fiber cable End A plug 3) is displayed in the Plug Definitions grid. By default, the added Plug is not connected to any media, as indicated by default values set for Connection Points field in the Plug Definitions grid ("-1").
Click on + action button
Located in the Plug Definitions grid, opens the Add Plug Definition dialog, which remains opened until Close is clicked, as this allows the adding multiple plugs of different types without having to keep re-opening the dialog.
This dialog enables specifying properties for the new Plug Definition to be added to the selected Cable Type (explained in more detail in next steps).
When adding a Plug to a Cable the Cable End on which the Plug is found must be specified. This is done clicking on the appropriate button at the left bottom side of the sub-dialog (Add plugs to End A in this example). Once the button is clicked a new Plug Definition entry is created in the (main) Plug Definition grid for the Cable Type.
The new definition appears in the last row entry in the Plug Definitions grid. As mentioned, the added plug is not connected to any media, as indicated by default values set for Connection Points field in the Plug Definitions grid ("-1").
This use case describes the steps involved in editing a fiber Plug Definition of the selected Fiber Cable Type. This operation begins with a click on the appropriate action button next to the row entry in the Plug Definitions grid that needs to be changed. This opens the Edit Plug Definition sub-dialog, that enables the user to change the Plug Type and some additional properties. The operation is finished either by saving or dismissing the changes by clicking on the appropriate button, which closes the sub-dialog and brings back focus to the (main) Cable Type Properties dialog.
Click on the Pencil action button...
...next to the row entry that needs to be changed (in the Plug Definitions grid). This opens the Edit Plug Definition dialog, which remains open until editing is either saved or canceled.
The following properties of the selected Plug Definition are enabled for editing :
Carries Power - indicates whether this plug is a power-carrying Plug. If it's set to Yes, this will allow the cable of this Cable Type to be connected to an equipment's power ports. Clicking on the field opens the drop-down menu displaying the two values - Yes and No.
Cable End - indicates which end of the Cable this Plug is on. Clicking on the field opens the drop-down menu that lists all cable ends and splices as available options:
Plug Type can be changed by selecting one of the rows from the Plug Types grid.
Finally, click on the Save button to save changes. To dismiss the changes, click on Cancel button.
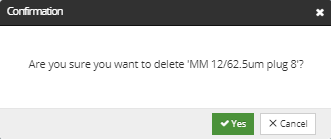
This use case describes the steps involved in removing a fiber Plug Definition from the selected Fiber Cable Type. This operation begins with a click on the appropriate action button next to the row entry in the Plug Definitions grid that needs to be removed. This opens a Confirm sub-dialog, allowing user to either confirm or cancel removal.
Click on X action button...
...next to the row entry that needs to be removed (in the Plug Definitions grid).