When building the Pathway environment, its possible to make a physical connection between Tray objects to represent a junction point within the Pathway route and helps in the routing process. The following images and text explain the use cases for routing a Duct over a Tray, using the Pathway instance created in the use case in topic Insert and route Pathway in Design World.
In this example:
the Duct Pathway is connected to another (Tray) Pathway
a Cable is routed through the whole portion of the Duct and over part of the Tray after which, its route is then continued in the Area.
Insert a Duct and a Tray into the Design World
For this example we will be using a Tray Pathway instance that can be created as explained in the use case in topic Insert and route Pathway in Design World and a Duct Pathway instance created as per that same topic.
Note: this process is the same when connecting either Duct and Tray Pathways to an existing Tray Pathway.
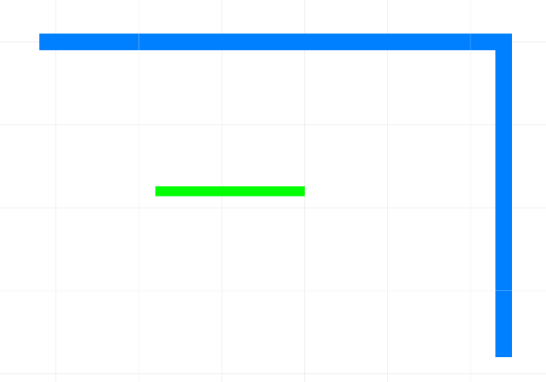
Route the Duct to a point near the Tray's endpoint
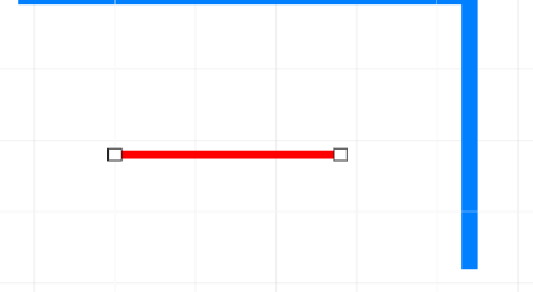
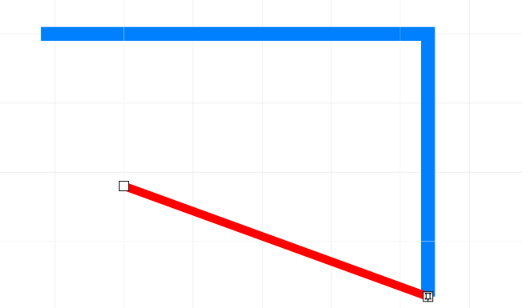
A single left click anywhere on the Duct Pathway object in the Design World will select and highlight it, displaying its end points,
but can also be invoked when inserting new Pathways objects into an area.
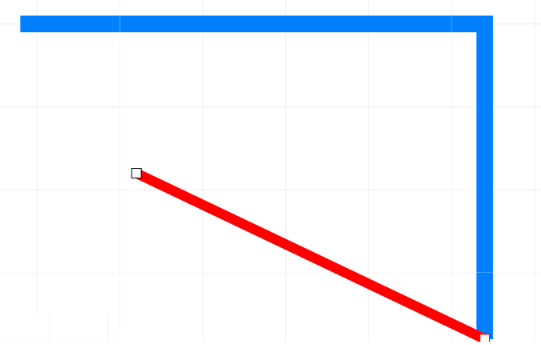
If one of the Duct's ends is is placed near the endpoint of another Pathway, a Tray Pathway in this case, an additional sub-dialog will open, offering different options associated with routing the Pathway, as explained in the next step.
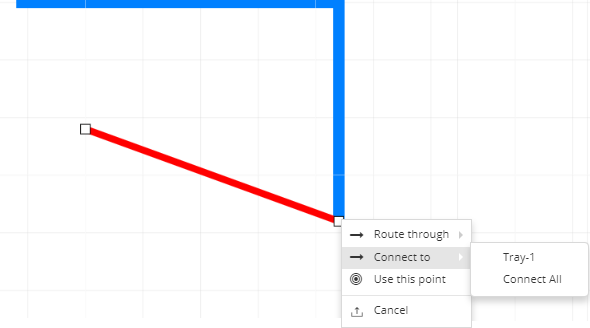
The Connect to option is used to make a physical connection to an existing Pathway. A list of available Pathway objects is then displayed, allowing the user to either select a specific Pathway or, if multiple Pathways exist, the Connect All option, allows the user to make a physical connection to all Pathways that exist at the selected point.
This Connect to option only allows the following connections to be made:
A tray can connect to any point along an existing tray route
A duct can connect to any point along an existing tray route
A duct can only connect to an endpoint of an existing duct route
Note: if selecting a specific pathway which contains child pathways, an additional sub-menu opens allowing the user to select a child Pathway entry.
Once the Connect to option and the Pathway instance are selected, the Duct is connected at the point of mouse click to the Tray starting point and Pathway routing mode is exited. The connection is indicated with an anchor icon (pin) at the point of connection.
Note: When one Pathway is connected to another Pathway in this manner, it becomes more convenient to route Cables over both Pathways as, the two Pathways are considered as sections of a single Pathway route.
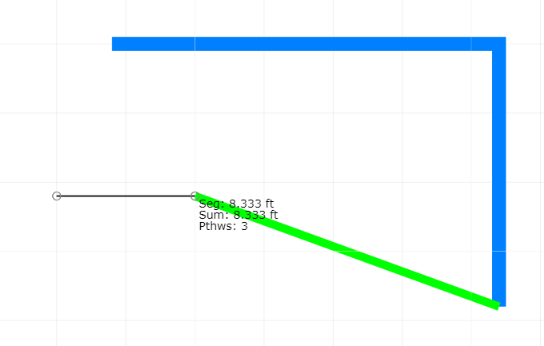
For this example we will be using an Ethernet Cable instance created as described in the use case in topic Insert and Route Cables using Cableset. The first left click sets the starting point for the Cable and the second places a vertex at the start of the Duct Pathway.
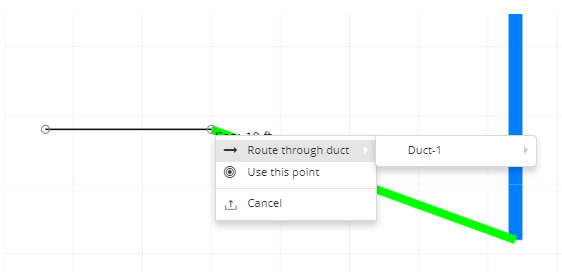
Once a Cable's current endpoint is placed near a Duct's endpoint, an additional sub-dialog opens, offering the additional options shown in the screenshot above. If Route through option is selected, an additional sub-menu opens displaying all the Pathway objects and their child Pathways in additional sub-menus available for selection. In this example the existing Duct, which is connected to the Tray is selected.
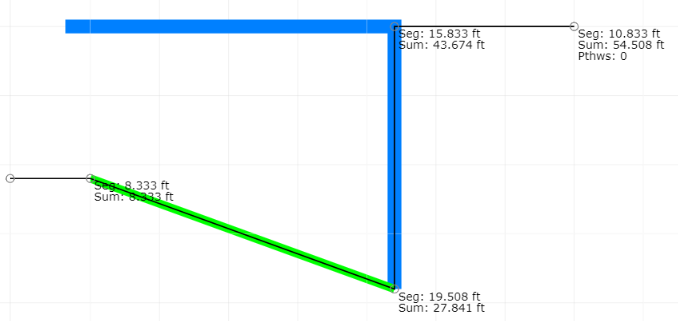
Once the Route through option and the Pathway instance are selected, the Cable is routed from the endpoint nearest to the selected point, or the starting point, through the whole length of the selected Duct, exiting the Pathway out through the other endpoint, or the exit point.
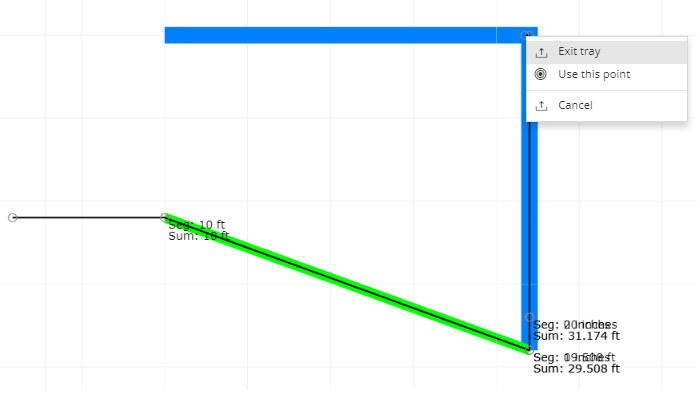
Once a new vertex is added to a Cable, as explained in the previous step, and the vertex lies somewhere along a Tray Pathway's route, an additional sub-dialog opens, offering the additional options shown in the screenshot above. If the Enter Tray option is selected, an additional sub-menu opens displaying all the Tray Pathway objects and their child Pathways in additional sub-menus available for selection. In this example, a single Tray Pathway with no child Pathways is selected which initiates routing through the Tray.
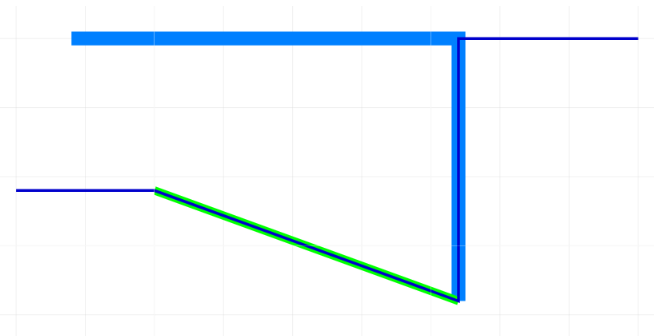
In this example, a Cable is routed some distance along the Tray's segment, and a single click on the desired position opens a pop-out dialog displaying the option to exit the Tray. If Exit tray is selected, the Cable route can be continued outside the Tray, starting from the point where Exit tray was selected.
Having exited the Tray, the Cable's route can be extended as desired. In the example above, the Cable is about to be terminated via double-click after a single additional segment has been added.