Equipment Elevation
IRM's Equipment Types allow a mounting space to be defined on the front or rear of the Equipment. The mounting spaces for Equipment instances can be viewed in an Equipment Elevation dialog.
Note: Even though "Elevation" is the name of the dialog for both Rack and non-Rack Equipment, in the following text "Rack Elevation" and "Equipment Elevation" will be used instead to distinguish between the two versions of the Elevation dialog.
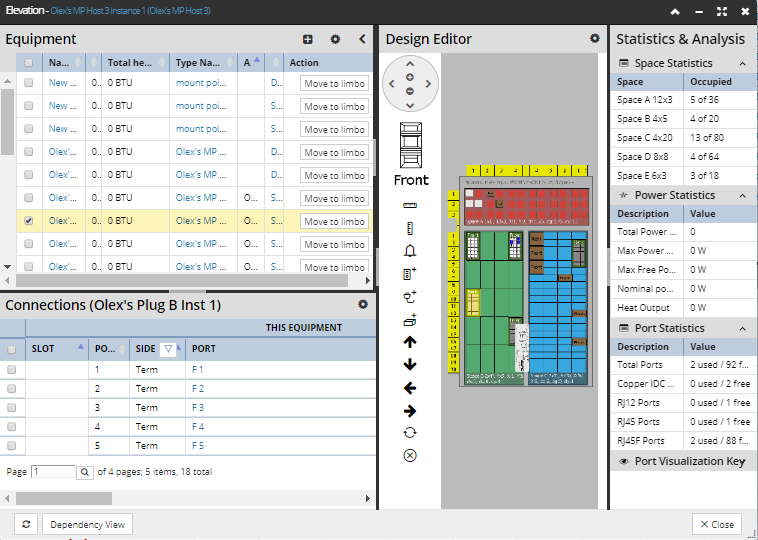
The Equipment Elevation dialog shows the front and rear Elevation image of the selected Equipment in 3D, along with any cards in slots and / or any cards placed in mounting spaces. The dialog also displays sections for Equipment, Connections and Statistics & Analysis providing detailed data and statistics about the contained Equipment:
Accessing the dialog
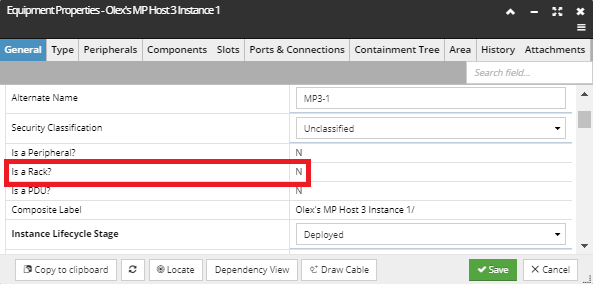
The Elevation dialog is opened by selecting the standard "Elevation..." Equipment context menu option. Which Elevation dialog is opened (Rack Elevation or Equipment Elevation), is decided based on the value of the "is a Rack?" property of the Equipment object:
Design Editor
The main feature of the Equipment Elevation dialog is the central panel -- the Design Editor -- which displays the 3D Elevation model of the selected Equipment and contains additional view and equipment controls, very similarly to the Rack Elevation dialog.
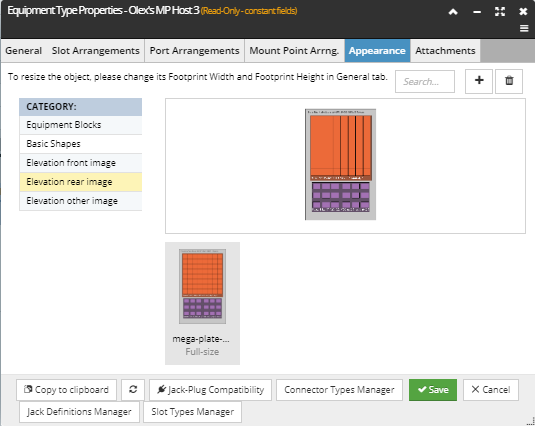
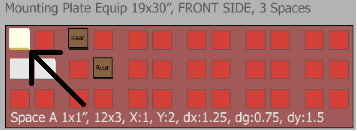
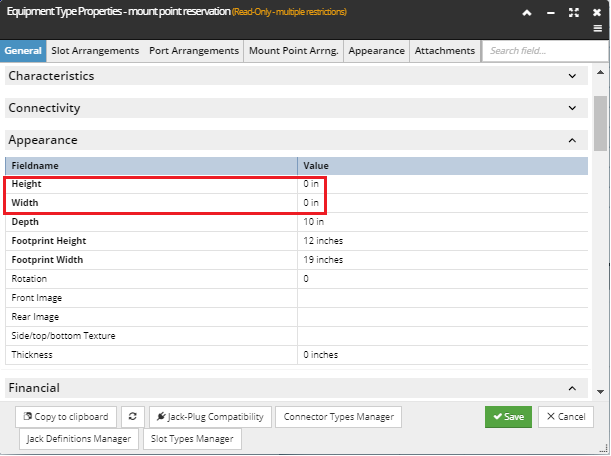
Important: In order for Equipment to appear in the Design Editor properly, the relevant Equipment Type must have either a front or rear Elevation image specified in the Appearance tab:
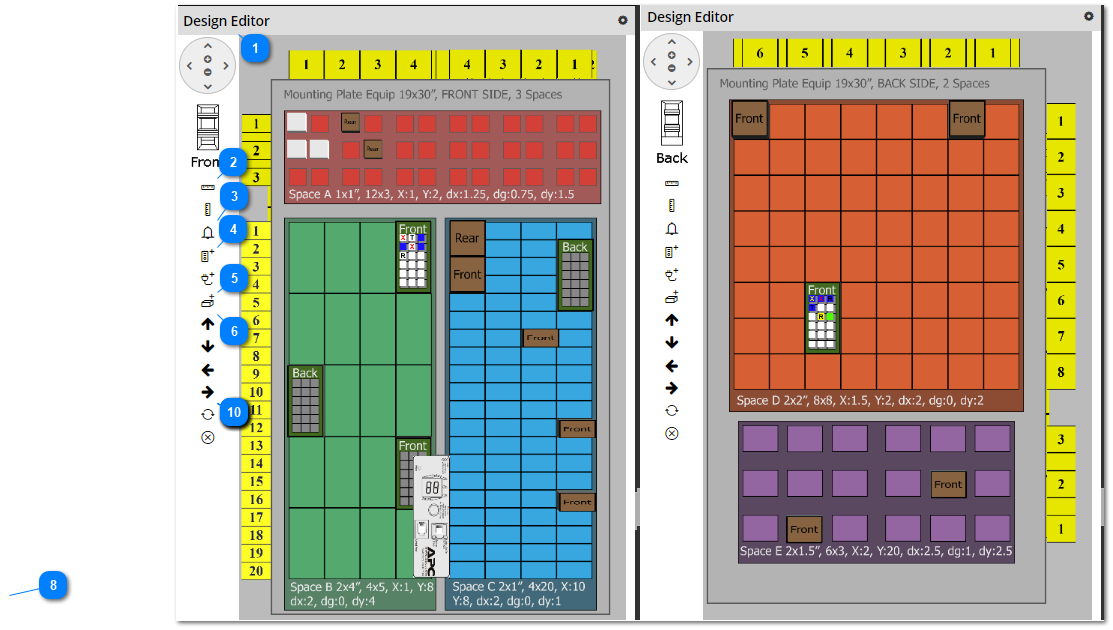
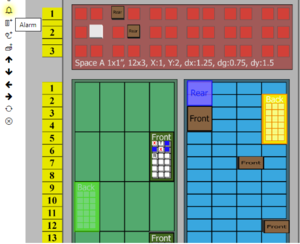
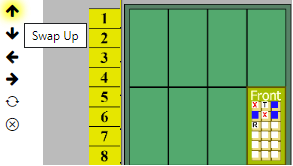
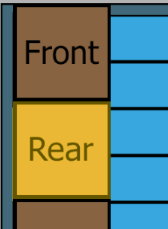
Observe the following Equipment Elevation example of Front and Back Elevation views for a "Mounting Plate" equipment instance:
-
each rectangular, colored area in the front and back views represents an individual Rack Space.
-
There are three in the front
-
depicted as Red, Green and Blue
-
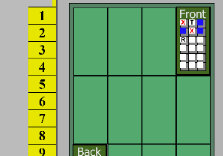
and two in the back view.
-
depicted as Orange and Purple
-
each Rack Space is then divided into sub-spaces of the same size and a fixed offset, representing Mounting Points
-
appropriate Equipment is mounted into one or more adjacent Mounting PointsNote: the example below is just for illustrative purposes, demonstrating the range of mounting spaces that can be modeled in IRM, and is not meant to look like any particular kind of real-world Equipment
Key concepts for Equipment Elevation and contrast with Rack Elevation
-
For an Equipment object to allow other Equipment to be mounted on it, it must have a Mount Point Arrangement in its Equipment Type.
-
Each Mount Point Arrangement defines the number and geometrical Mount Points that child Equipment can be mounted in.
-
A single Mount Point Arrangement defines a single (front or rear) "Rack Space", which is simply a region in the front or back of an Equipment object where child Equipment objects can be mounted.
-
When placing child Equipment into the mounting space in Equipment Elevation, that Equipment snaps to the defined Mount Points defined by the Mount Point Arrangement.
-
Mounted Equipment can occupy one or more Mount Points that are adjacent either horizontally or vertically.
-
If an Equipment has a mounting space with child Equipment mounted in it and that parent Equipment is itself mounted in a Rack, the child Equipment is drawn both in the Equipment Elevation for that parent Equipment and in the Rack Elevation for its parent Rack.
-
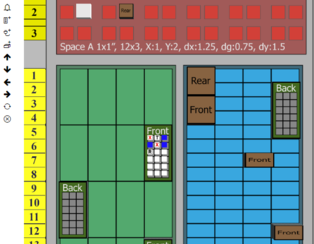
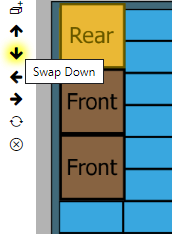
To reflect the port state in Equipment Elevation (and also in Rack Elevation), Port Visualization shows the Port State for any Port in the parent and child Equipment both in the Design Editor and in the Statistics and Analysis panel. Such an example can be seen in the screenshot above, where we have a mounted child object, the front view for which shows several different Port states:
Design Editor Controls
The following covers the details of each control in the Design Editor, as listed below:
Pan / Zoom control and the multi-part view control with front/back toggle button This control works as described in the Rack Elevation dialog.
|
Alarm toggle buttonWorks the same as in Rack Elevation dialog. Below is screenshot image of an example Design Editor with the Alarm button clicked, triggering several equipment in the view being highlighted and blinking, while another click on the same button brings back the Equipment into the original state:
  |
Add Equipment and Draw Cable buttonsThe Add Equipment button is used to Add and Place Equipment into a Mount Point.
The Create New Cable is used to inserting Cable objects, which can then be used to connect this or containing Equipment to other Equipment instances.
|

 ->
-> 

 - >
- > 
Replace and Delete buttons |
The following are other parts of the Equipment Elevation dialog, as listed below, most of which are same as in the Rack Elevation dialog:
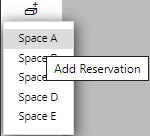
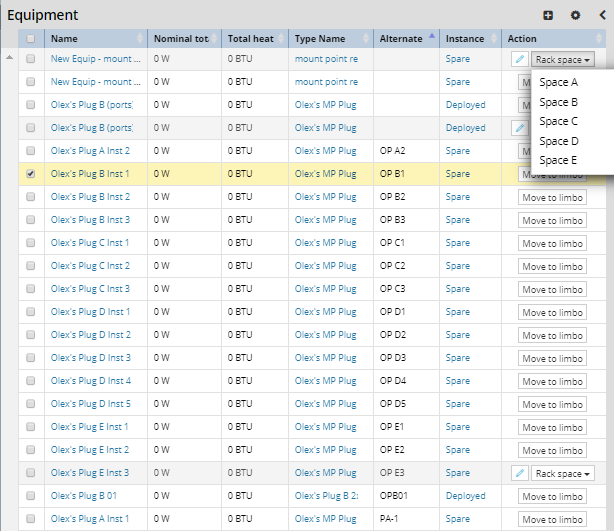
Equipment panelSame as in the Rack Elevation dialog, the only difference is that the Rack Spaces in the drop-down are the ones defined per (in Equipment Type - Mount Point Arrangements tab):
 Both the Replace and Delete Equipment buttons work completely the same as in the Rack Elevation dialog.
|
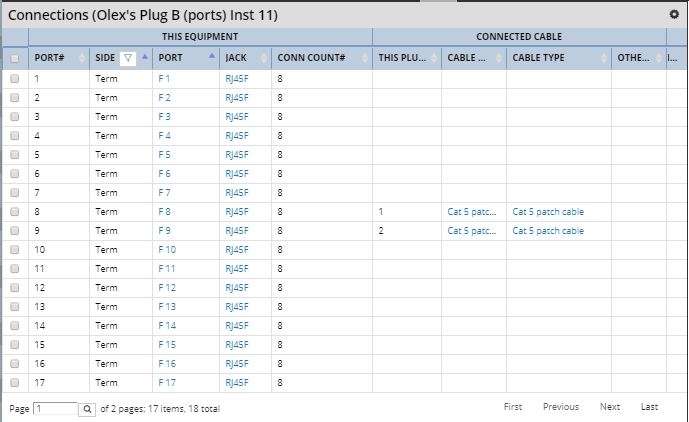
Connections panelThis panel looks and works the same way as in the Rack Elevation dialog:
 |
Statistics & Analysis panelVery similar to that in the Rack Elevation dialog, the only difference is in the Space Statistics accordion; the data is listed with one Rack Space per row:
 |